Getting started
Most customer onboarding relies on generic welcome emails or tutorial videos. However, these tactics rarely improve customer outcomes or meaningfully increase new paying customer conversion. In this playbook, we’ll break down how to automate the creation and delivery of a personalized welcome page, complete with a tailored video, for every new signup.
Plus, by segmenting based on factors like industry, use case, or role, you can deliver highly relevant onboarding experiences that captures new users’ attention and help them quickly realize the value of your product.
Here’s a quick breakdown of the end-user experience:
Imagine each new customer being welcomed with a customized page featuring a video from their assigned rep, or a key figure in your business.
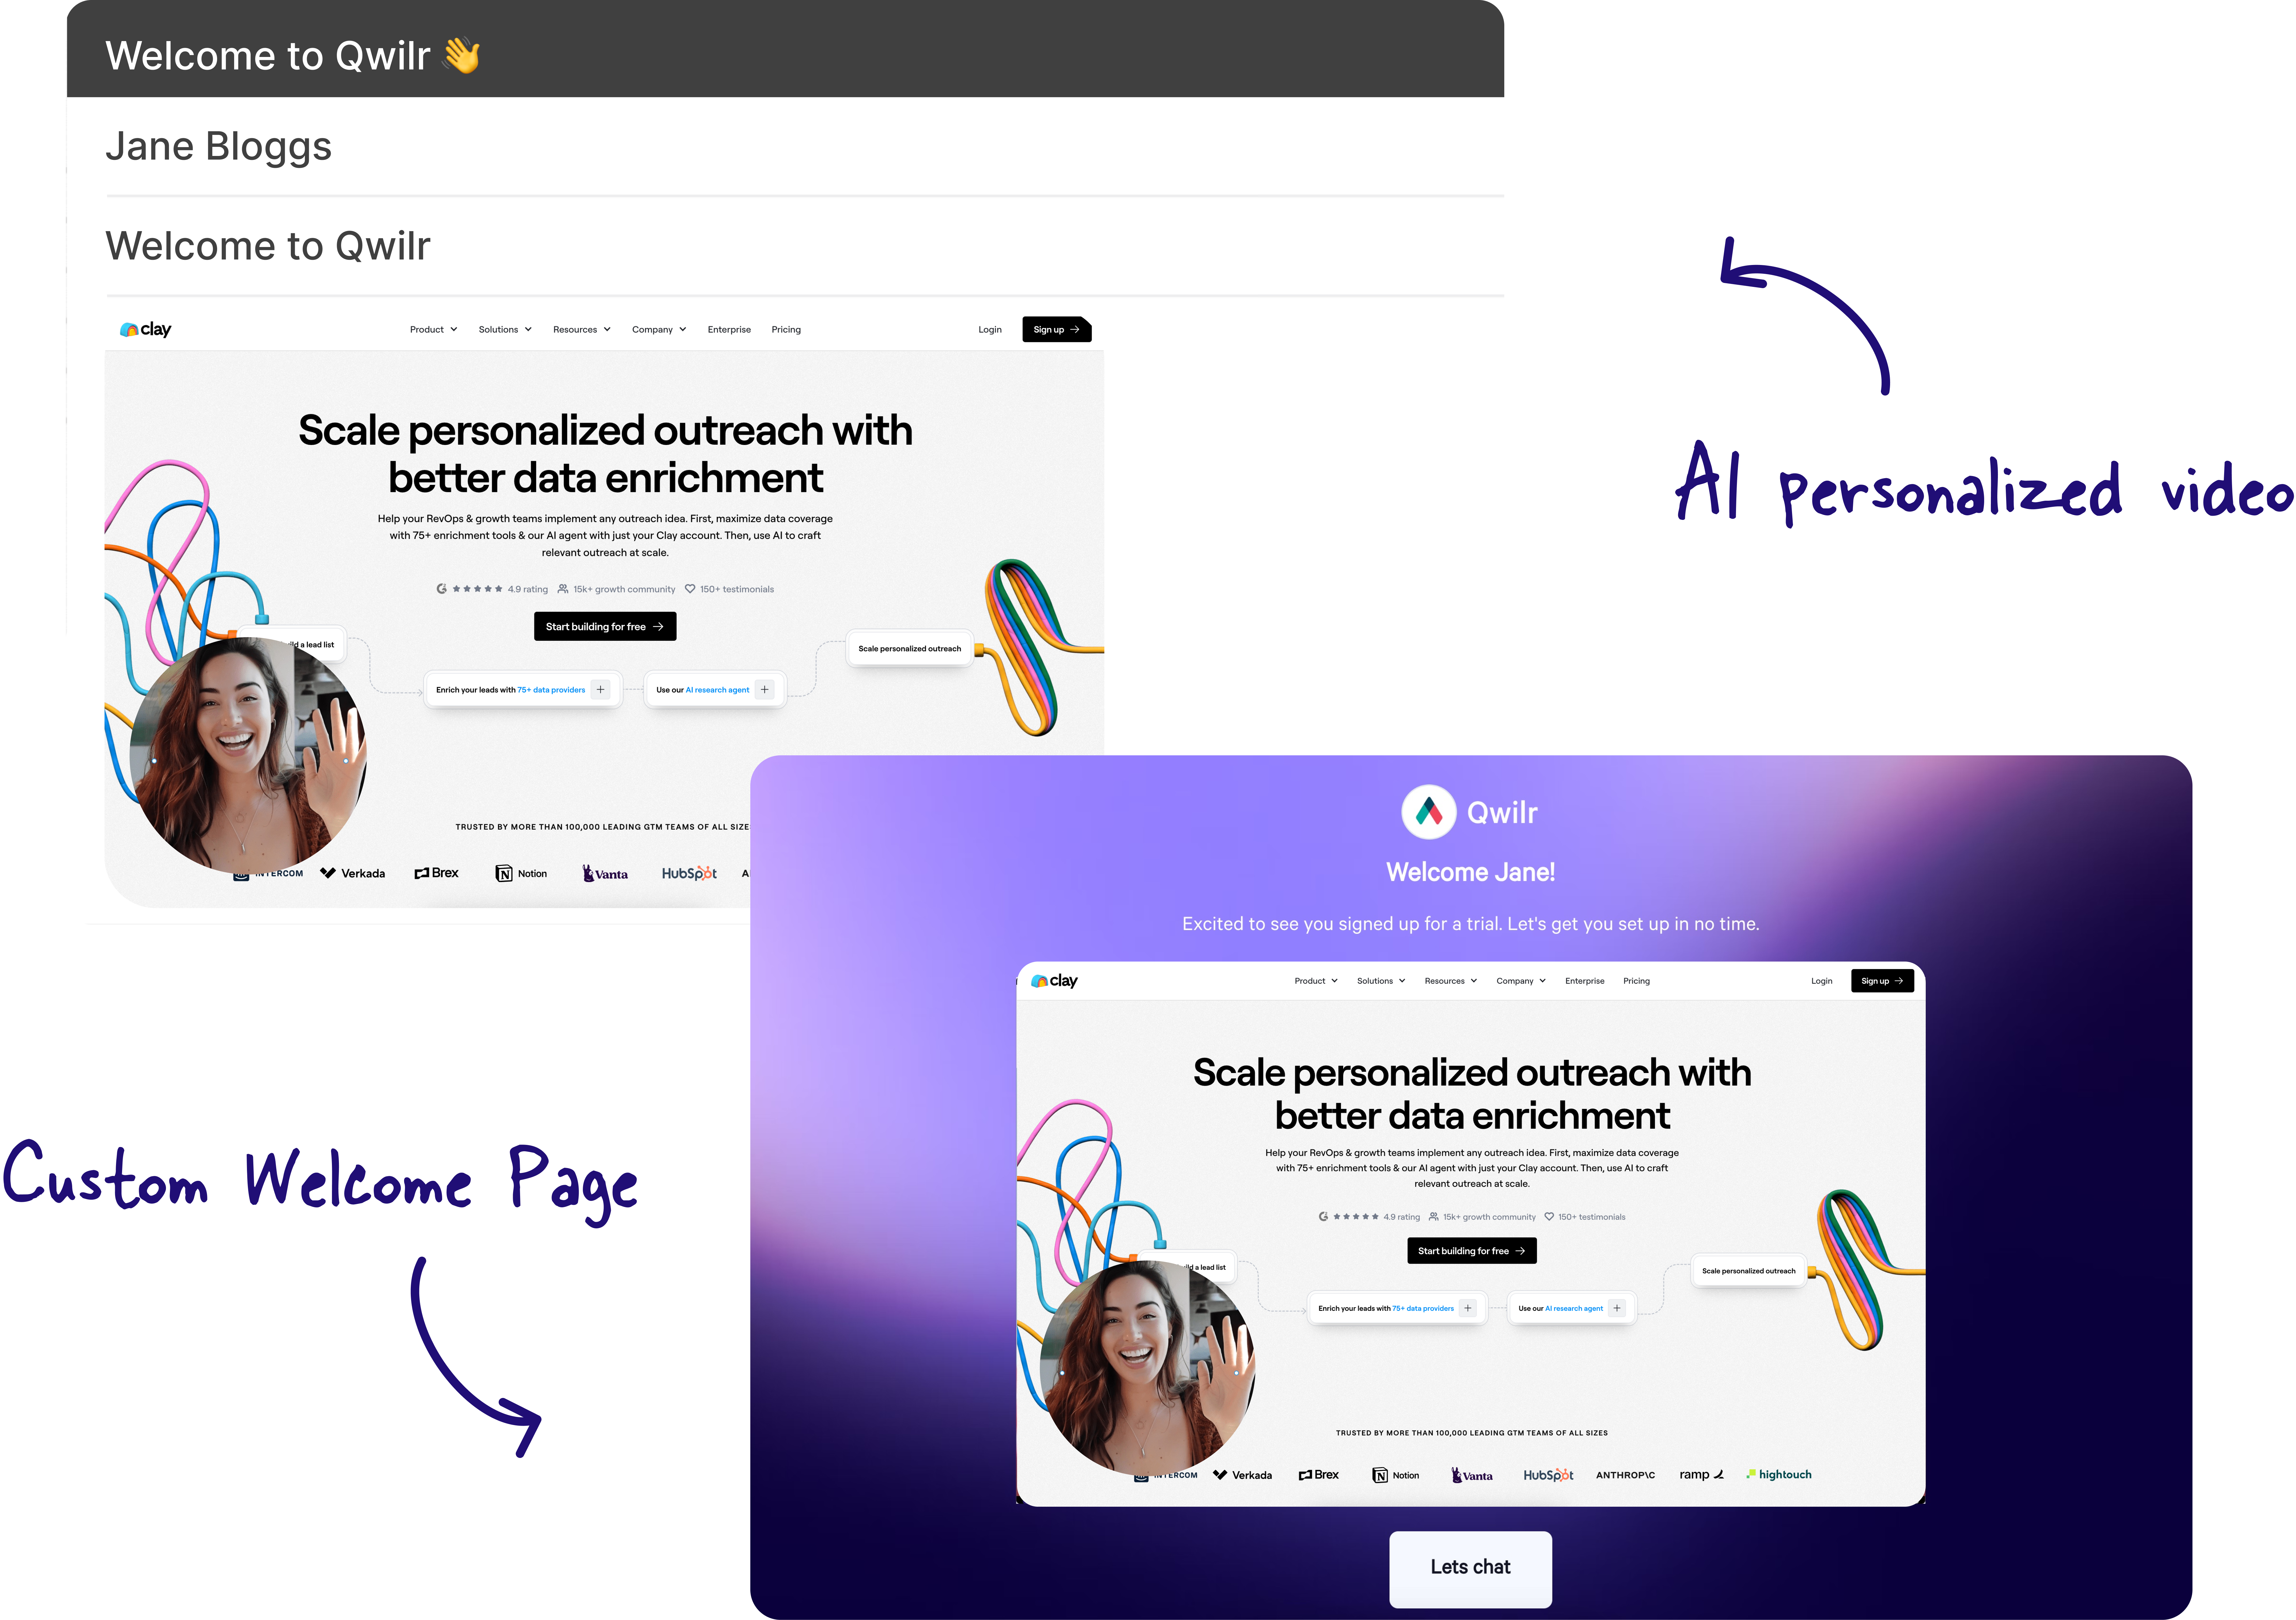
Here's what our welcome page looks like:
What results could I expect:
While we’re not one for making promises…
Since adopting this personalized welcome page approach, we’ve seen a 28% improvement in our positive reply rate.
Additionally, it’s now easier than ever for our inbound sales team to engage these leads across multiple channels, such as LinkedIn and phone calls. When leads meet with an AE, they’re more engaged and better prepared, resulting in higher opportunity rates and faster deal cycles.
What you'll need:
| Tool | Purpose |
|---|---|
Qwilr | We’ll use Qwilr to automate the creation of personalized welcome pages for new users. We’ll start with a base page template, then add tokens for a more tailored experience. |
Sendspark | We’ll use Sendspark to create personalized videos for each new user, and we’ll seamlessly embed each video into its respective Qwilr page. |
Zapier | We’ll rely on Zapier to automate workflows across Qwilr, Sendspark, and your CRM, enabling us to trigger video and page creation. |
CRM | We’ll use the CRM to store customer information used to personalize each page and video, and it’s likely where we’ll trigger the delivery of the automated sequence or email flow to users. |
Step 1: Create your welcome page template in Qwilr
Start by designing a welcome page template in Qwilr. Be sure to include a dedicated section for embedding the personalized Sendspark video you’ll add in Step 2.
At Qwilr, our template includes:
- A welcome video
- Highlights of what’s possible with Qwilr, showcasing relevant features and outcomes
- Customer wins and recent G2 insights
- A “Book a Meeting” section for easy scheduling
Here’s how to use a Qwilr token to create an automated placeholder for the personalized Sendspark video we’ll create in the next step of this play:
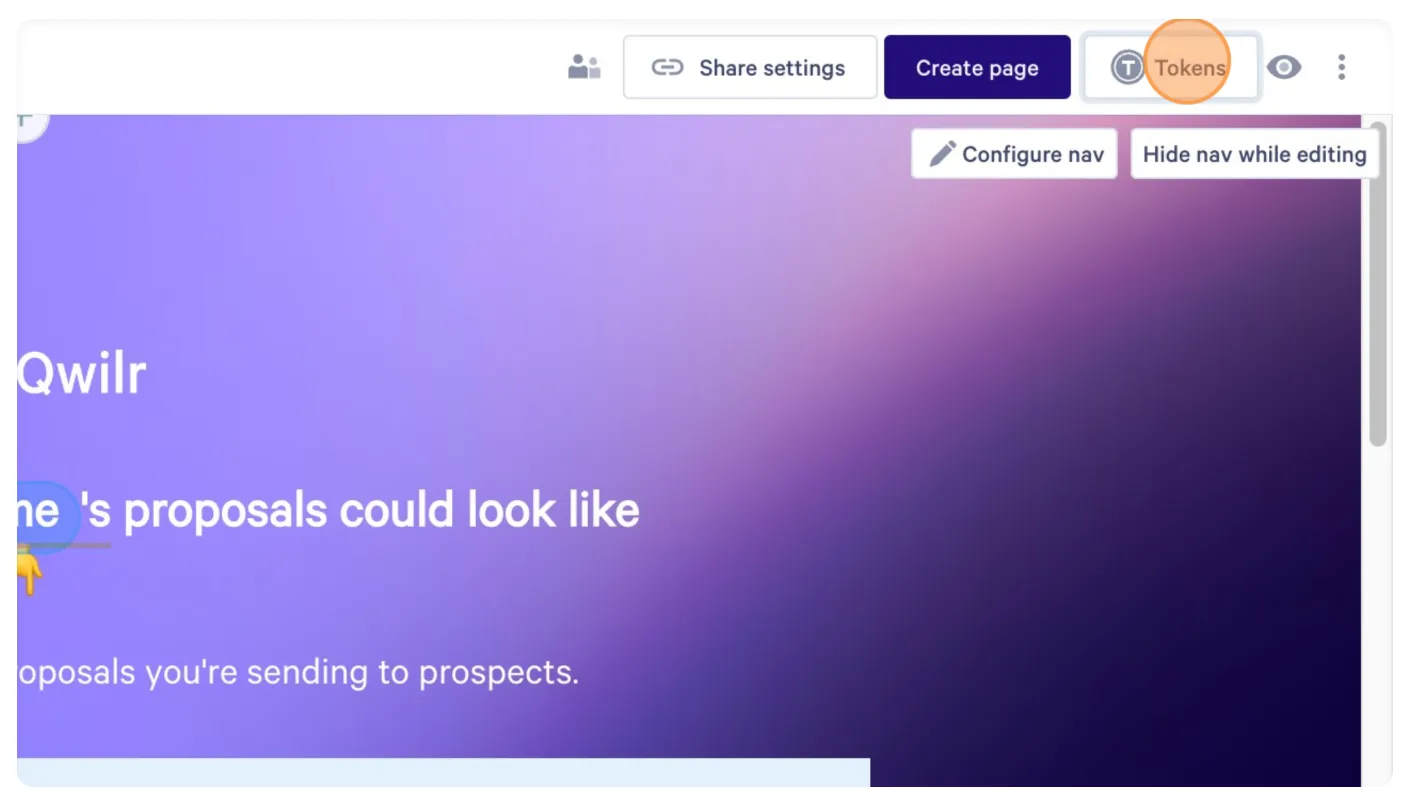
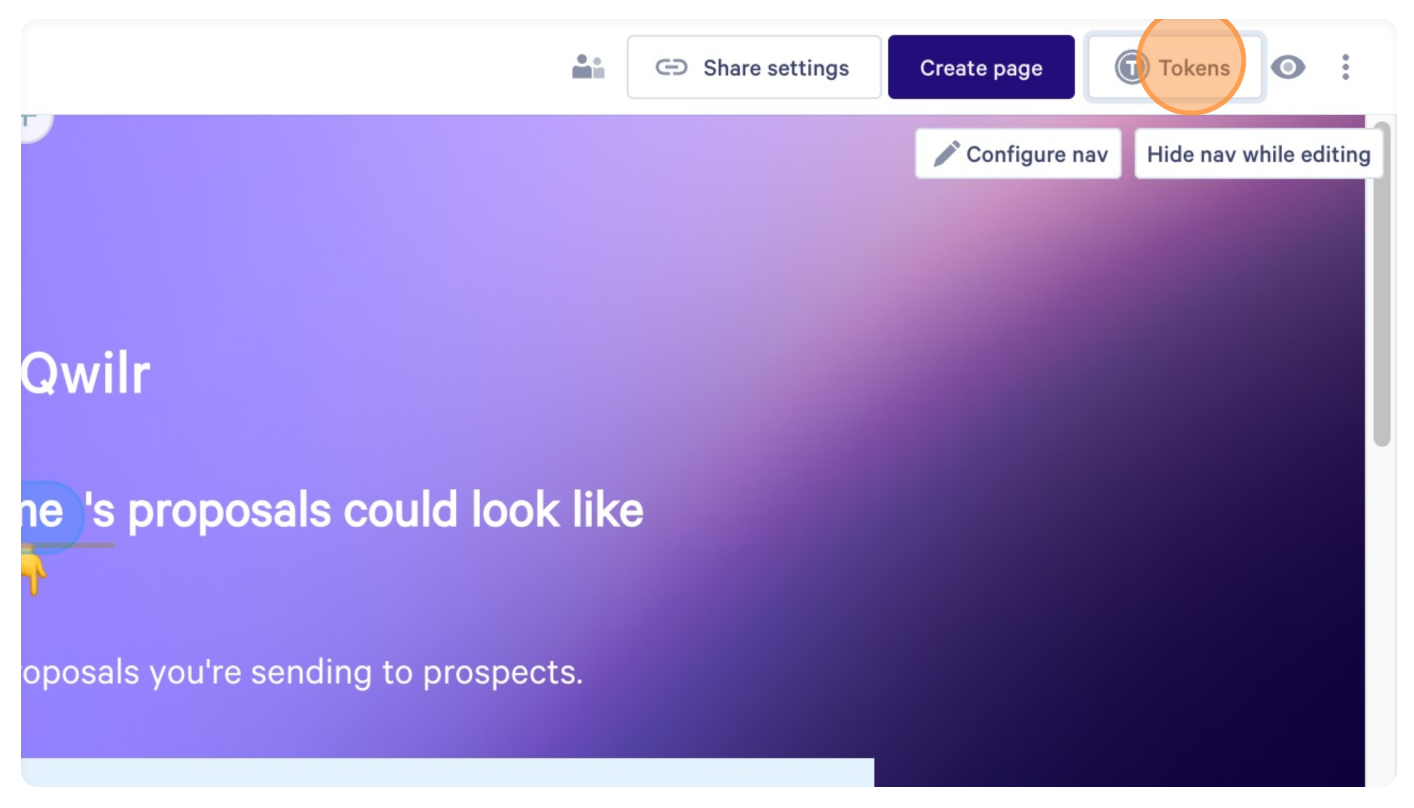
- In the template editor, click Tokens in the top right corner.
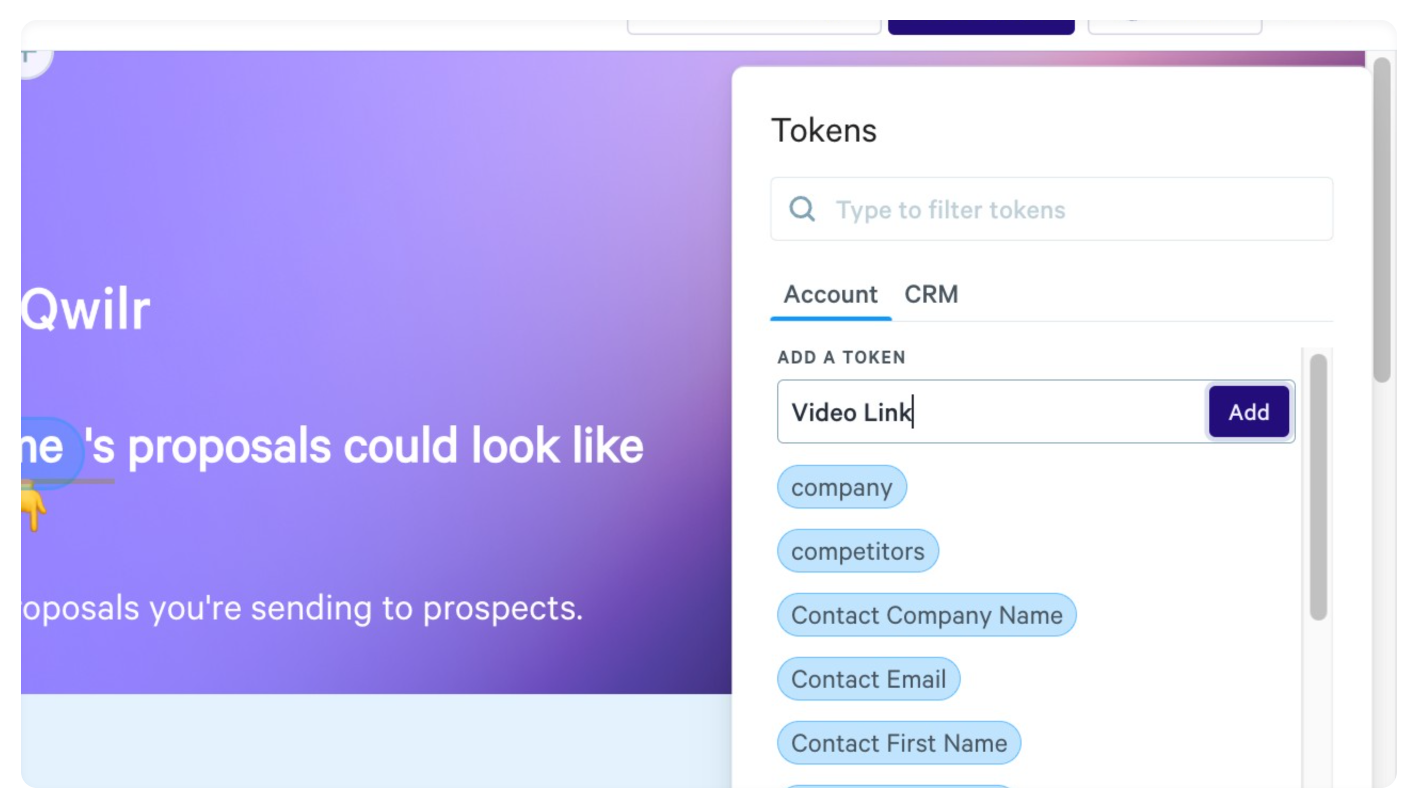
- Enter a new token name, e.g. Video Link, and click Add to save the token.
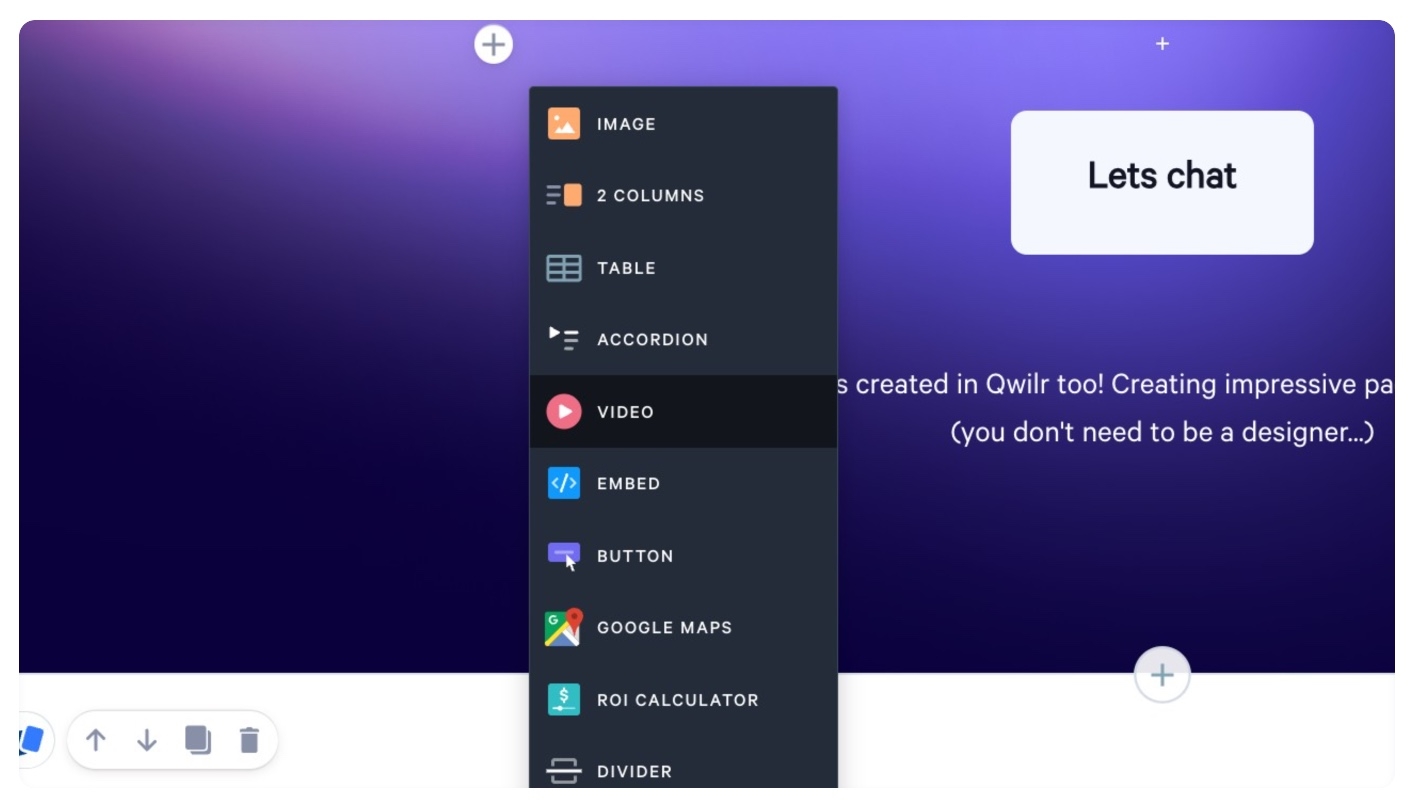
- In any text block, add a video embed.
- Click the Token icon within the video widget.
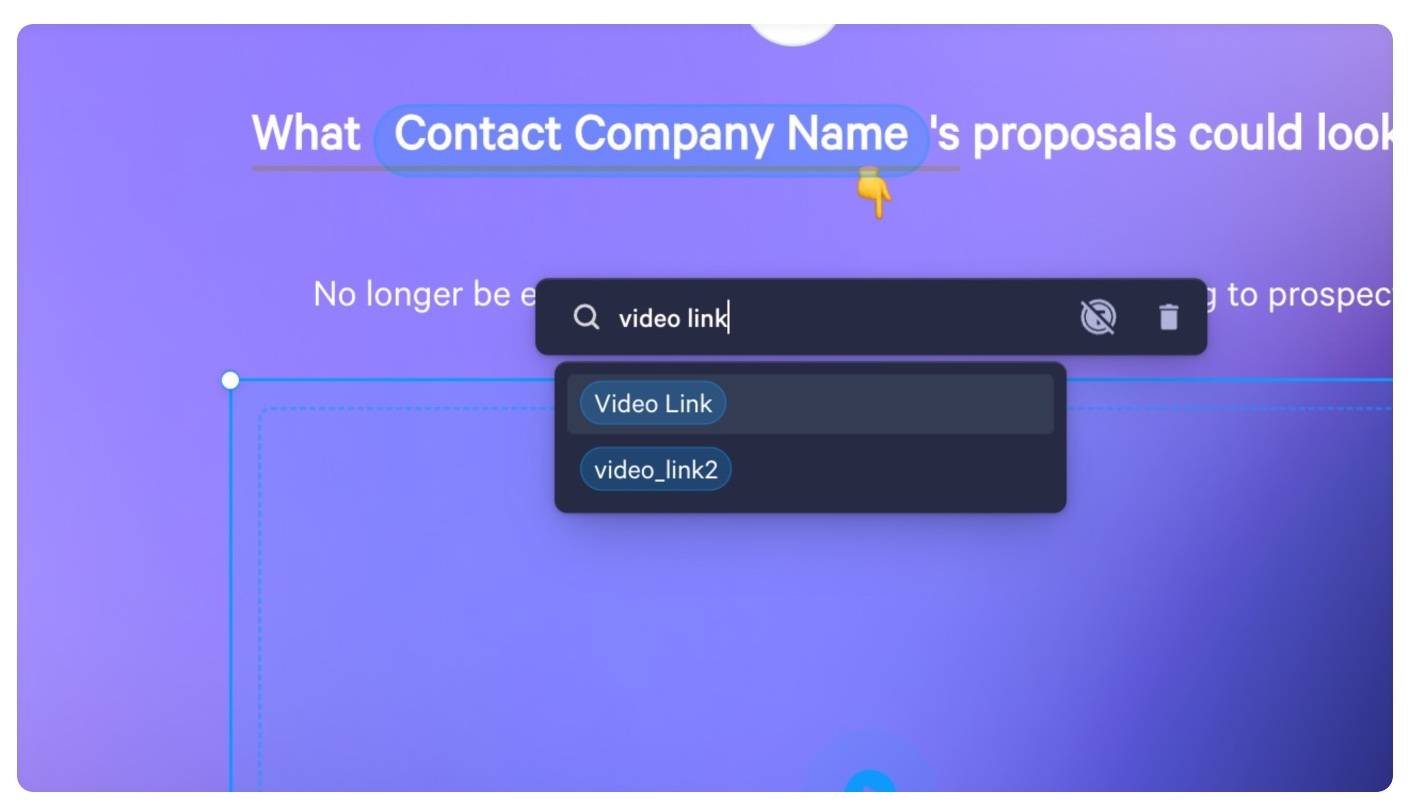
- Enter the token name you defined, such as Video Link.
For our first version of our welcome page template at Qwilr, we used the following tokens:
- Video Link: To embed the Sendspark video.
- Contact First Name
- Contact Company Name
📌 Getting started tip
Starting with a single page template for this play is recommended, though you can create multiple variations in the future.
For example, if your product serves diverse industries with varying use cases, consider creating multiple page templates with tailored videos and content for each. You can base these variations on information collected during sign-up through qualifying questions (e.g., industry) or with enrichment tools like Clearbit or Apollo, which can automatically identify the lead’s industry.
Step 2: Create your personalized video template in Sendspark
Now it’s time to set up your video template in Sendspark, which will allow you to generate personalized versions for each welcome page.
With Sendspark’s AI features, you can record a base video once, and then automatically customize it for each prospect by cloning your voice and displaying their company website in the background. This creates a highly engaging and relevant experience for each new user.
- In Sendspark, head to Dynamic Videos. Then click Start Recording and follow the prompts.
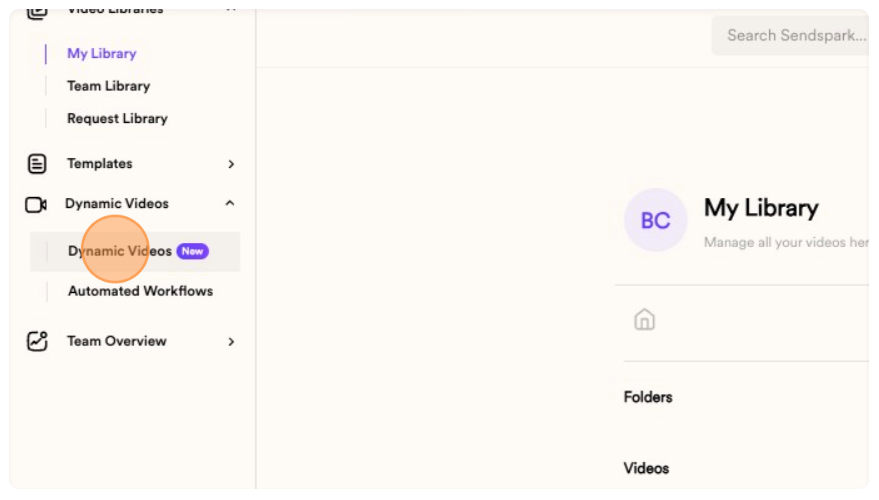
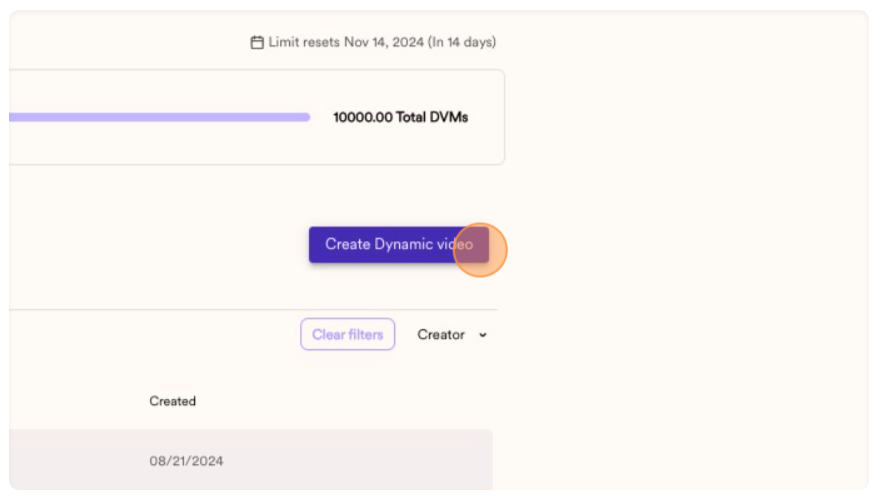
For more detailed instructions on creating a Dynamic Video in Sendspark, check out their detailed guide.
Step 3: Automate the creation of personalized videos
With our welcome page template created in Qwilr and video template in Sendspark, it’s time to set up the first of two Zapier workflows. This first workflow will automate the creation of personalized videos for new users when they sign up.
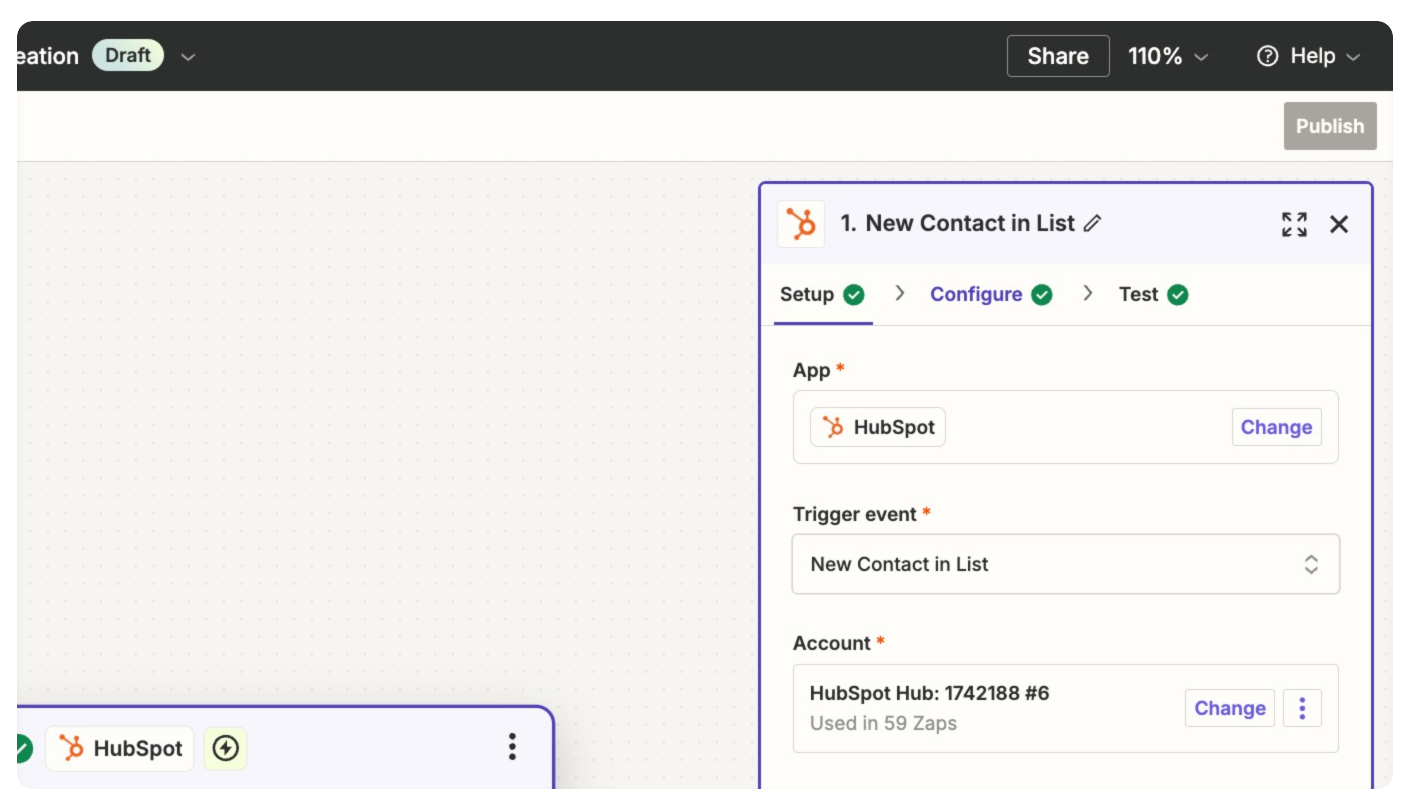
- Set up a new signup trigger in CRM
- In Zapier, or your CRM, create a workflow to trigger Sendspark video creation whenever a new user signs up. For example, if you have an automated list in your CRM that updates with each new signup, this list can serve as your trigger.
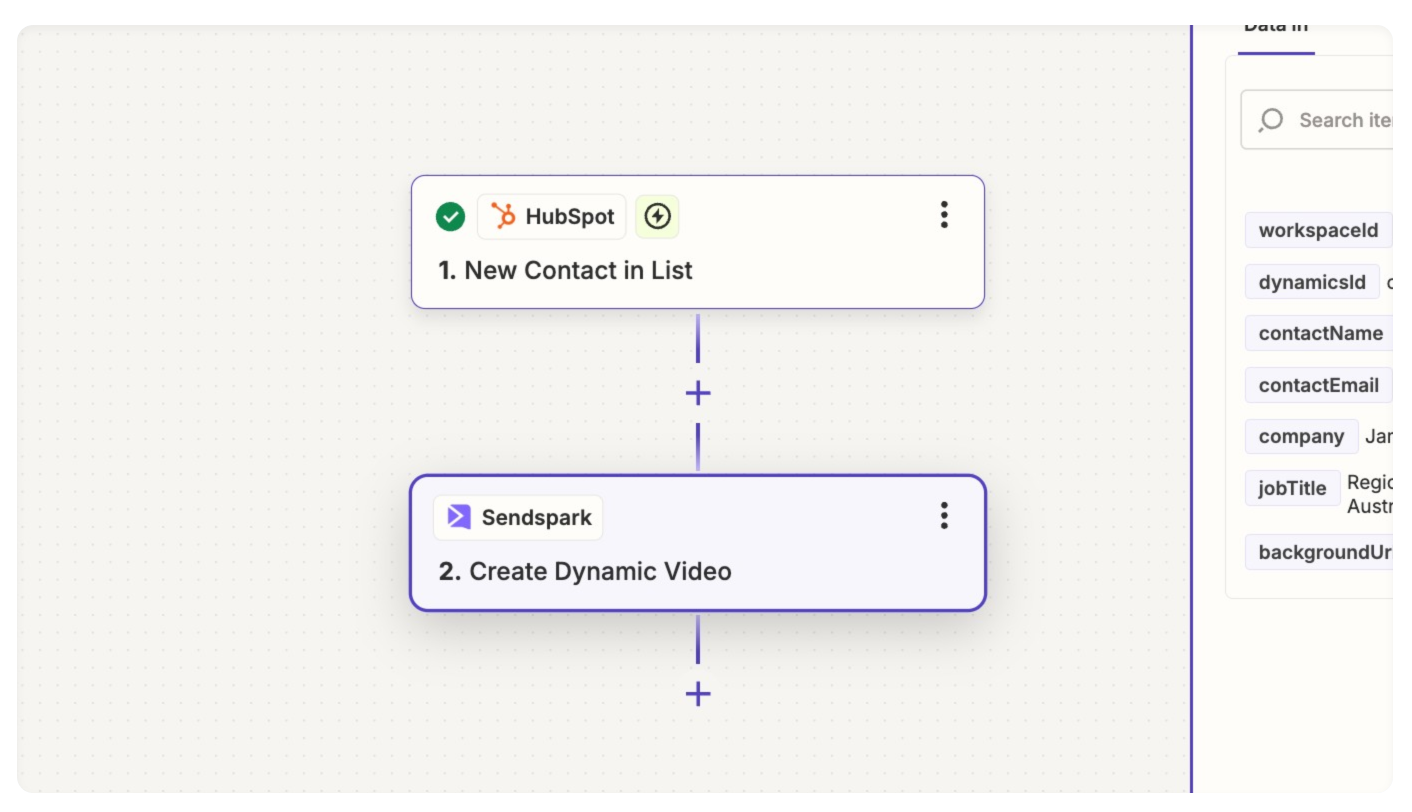
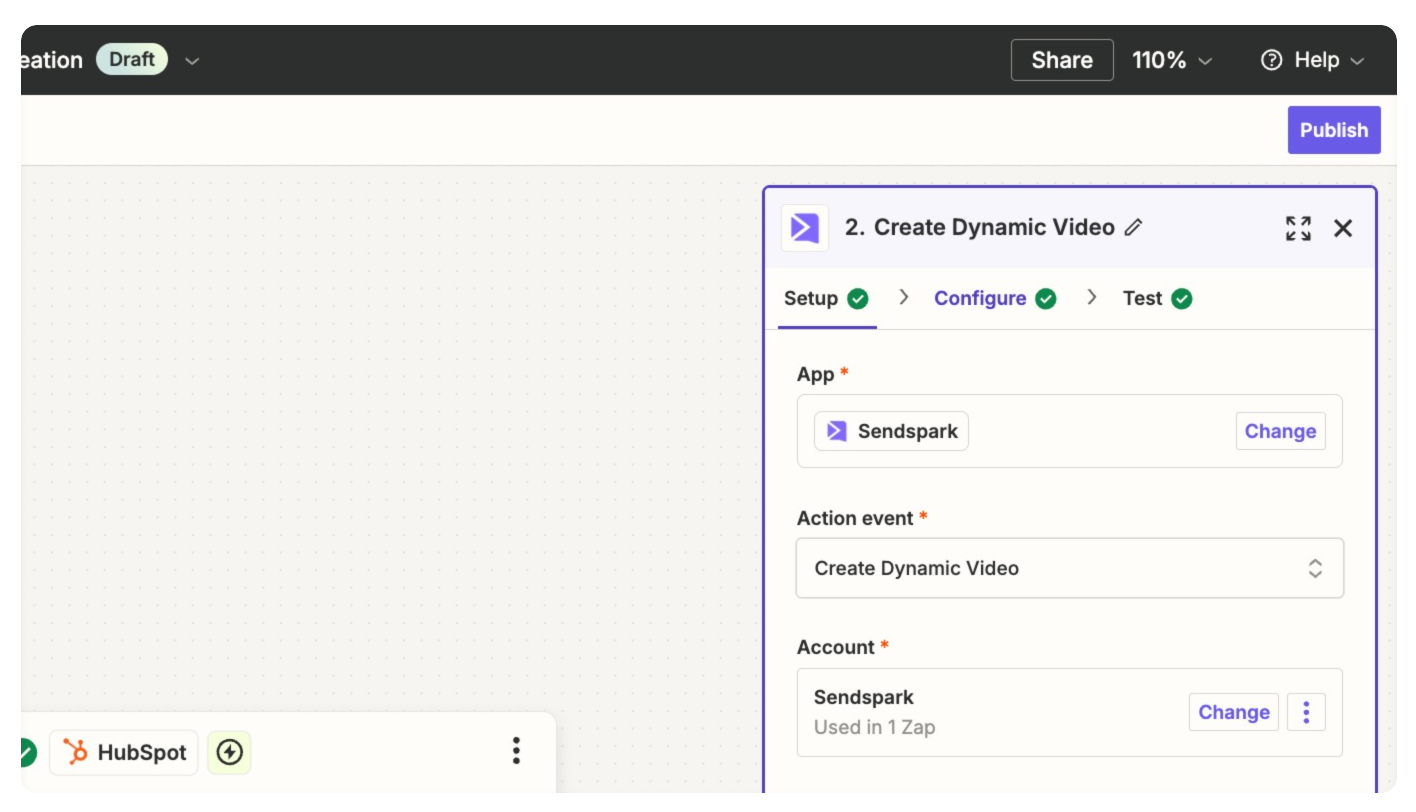
- For the action, select Create Dynamic Video in Sendspark. Then, choose the video template you created in Step 2.
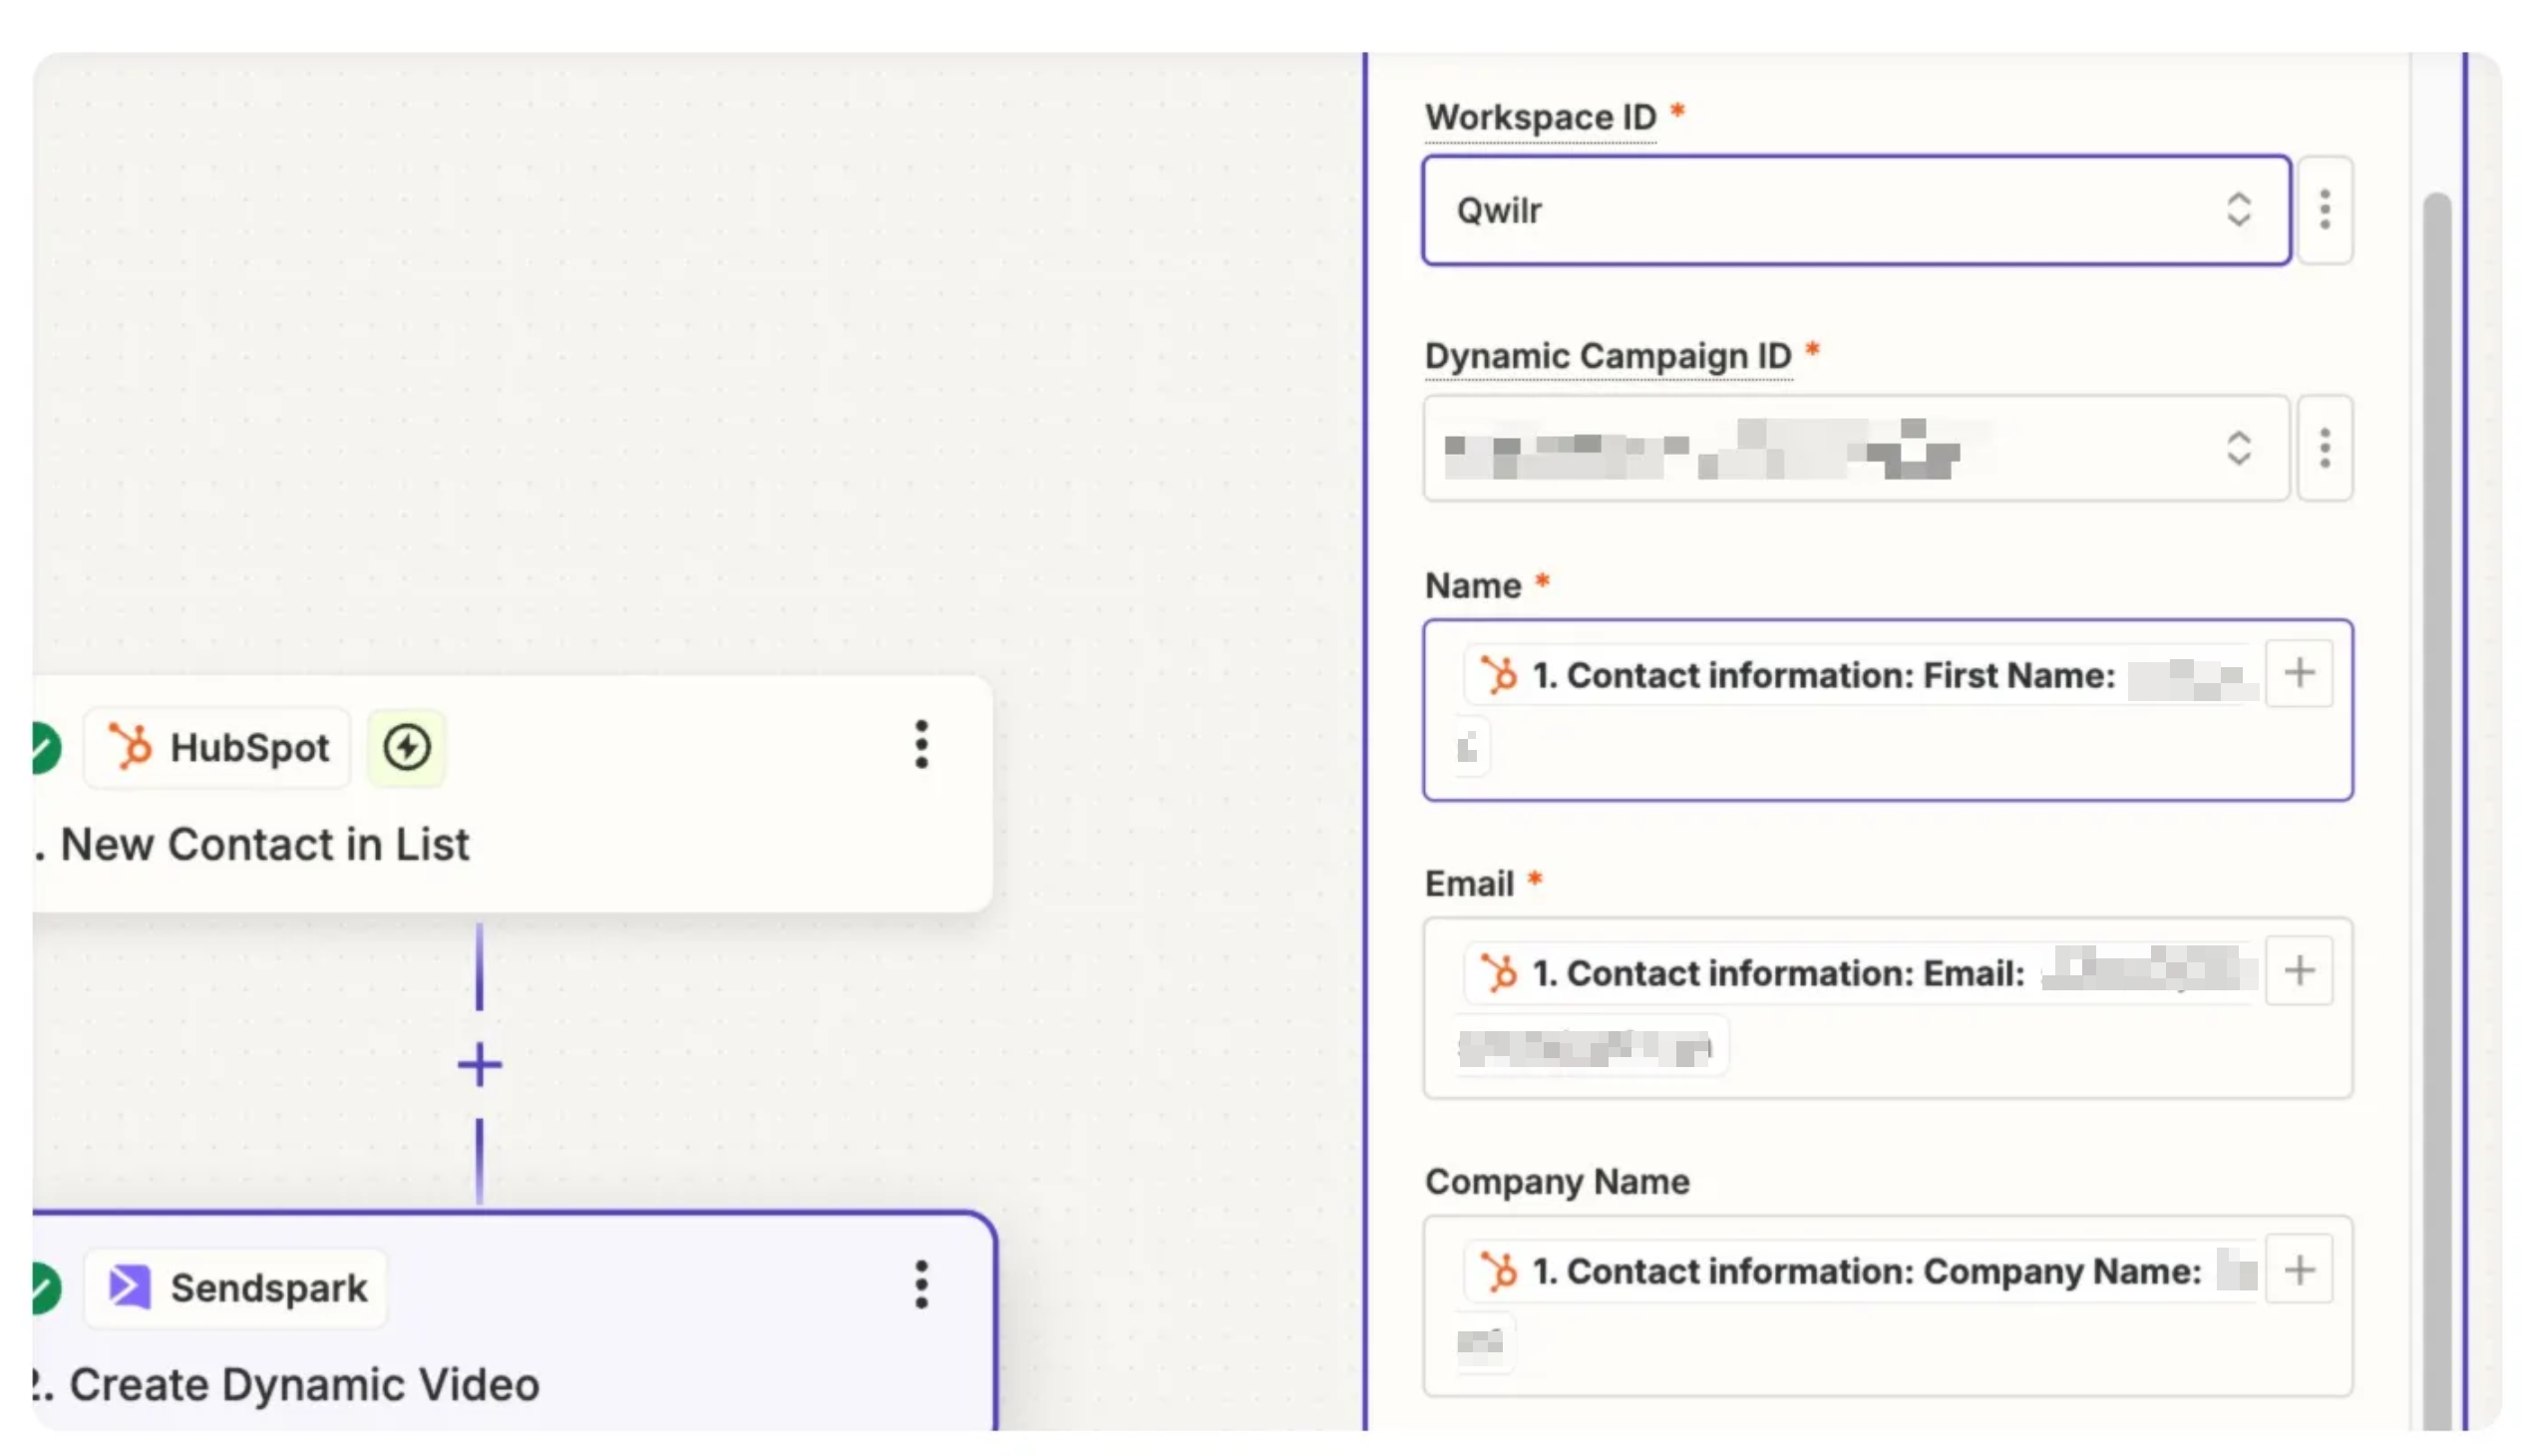
- In the configuration, we recommend you include the recommended CRM fields, most importantly name and website, which can be used by Sendspark to personalize the AI voice welcome and the video background for each new user.
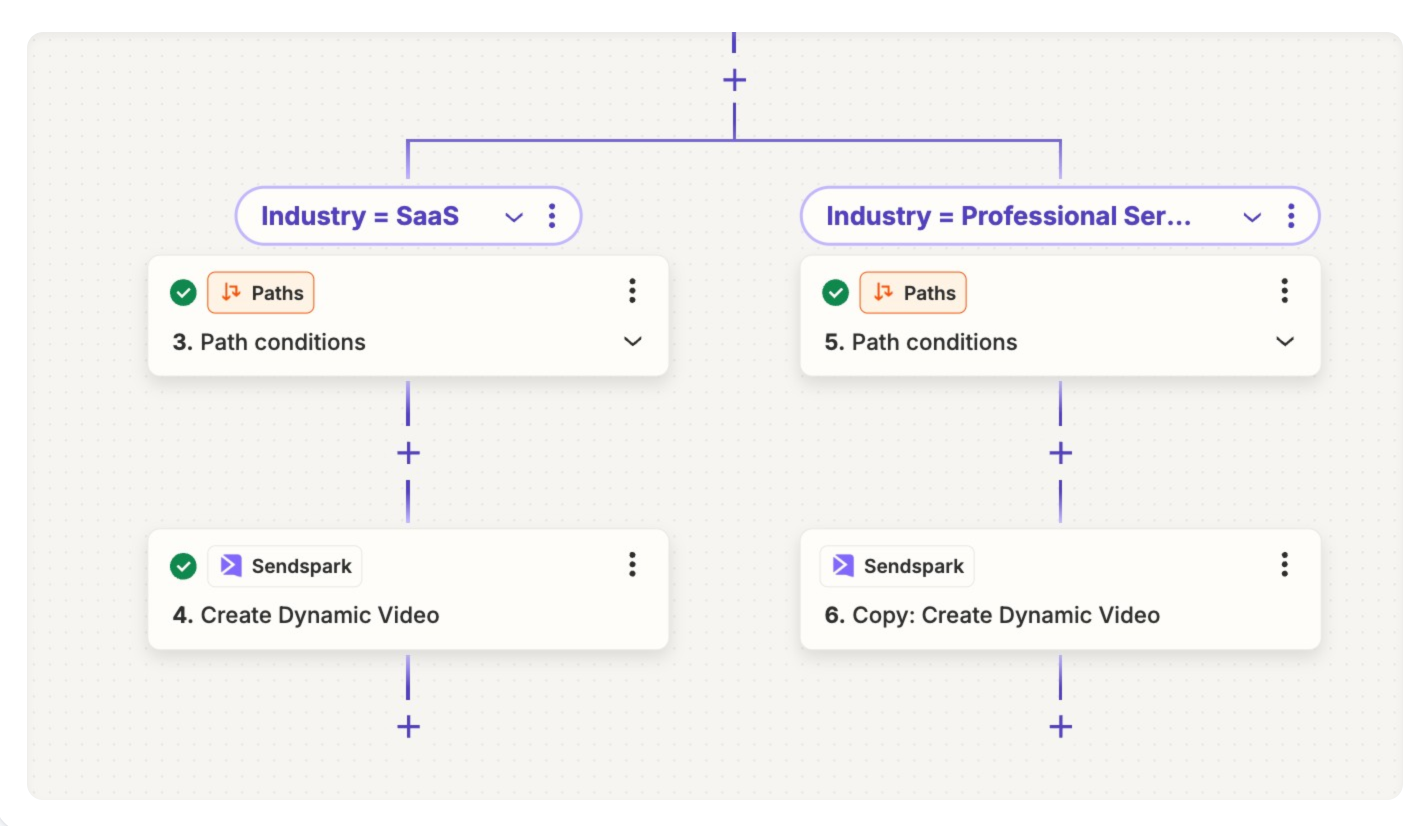
- If desired, you can create separate branches based on user characteristics to further personalize the experience. However, for an initial setup, one video will suffice.
Great. So far, we’ve set up a workflow to create a new video each time someone signs up for our product. We’re almost there. Next, we’ll configure a second workflow to automatically embed the newly created video into our Qwilr welcome page and record this link in our CRM.
Step 4: Automate the creation of personalized welcome pages
With our welcome page template created in Qwilr and a Zapier workflow set up to automate video creation, it’s now time to set up our second workflow. This workflow will automate the creation of personalized pages for each new customer, embed their unique video, and add the page link to a CRM field, allowing it to be easily included in a sequence and delivered to the customer shortly after sign-up—all automatically!
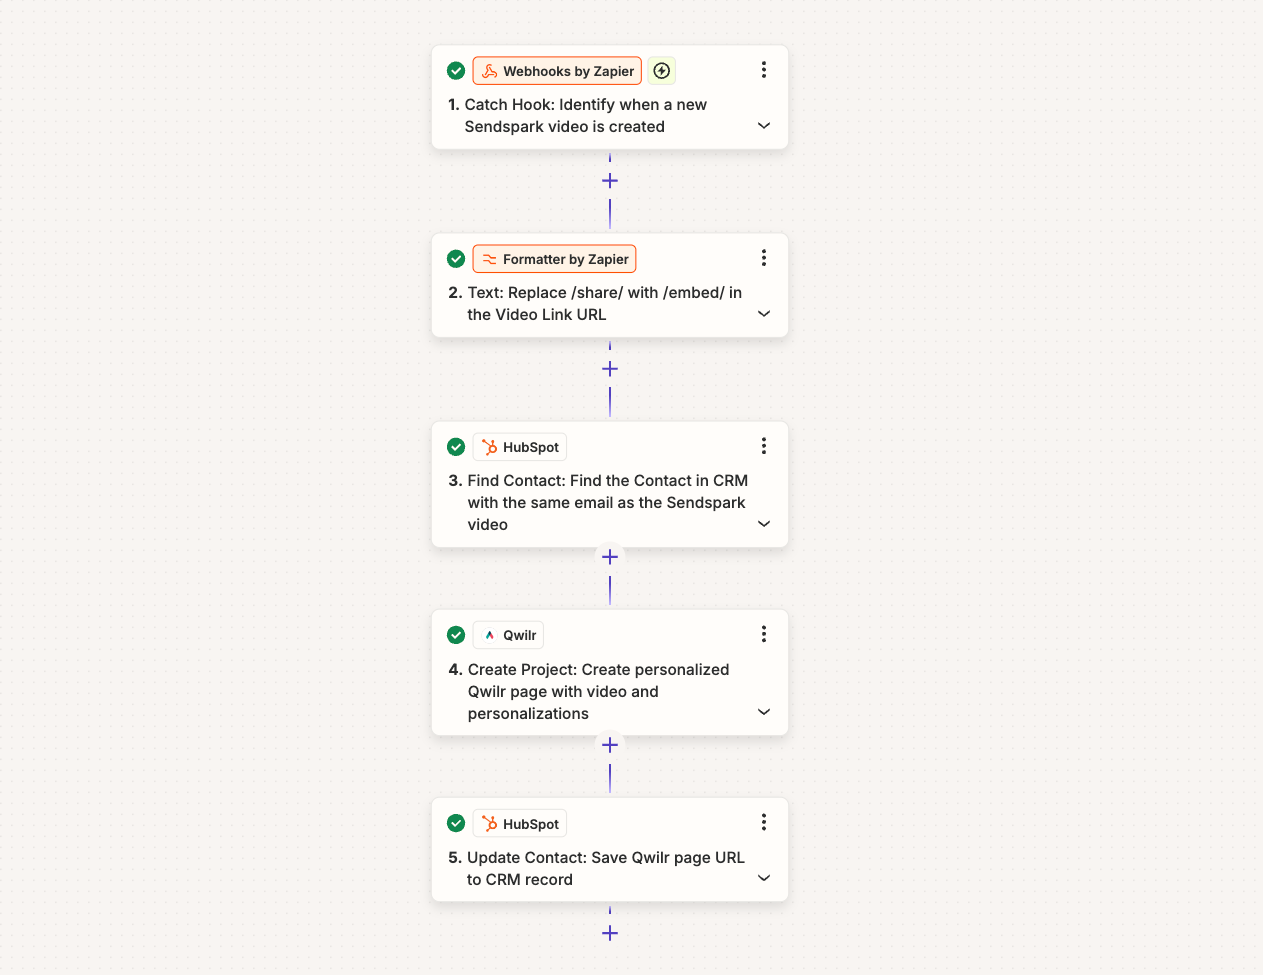
Here's a preview of what we'll be setting up in this workflow:
Lets jump in.
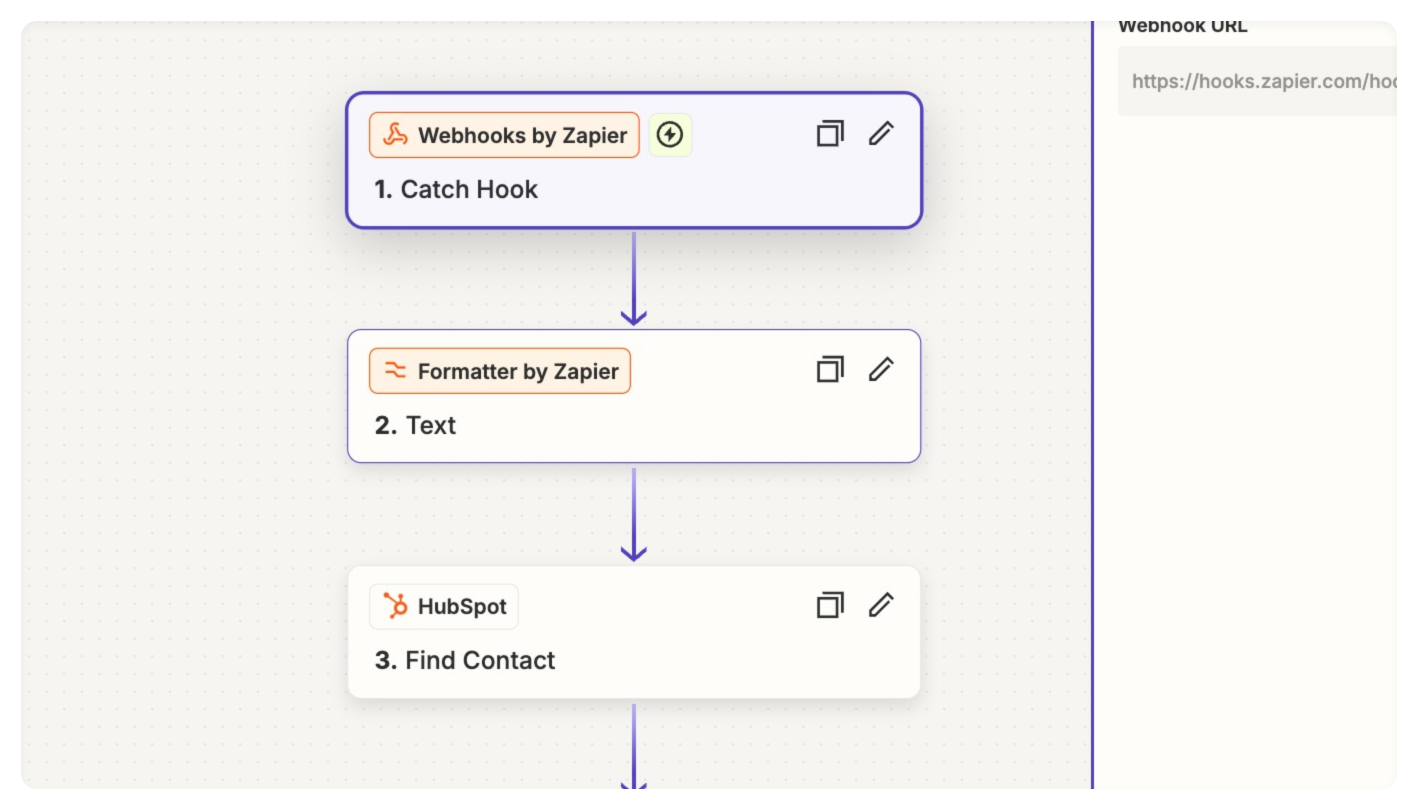
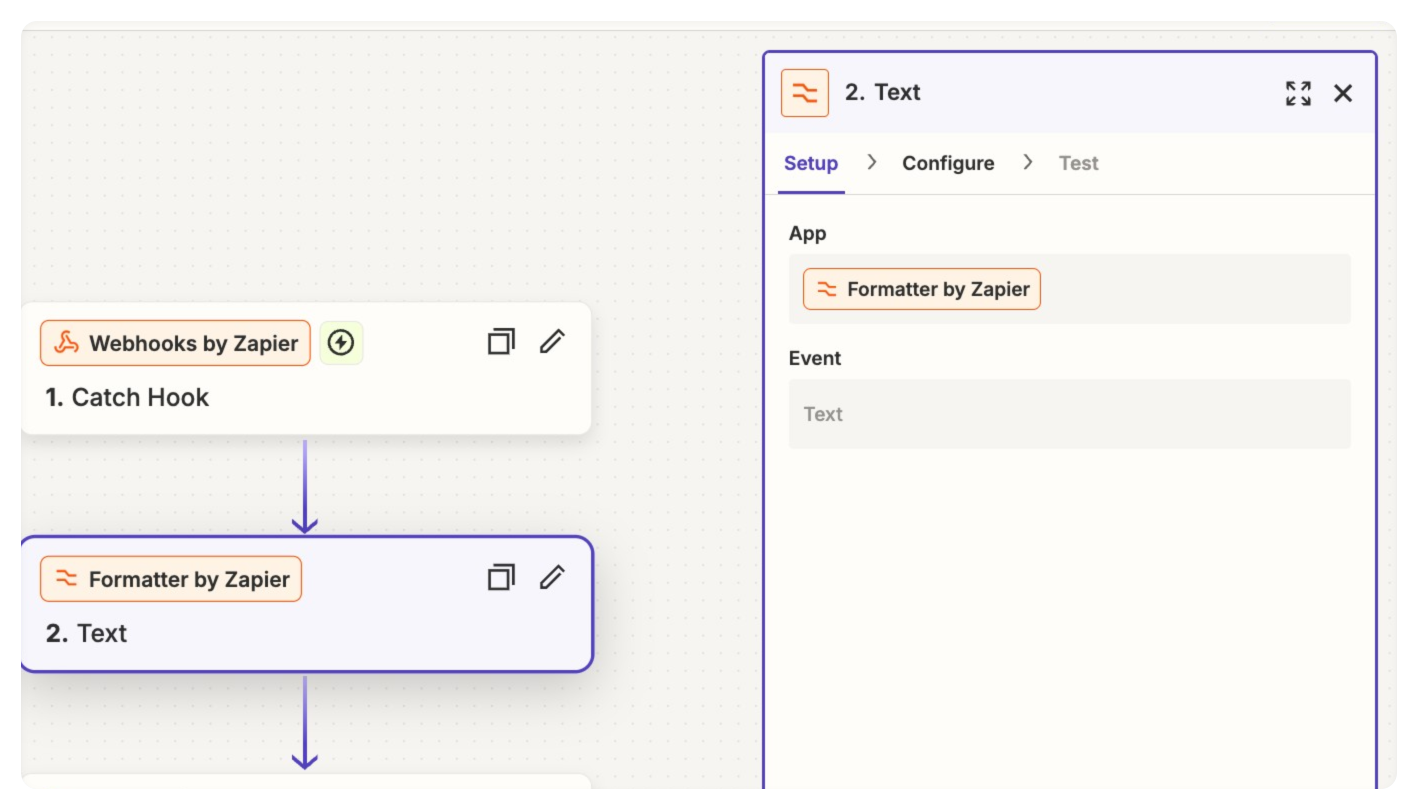
- In Zapier, create a new Zap with the trigger Catch Hook. We’ll use this webhook to notify Zapier whenever a new video is created in the designated Sendspark campaign. Make sure to note the automatically generated hook URL, as you’ll need it for the next step.
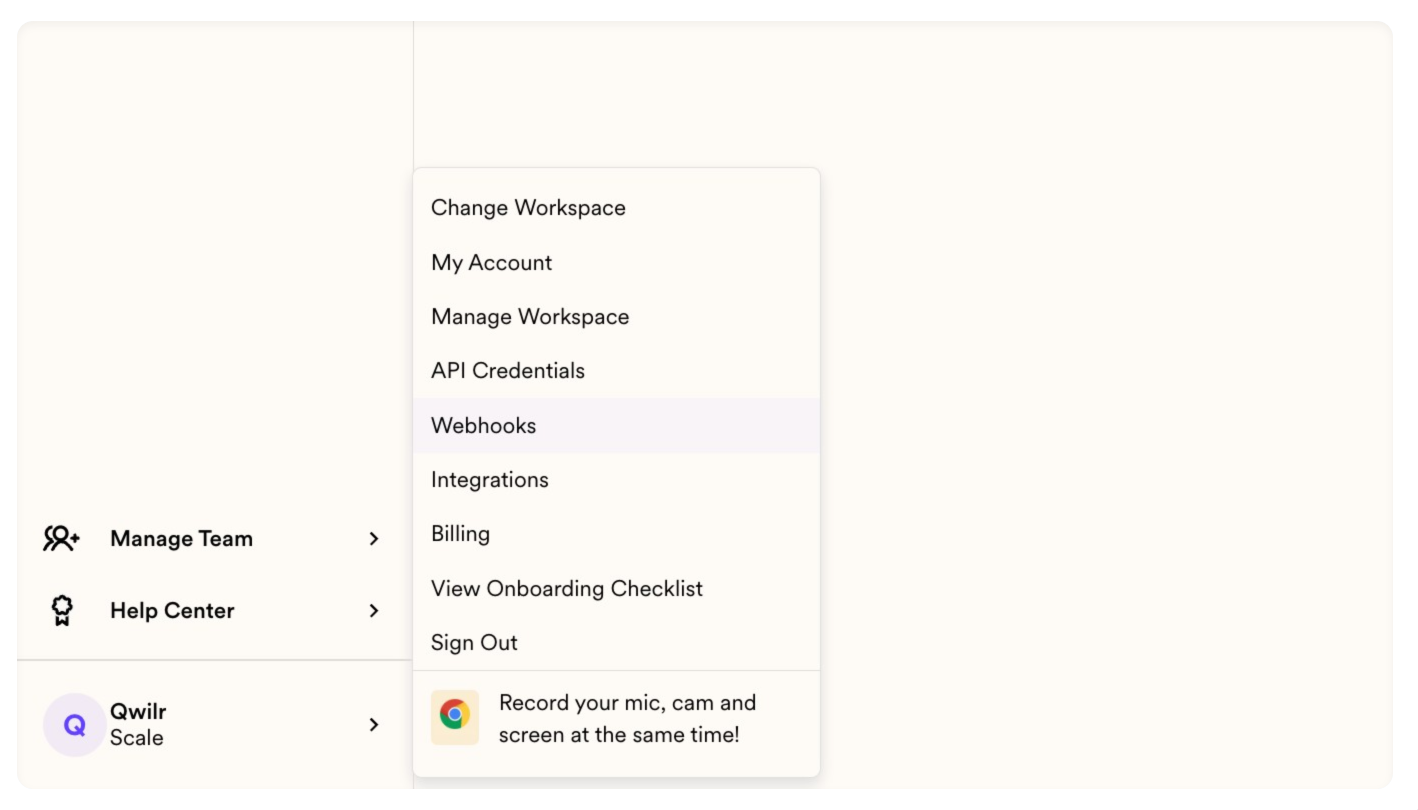
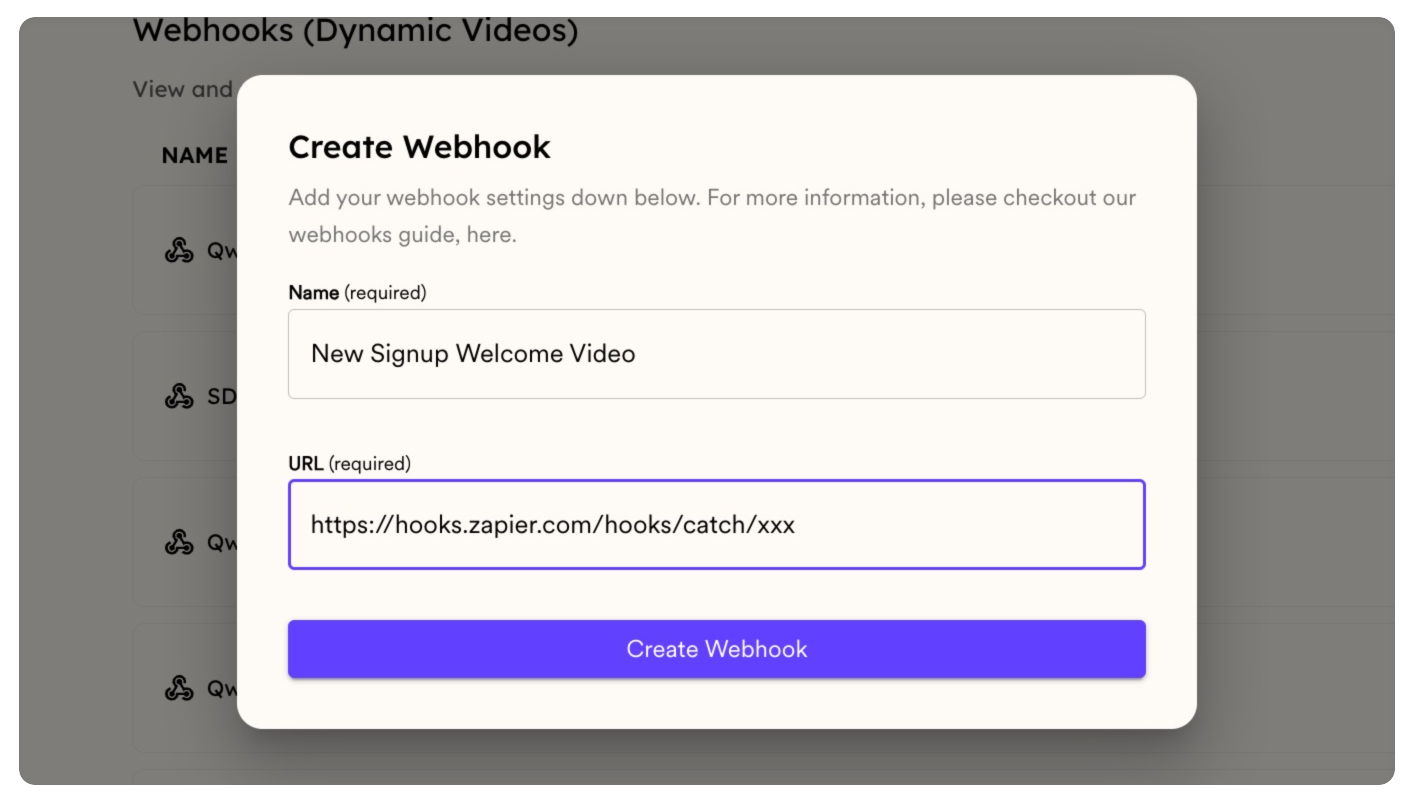
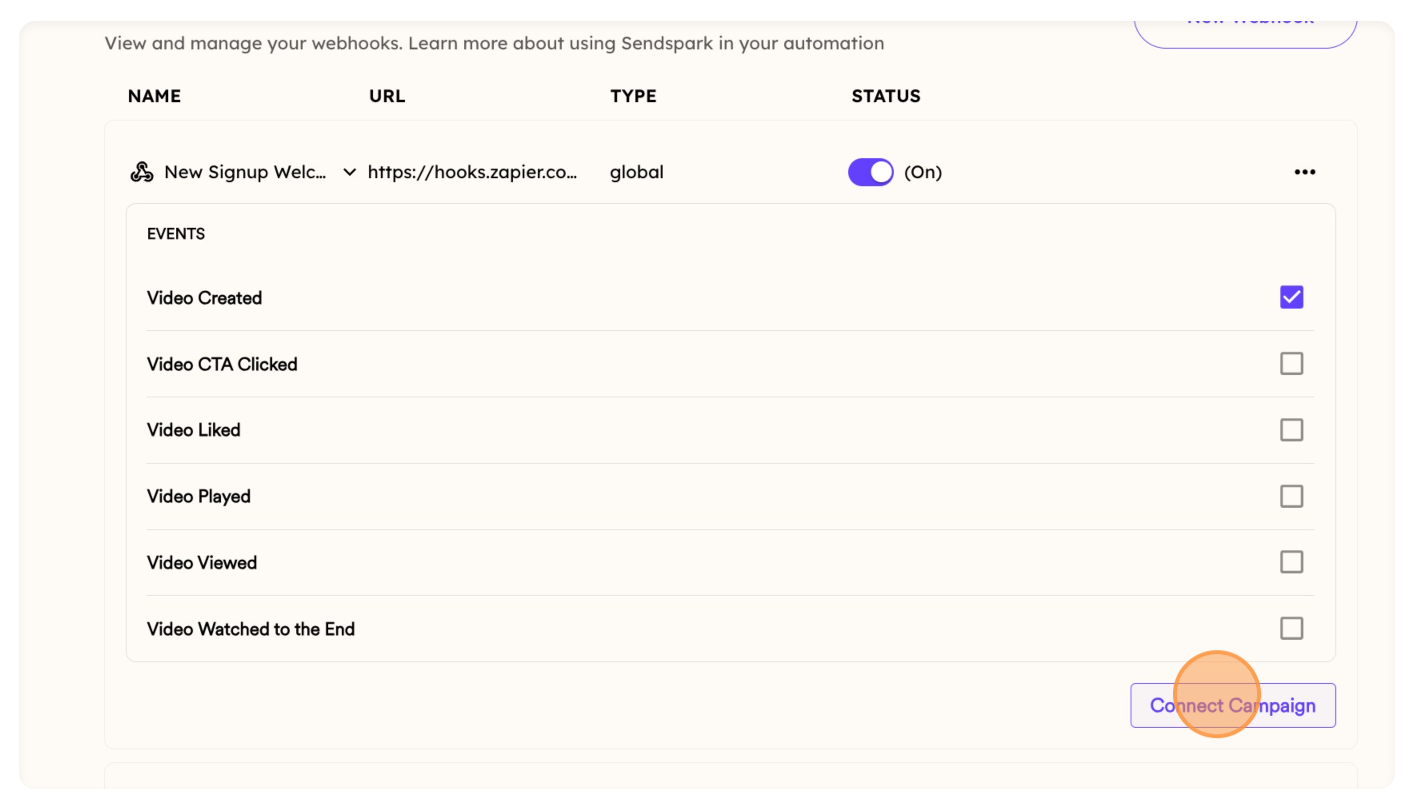
- In Sendspark, navigate to Settings > Webhooks. Give your new webhook a name, e.g. New Signup Welcome Video, and set up your webhook to fire on Video Created events. Then, paste the webhook URL from the previous step into the URL field and click Create Webhook.
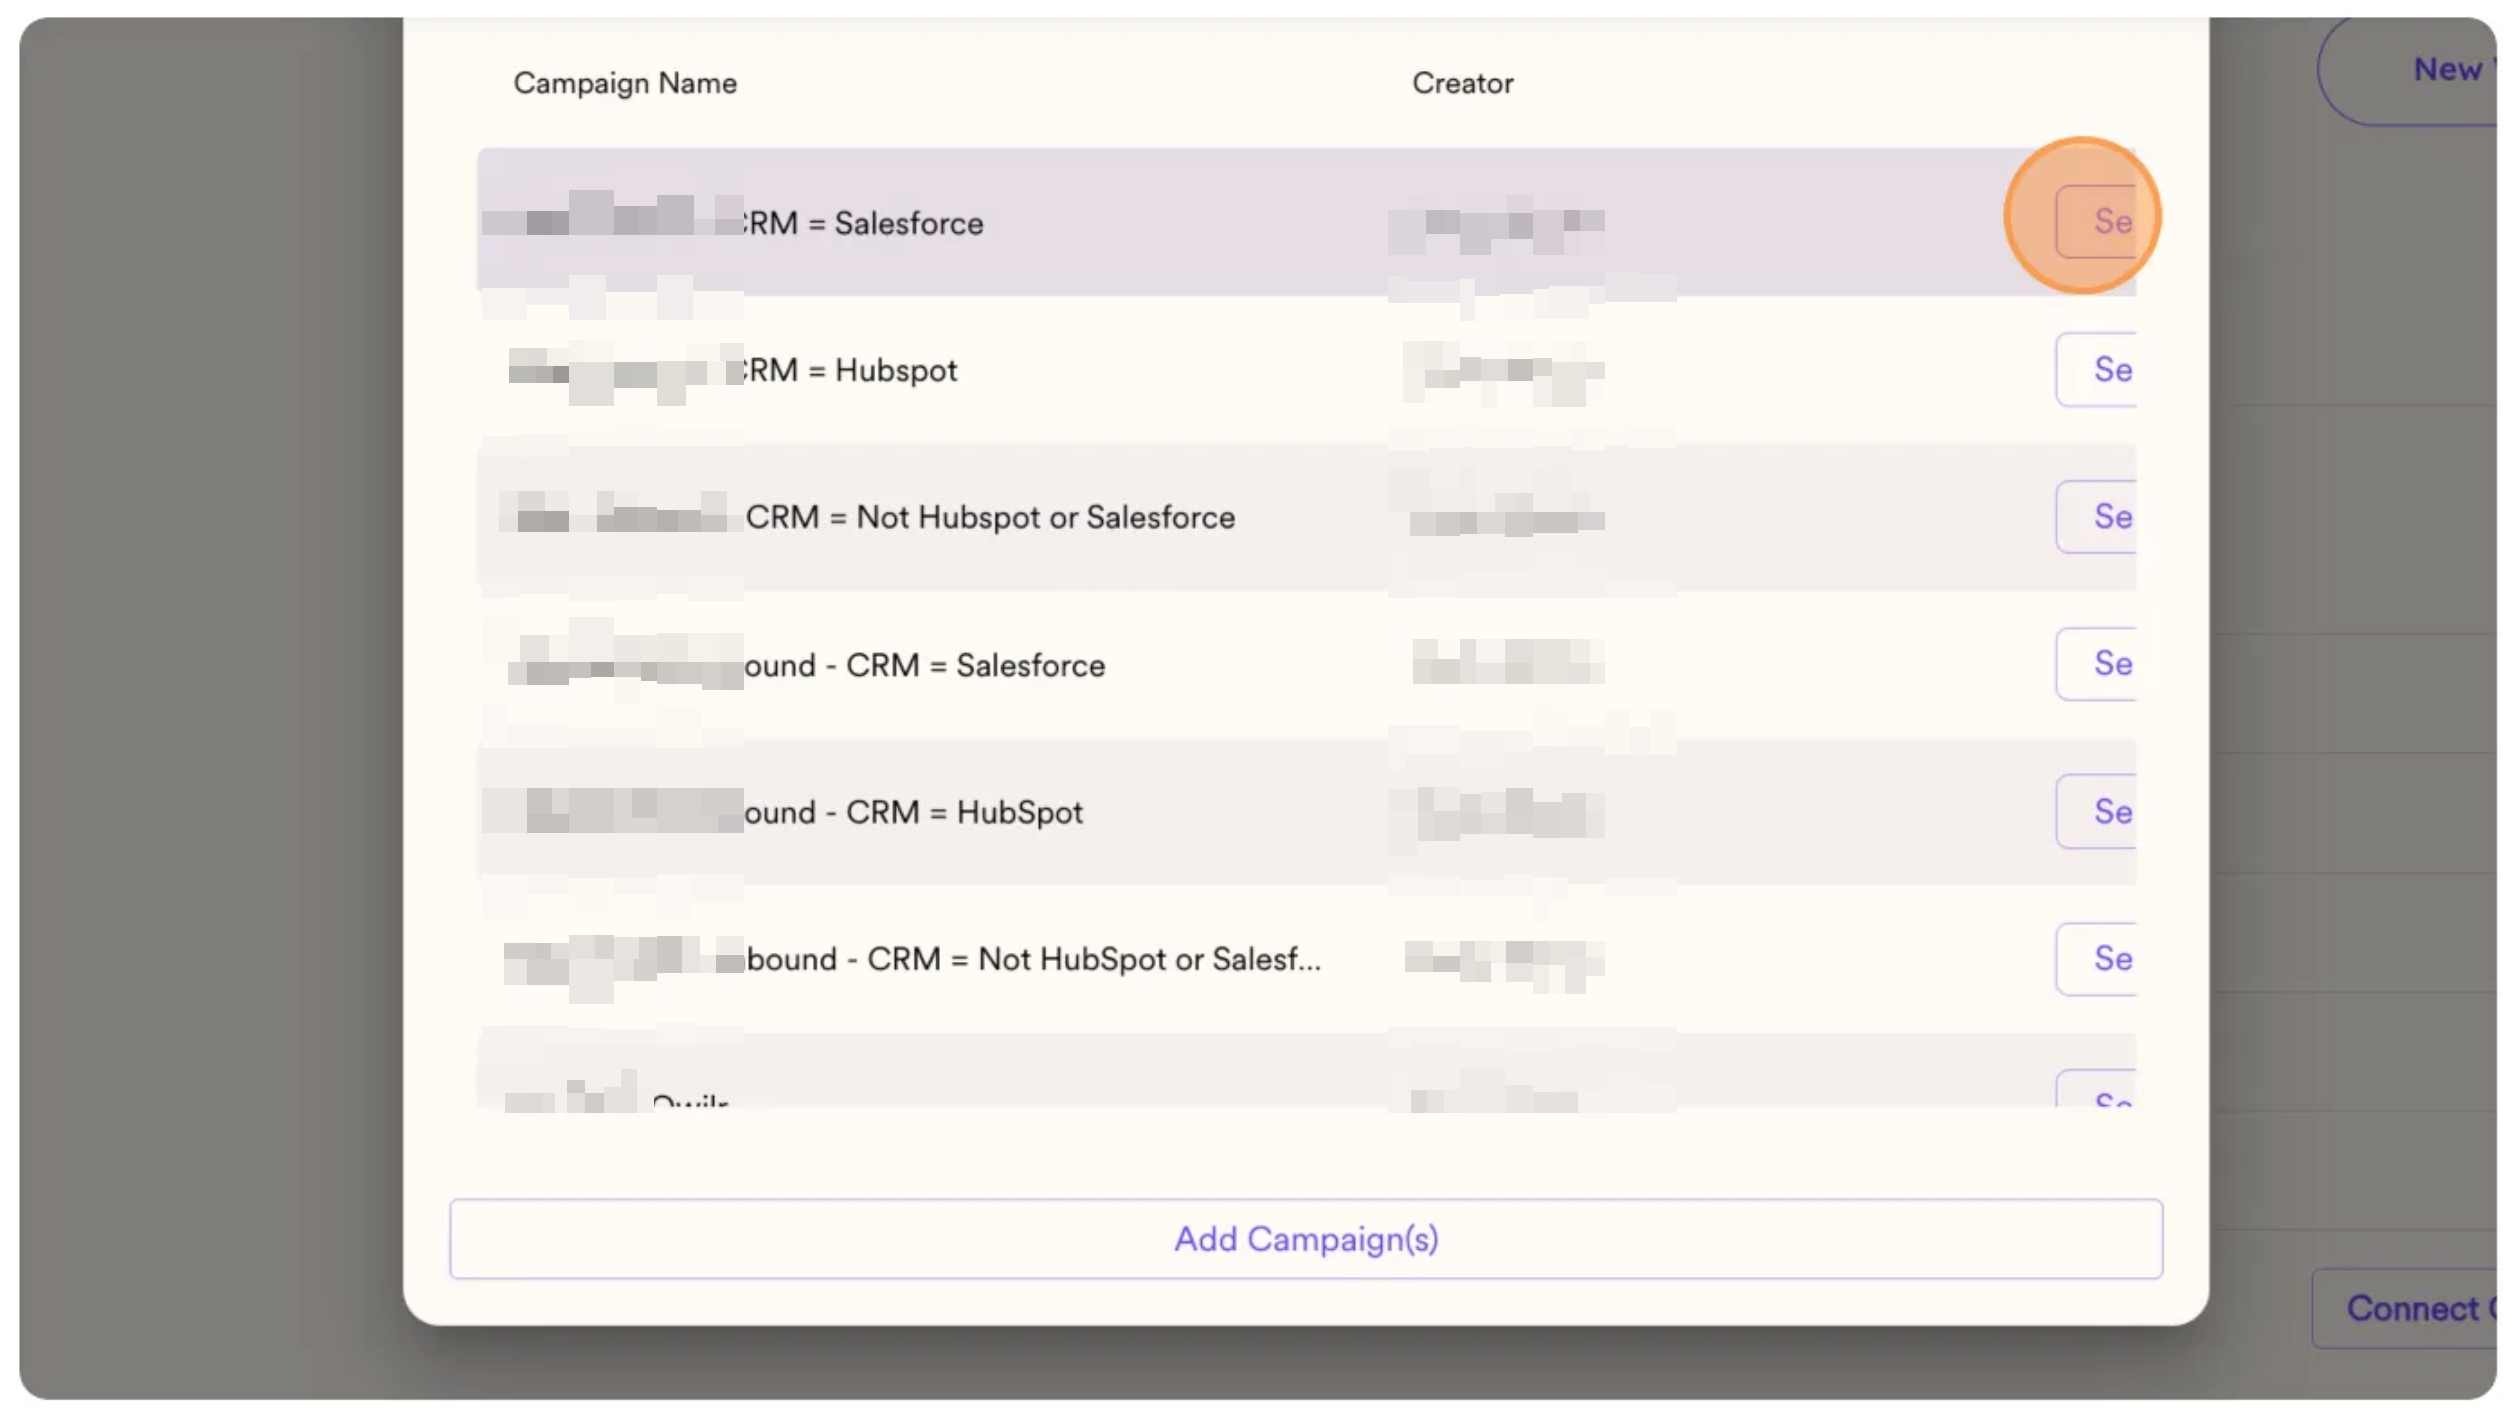
- Once your Webhook is established, click Connect Campaign, nominate the Sendspark campaign you created in Step 2 and save your selection by clicking Add Campaign(s).
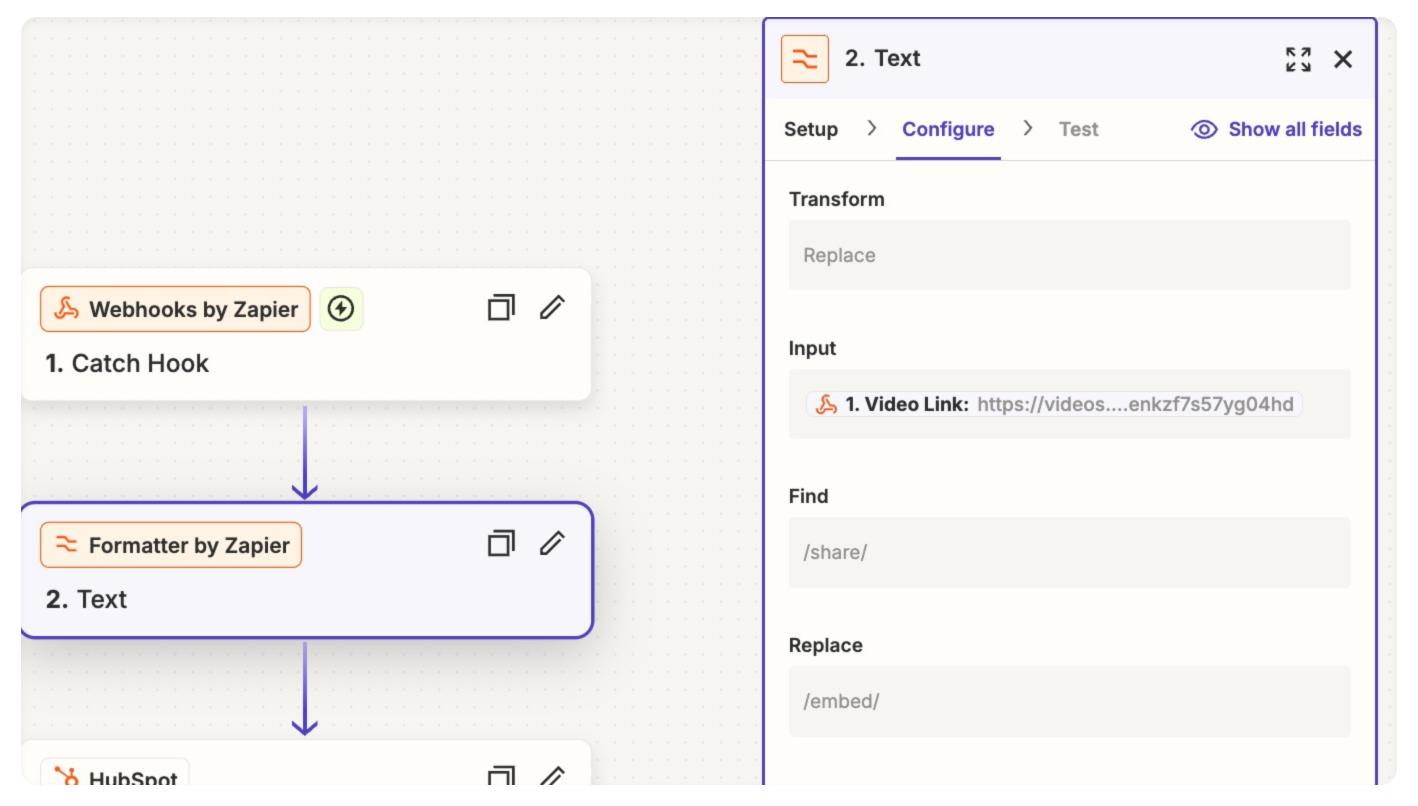
- In Zapier, add a second step using Formatter to replace “/share/” with “/embed/” in the video URL.
- The correct URL format is: https://sendspark.com/embed/xxx
- In Zapier, create a third step, Find Contact in your CRM, to retrieve the record ID for the contact with the same email address that’s associated with the personalized video. In a later step, this will allow us to update a property on the contact record with the link to the custom welcome page.
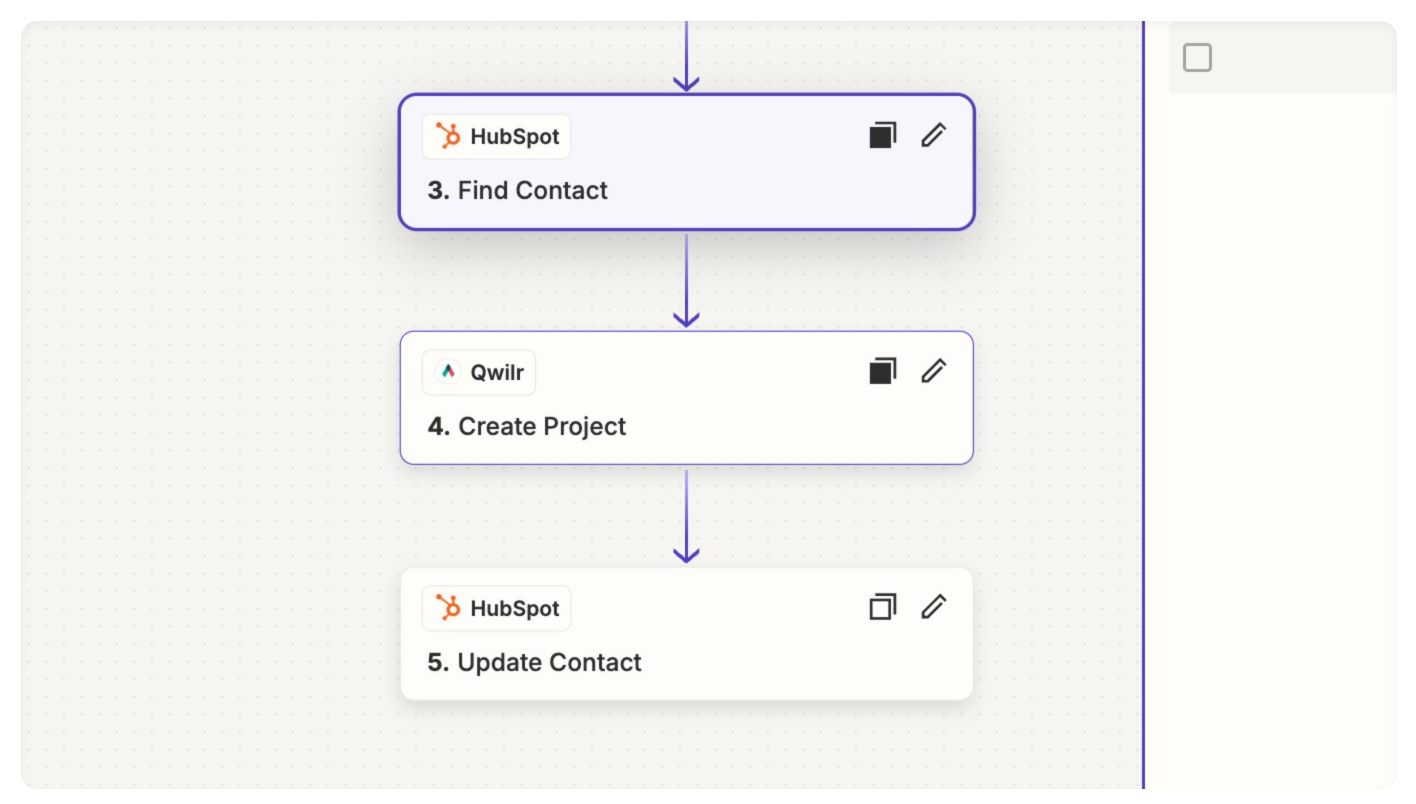
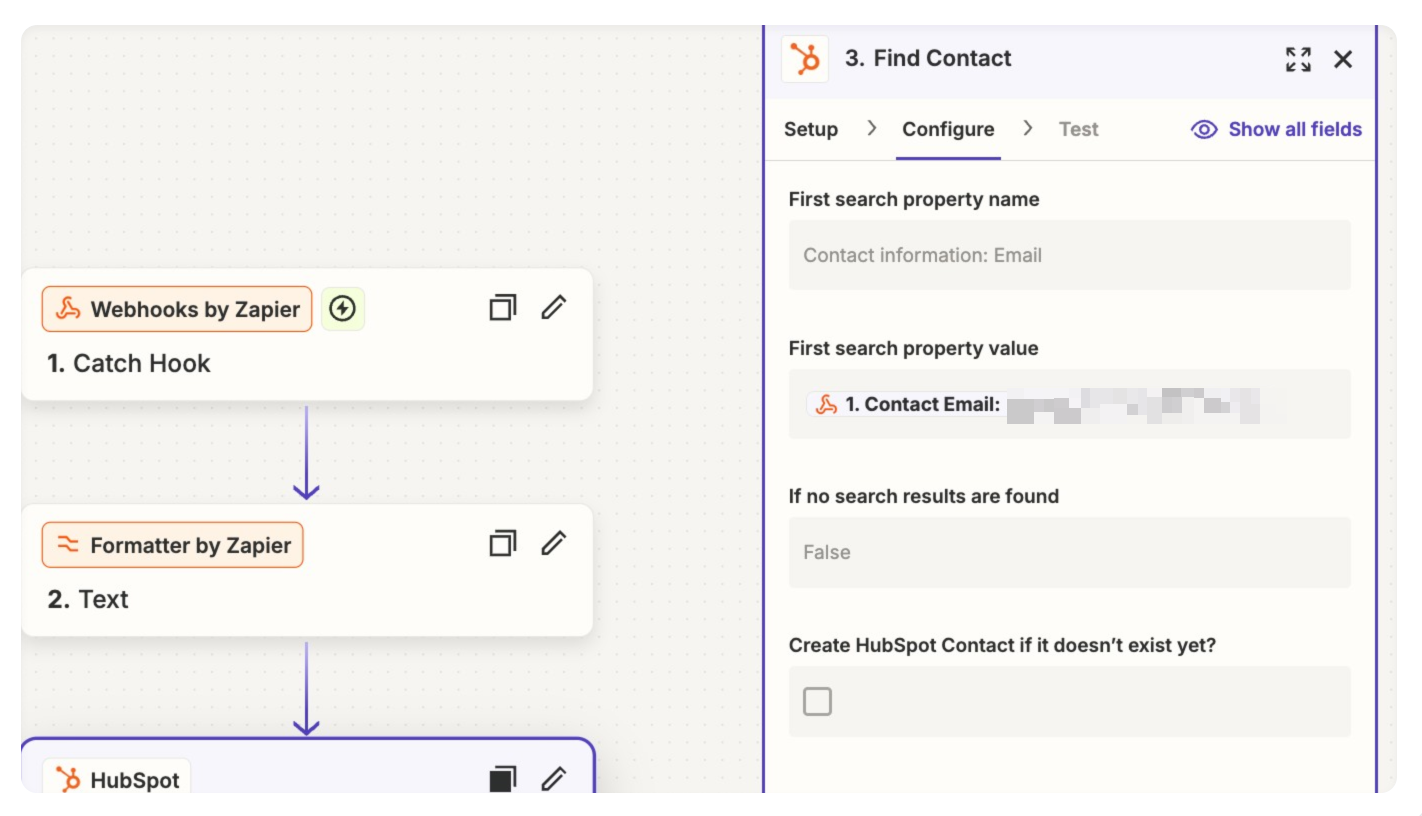
- In Zapier, create a fourth step, Create a New Project in Qwilr, and select the template you created in Step 1. This step will create your personalized welcome pages for new users.
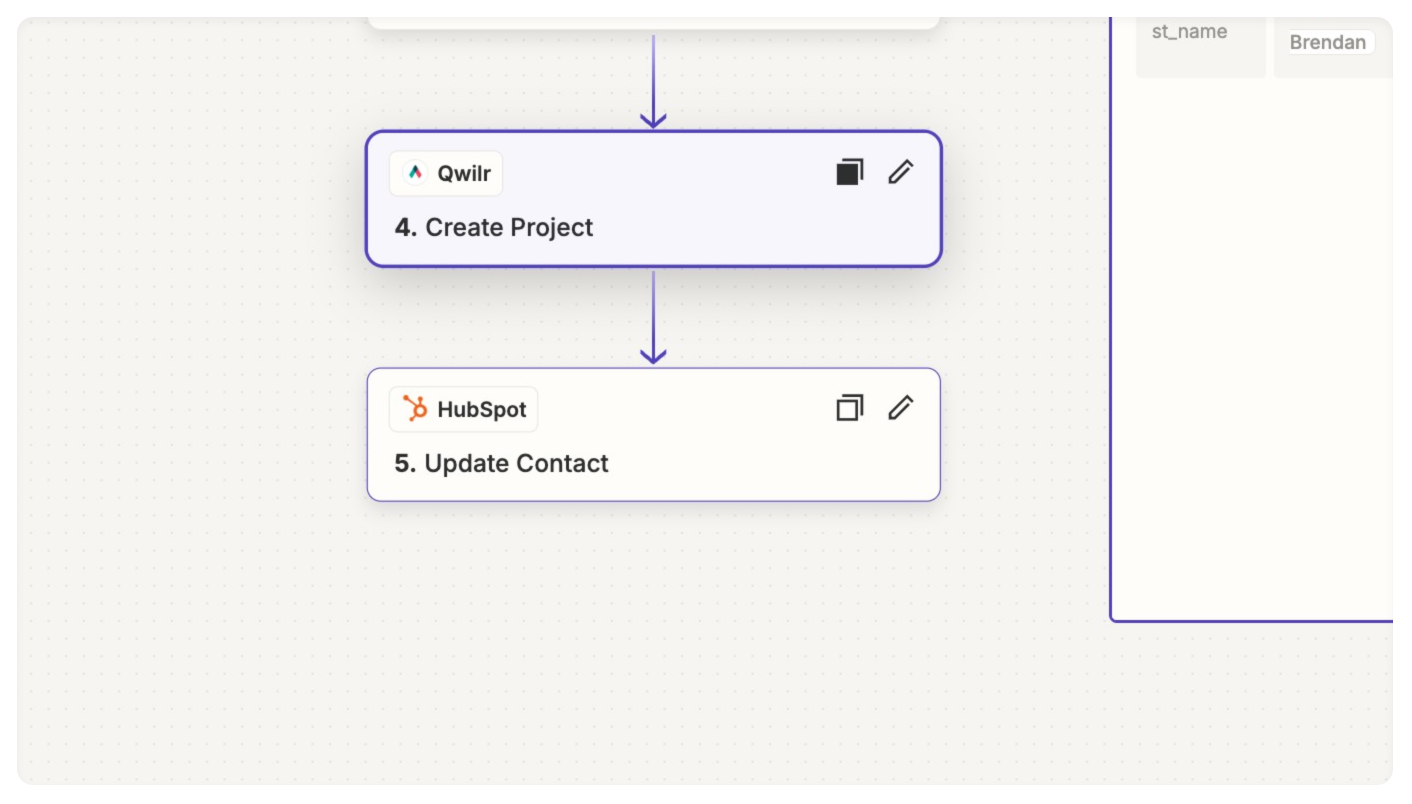
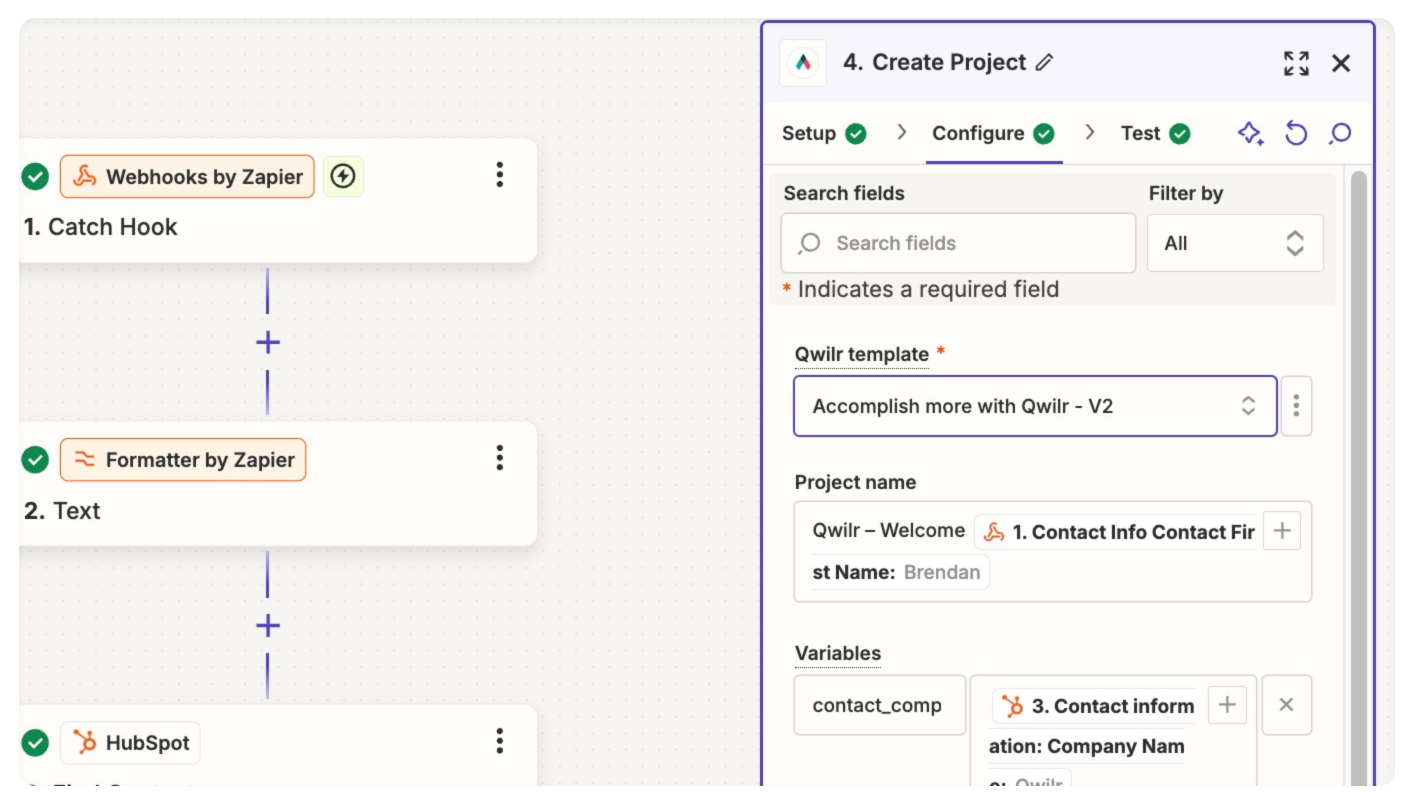
- In the variables section, include any tokens you created for the page in Step 1, such as the video link. This is where all page personalizations are applied.
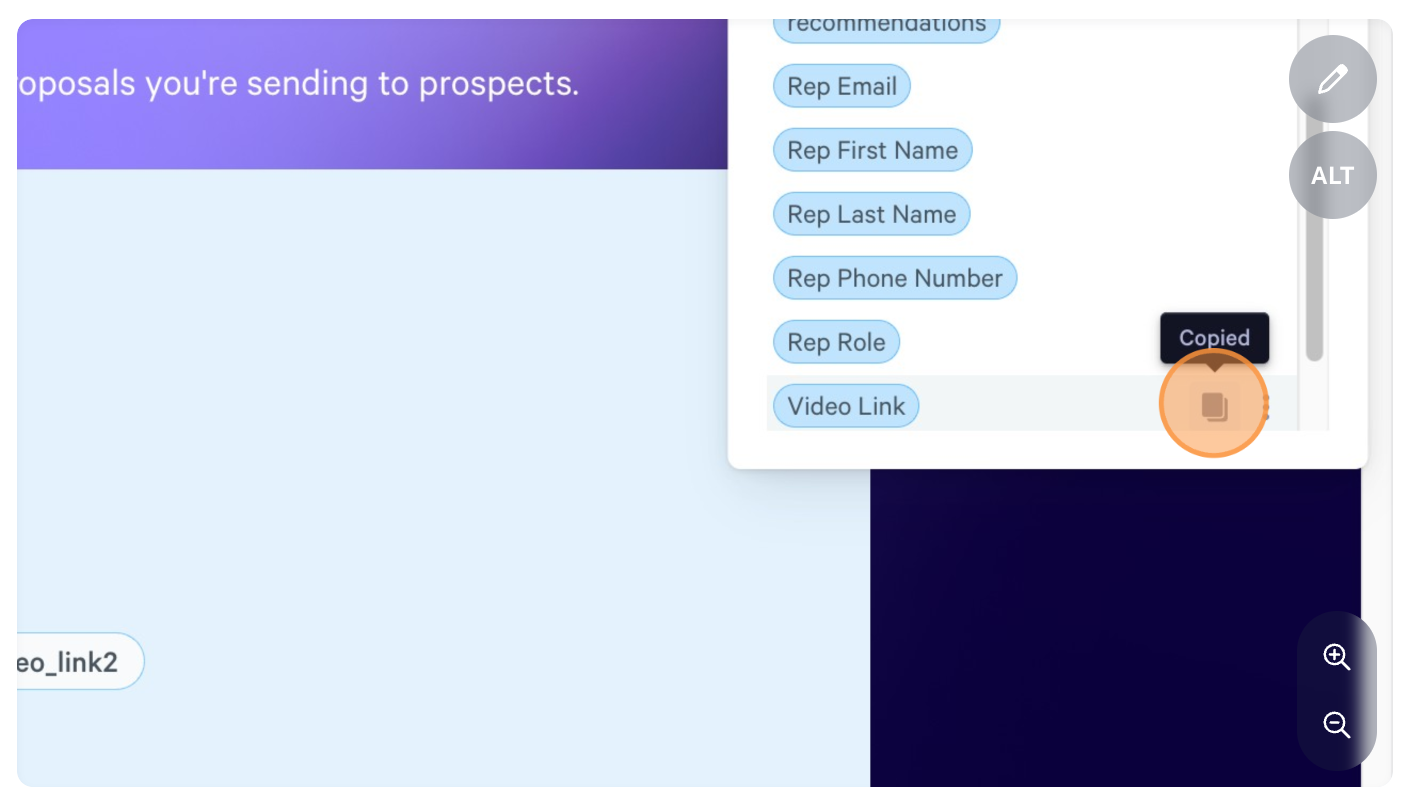
- For the variable label (the left part of the variable table in Zapier below), you’ll need to use the exact token name from Qwilr.
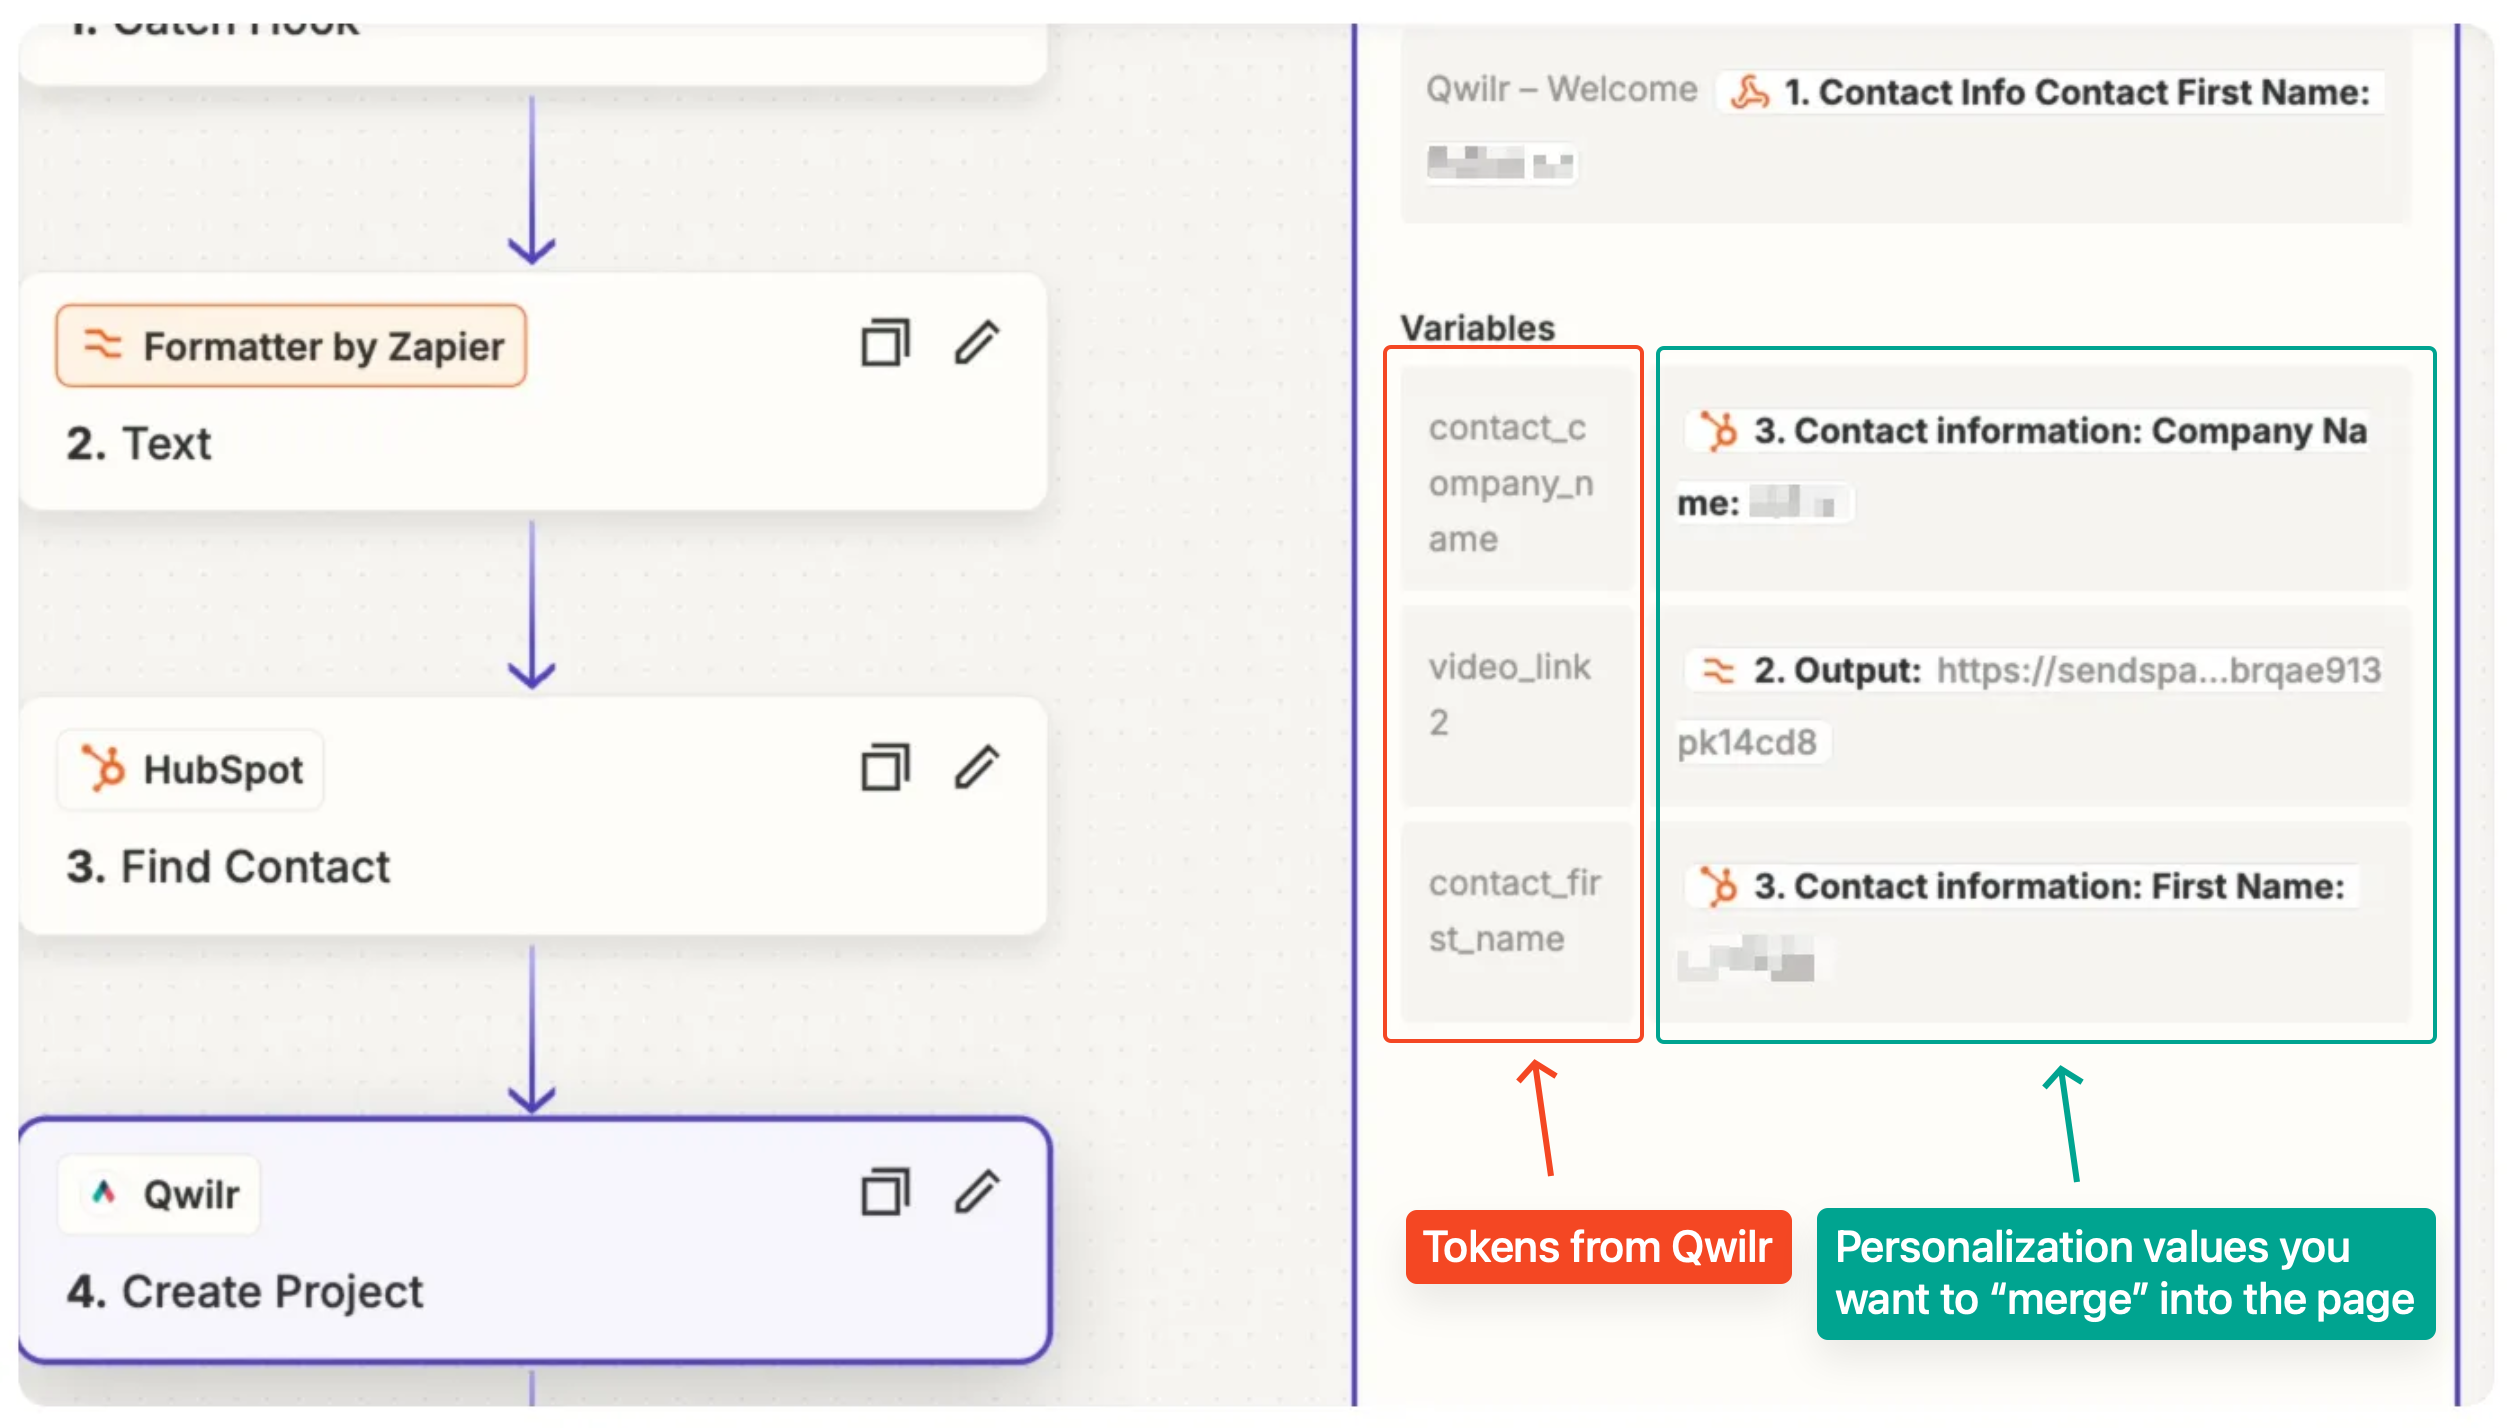
- To find this, open the tokens menu in the top right of the Qwilr template interface and click the Copy icon next to the relevant token. On the right-hand side in the Zapier table, map the CRM field that contains the value, along with the video link from the output of the Formatter step above.
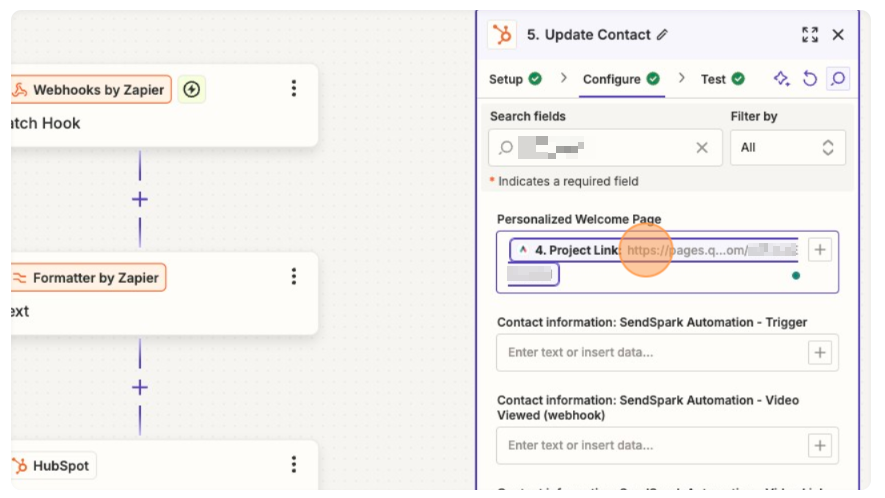
- In Zapier, create a fifth step, Update CRM Record, to store the personalized Qwilr page link in your CRM. In this step, map the Qwilr page URL to a custom CRM field (e.g., “Welcome Page Link”) within the contact record found in Step 3 of this workflow. This will mean the personalized page link is now logged in your CRM and can be easily inserted into your post signup email sequence.
Step 5: Test your workflow
Confirm each step is working as expected:
- Sendspark video: Trigger a test signup to verify that a personalized video is created with the correct details (e.g., name, company).
- Qwilr page: Ensure the welcome page generates with the video embed and any tokens (name and company).
- CRM: Check that the custom page link is automatically added to the contact record and can be pulled into your sequences.
Once testing is complete, your workflow is ready to deliver a polished, personalized welcome experience to every new user.
Wrapping up
By launching this personalized welcome flow, you’re creating a more personalized and memorable new user experience. This workflow can also be segmented further to enhance relevance and engagement.
Plus, with Qwilr’s page analytics and Sendspark’s video analytics, your sales reps can receive real-time signals of user activity during onboarding, helping them inform follow-up actions.
About the author

Brendan Connaughton|Head of Growth Marketing
Brendan heads up growth marketing and demand generation at Qwilr, overseeing performance marketing, SEO, and lifecycle initiatives. Brendan has been instrumental in developing go-to-market functions for a number of high-growth startups and challenger brands.