Your deal’s right there—so close you can feel the commission. The prospect’s eager. You’re eager.
Then comes the paperwork nightmare: email ping-pong, missed signatures, or reprints because someone scribbled in blue ink instead of black. Deals stall, excitement fades, and follow-ups drag on.
Because of these complications, electronic signatures have moved from "nice-to-have" to "must-have" for sales teams who want to close deals faster. What used to take up to five hours can now be completed in under ten minutes.
No more racing across town (or worse, mailing documents back and forth). Just click, sign, done.
Let's explore how to choose and implement e-signature tools that will have your team signing, sending, and celebrating deals in record time.
But first: why e-signatures?
The global e-signature market is huge. In 2023, it was valued at $5.34 billion, and it's expected to grow to $118.88 billion by 2032.
What's driving this growth?
The reality is that paper-based signing processes cost sales teams both money and momentum. When a deal hinges on physical paperwork, every hour spent waiting for signatures risks losing the prospect's attention.
Think about your last paper sales contract. How many days did it spend in limbo? How many follow-up emails did you send? How many times did you check your inbox hoping to see that signed PDF?
With e-signatures, that waiting game disappears and you reduce your sales cycle. Your prospects can sign from anywhere, on any device.
No printing. No scanning. No wondering if the document got lost in the mail.
The impact goes beyond convenience. Considering sales reps only spend 28% of their time actually selling, every minute saved on administrative tasks is a minute you can spend on building relationships, pursuing new opportunities, and moving deals forward.
Now, let’s look into the different methods including manual and e-signature software you can use for e-signatures.
Read next: Electronic signature implementation best practices
Draw it manually
Want to keep things old school? You can draw your signature on paper, snap a photo, and use it digitally. This method works with any tool that accepts image signatures.
Pros
- Works with any platform that accepts image uploads
- Requires no special software or tools
- Costs nothing
Cons
- Requires editing software to clean up the image
- Takes more time than digital options
What you need to do
- Write your signature clearly on plain white paper
- Take a well-lit photo of your signature
- Crop the image to remove excess background
- Save it as a PNG file
- Upload it when needed for signing documents
Adobe Acrobat Sign
Adobe Acrobat Sign does exactly what you'd expect from the company that created PDFs—make document signing feel like second nature.
You can prep docs, collect signatures, and track everything from a single dashboard.
While the interface takes time to learn, it offers both basic e-signatures for simple approvals and beefier security features when you need to verify signer identity.
Pros
- Offers deep PDF integration for editing, preparing, and sending documents for signing in one platform
- Automatically detects form fields to identify where signatures and data go
- Integrates with Adobe and non-Adobe tools like Workday and Salesforce
Cons
- Feels complex if you only need basic signing features
- Requires an Adobe subscription to unlock full functionality, which may be excessive for teams needing only signatures
What you need to do
1. Create a free Adobe account or log in with your existing one to continue

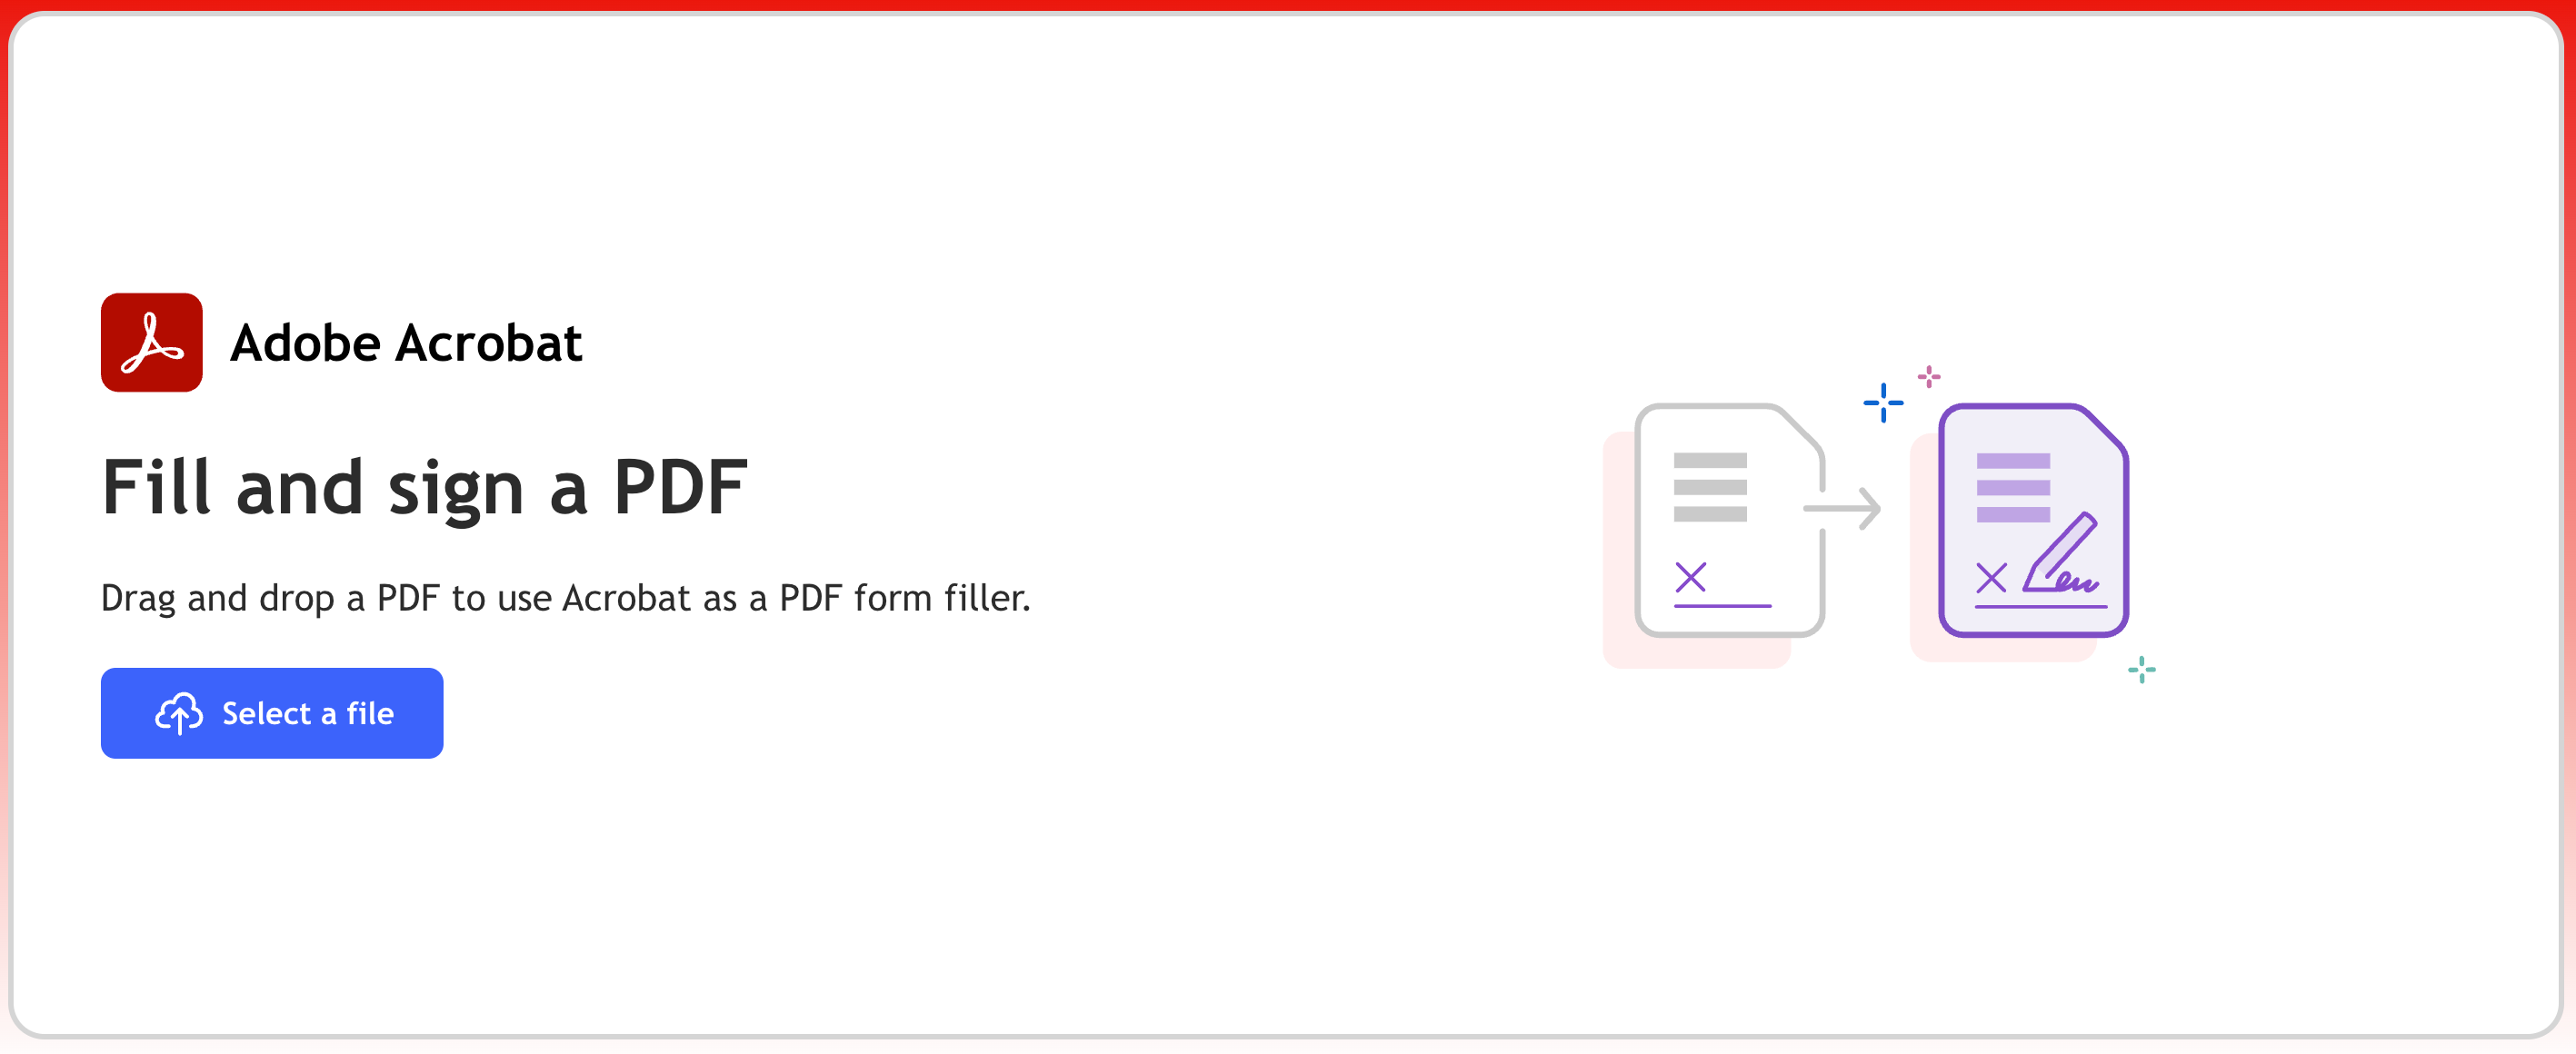
2. Upload your PDF document to Adobe Acrobat Sign by clicking “Select a file” or dragging and dropping the doc
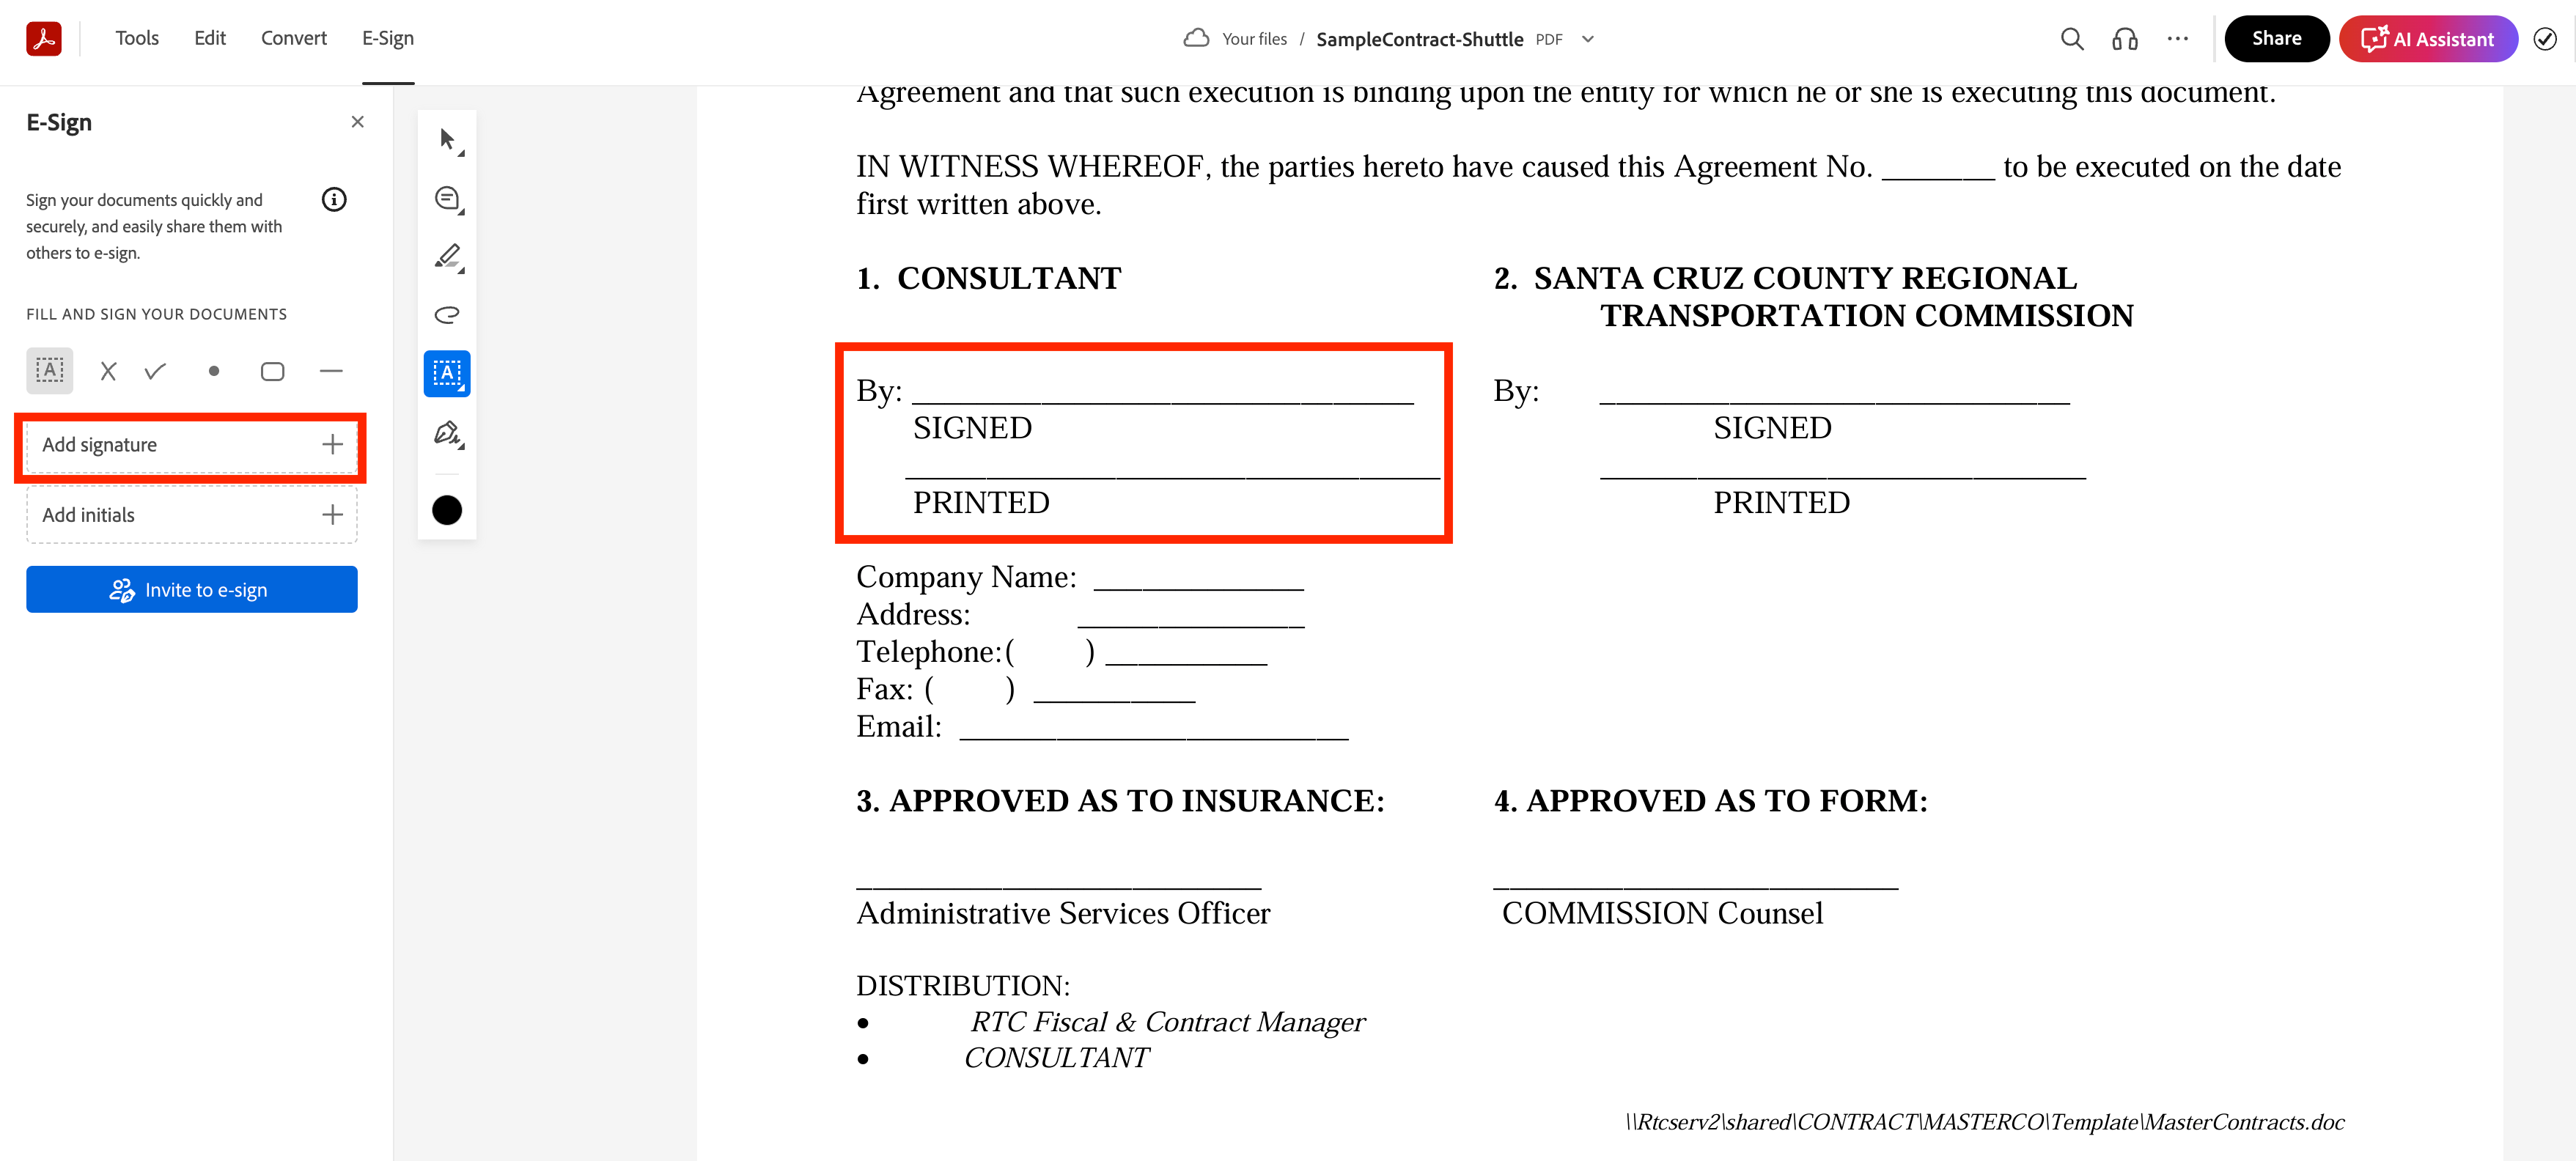
3. Scroll down to the field where you want to add your sign and click the “Add signature” button on the left
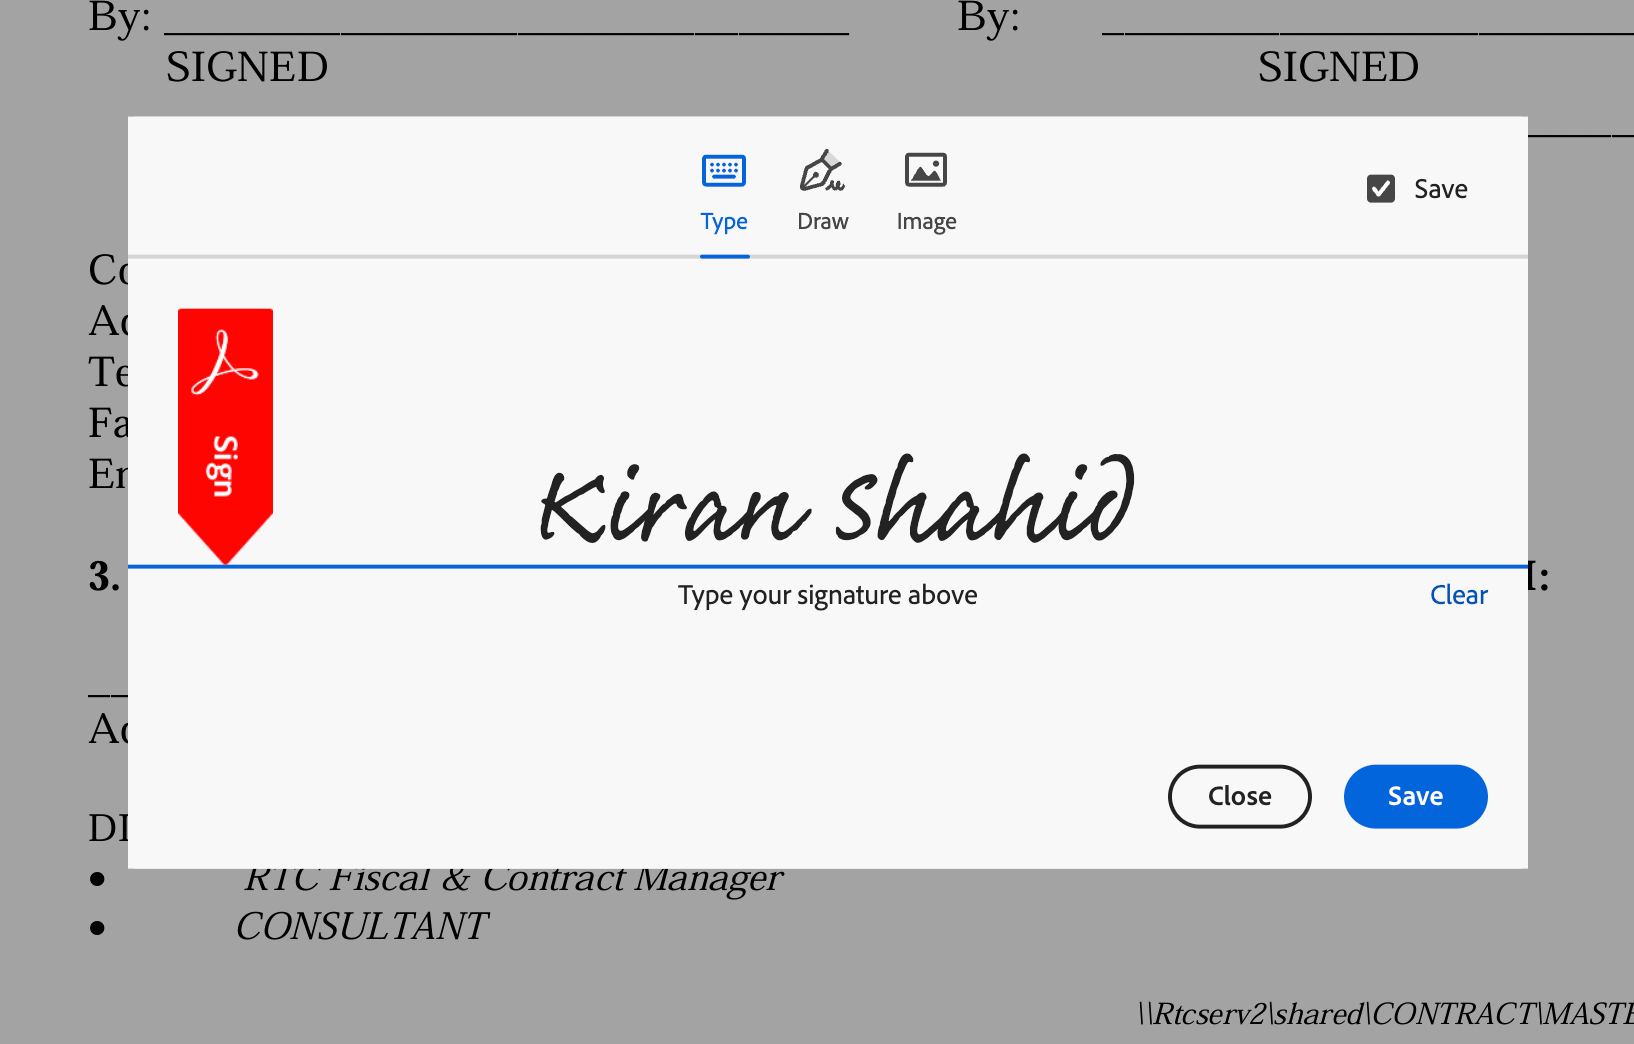
4. Type, draw, or upload an image of your signature
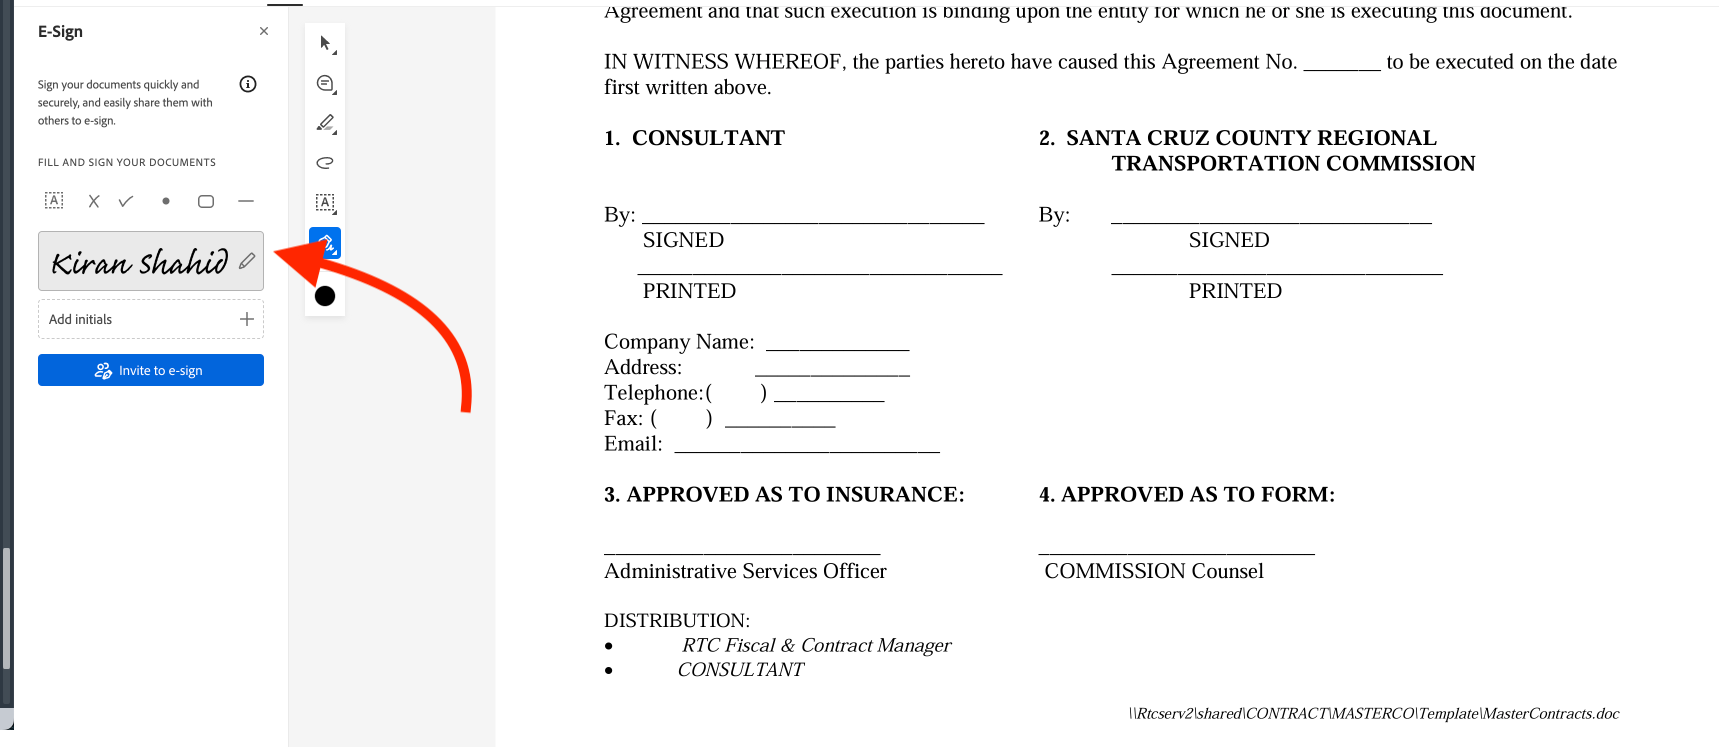
5. When you’ve created your signature, you’ll see it in the left sidebar
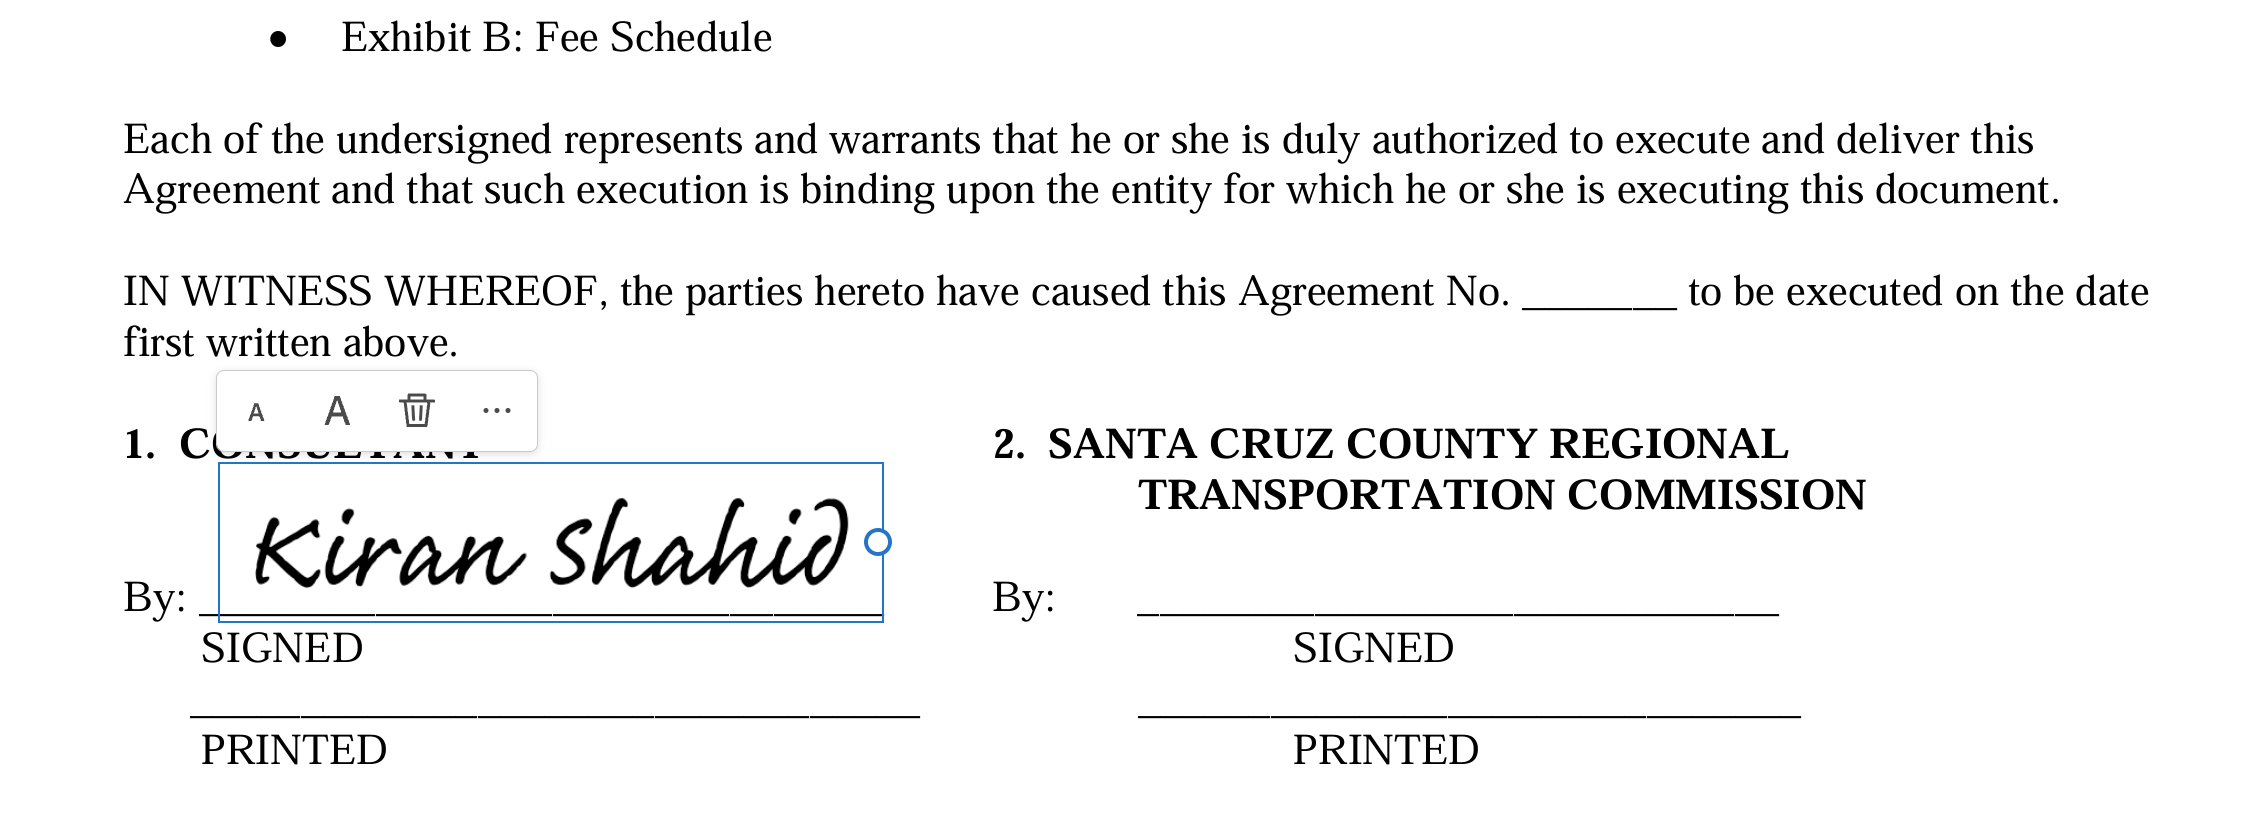
6. Simply drag and drop into the field you want to sign and resize the signature if needed
7. When done, click the “Download” button on the top right to get a signed copy of your contract
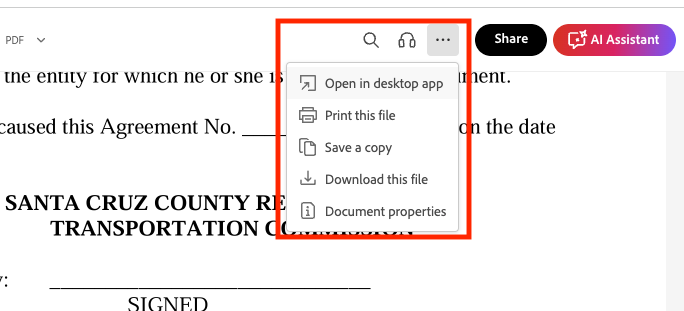
Microsoft Word
The OG word processor comes with built-in e-signature capabilities through Microsoft's cloud services.
You can request signatures right from your Word docs without jumping to another platform. Plus, it syncs smoothly with other Microsoft 365 tools you're probably already using.
While it's not a replacement for dedicated e-signature platforms, it provides basic document signing capabilities with the security of digital certificates (on Windows platforms).
Pros
- Works directly within Microsoft Word where many teams write their contracts
- Uses certificate-based digital signatures for enhanced security on Windows platforms
- Saves signed documents to OneDrive or SharePoint
Cons
- Supports only Word documents (no PDFs or other file types)
- Lacks advanced workflow options for handling complex signing sequences
What you need to do
1. Click where you want the signature line to appear in your Word document
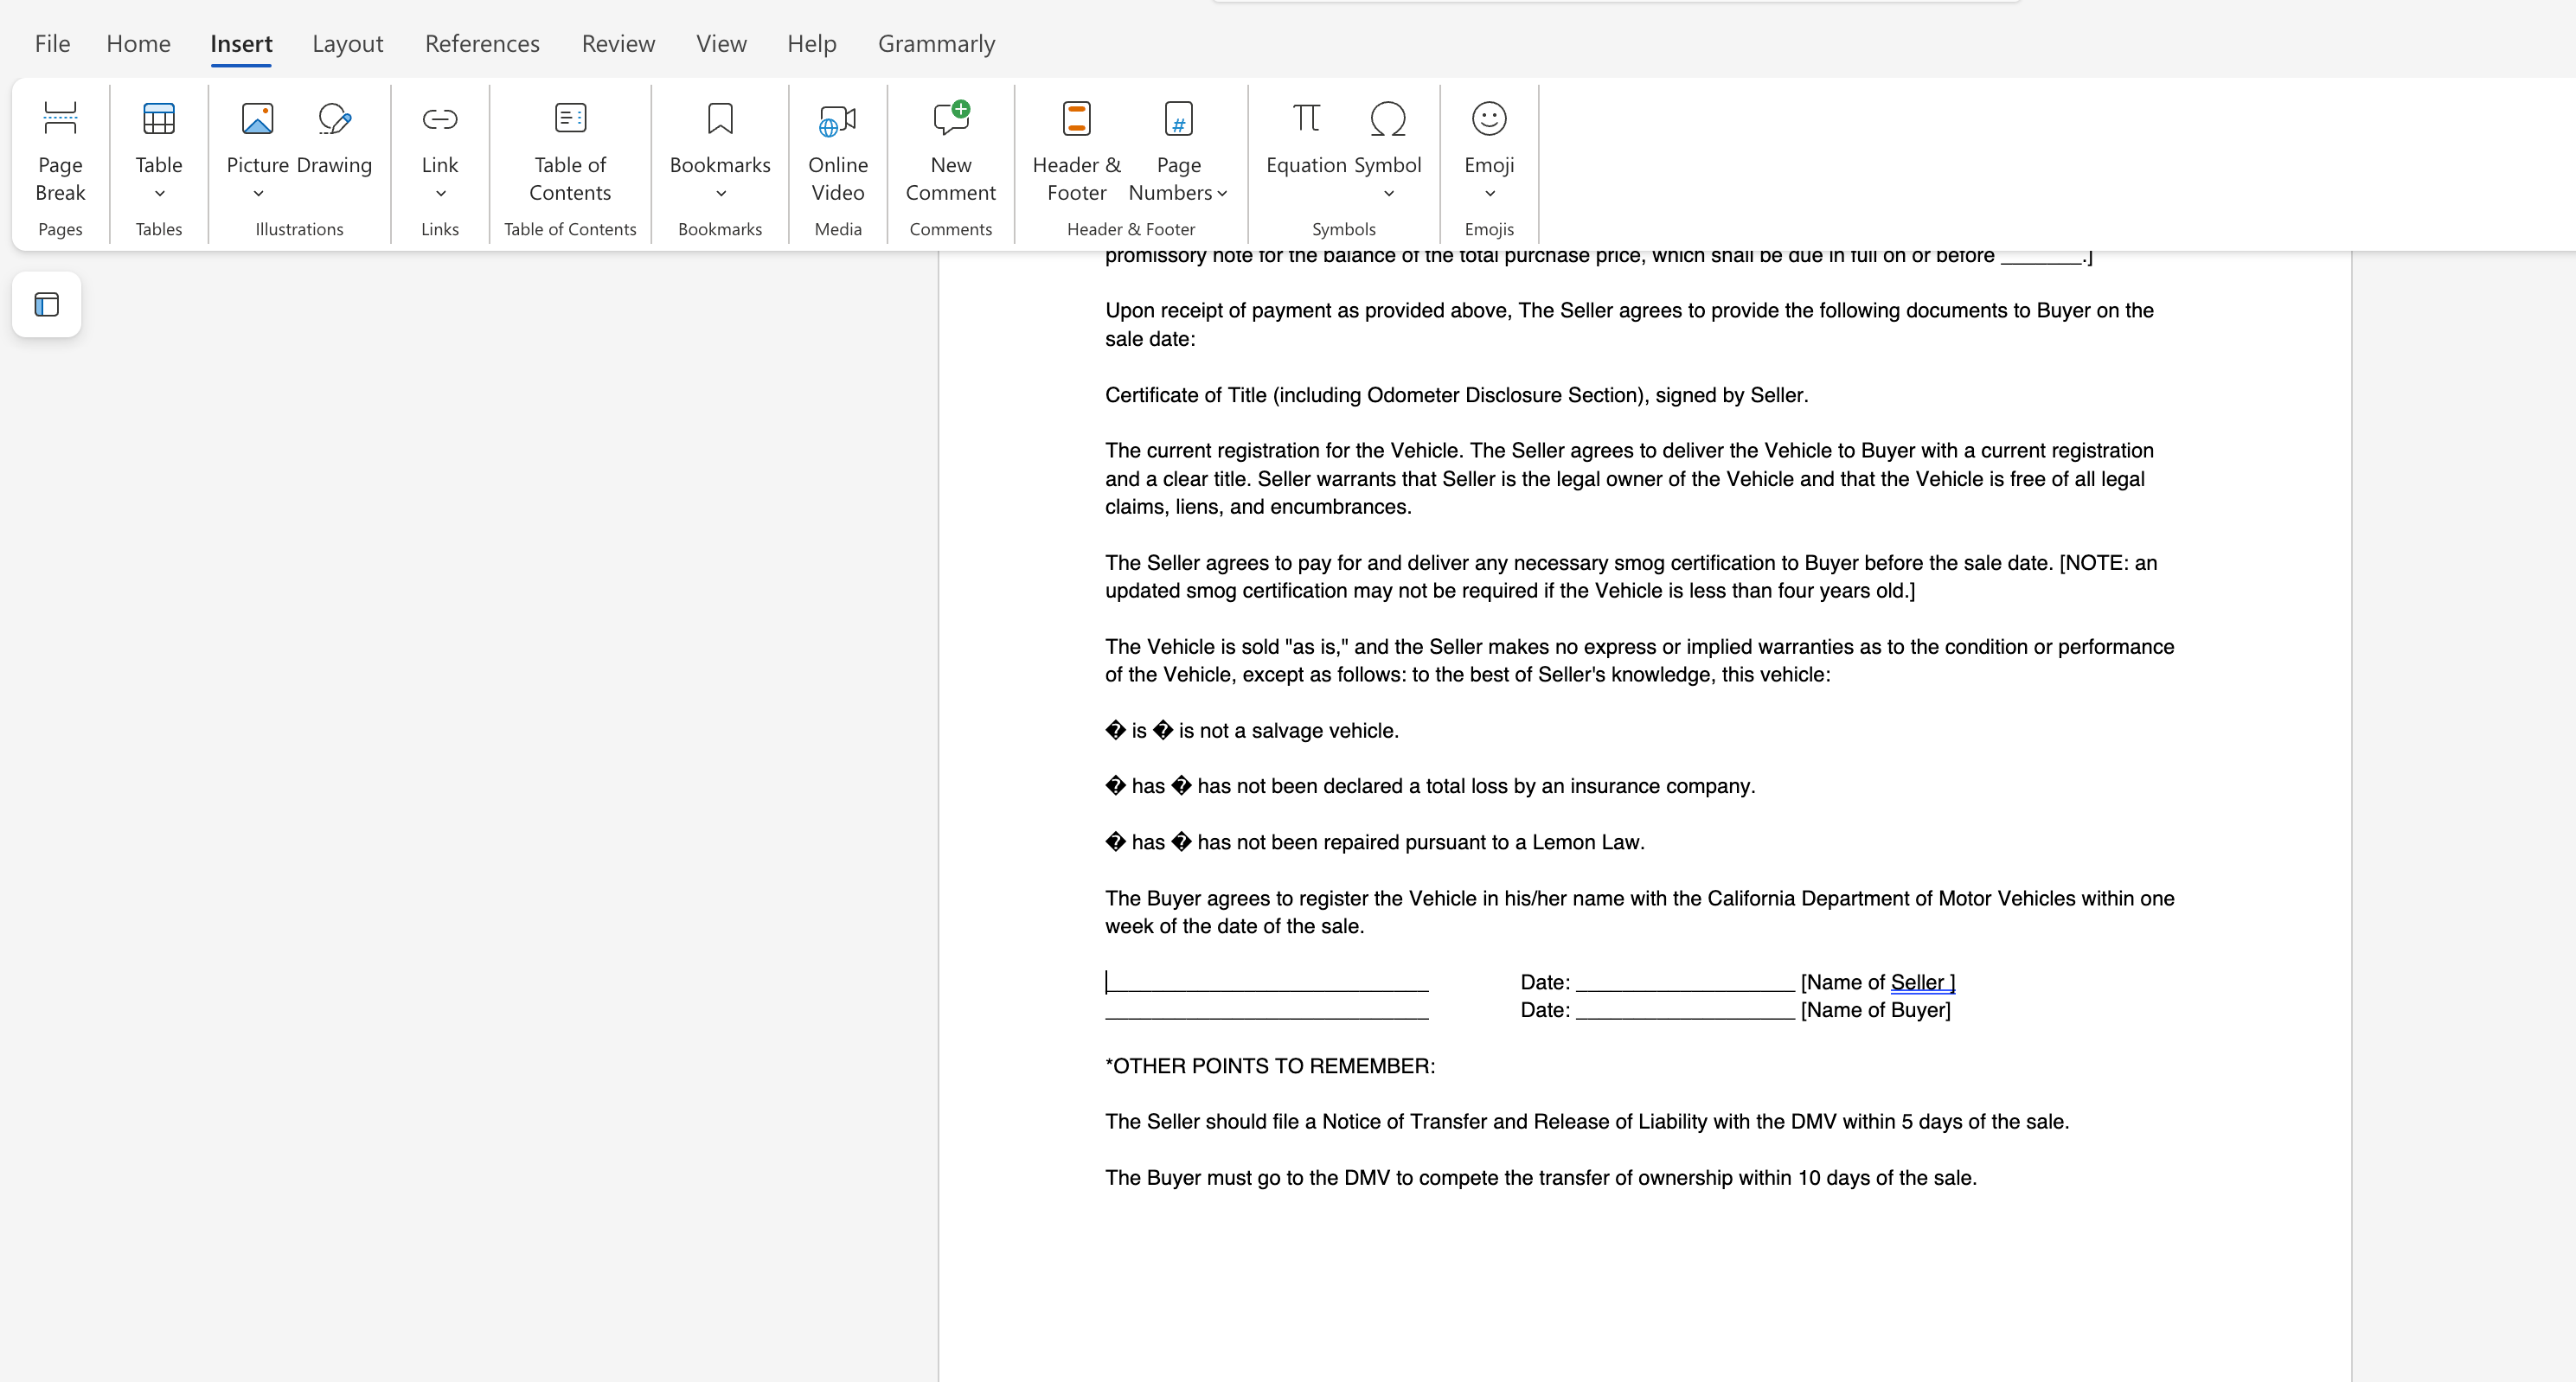
2. To add a signature, click the Insert tab, then select “Drawing”

3. Draw your signature
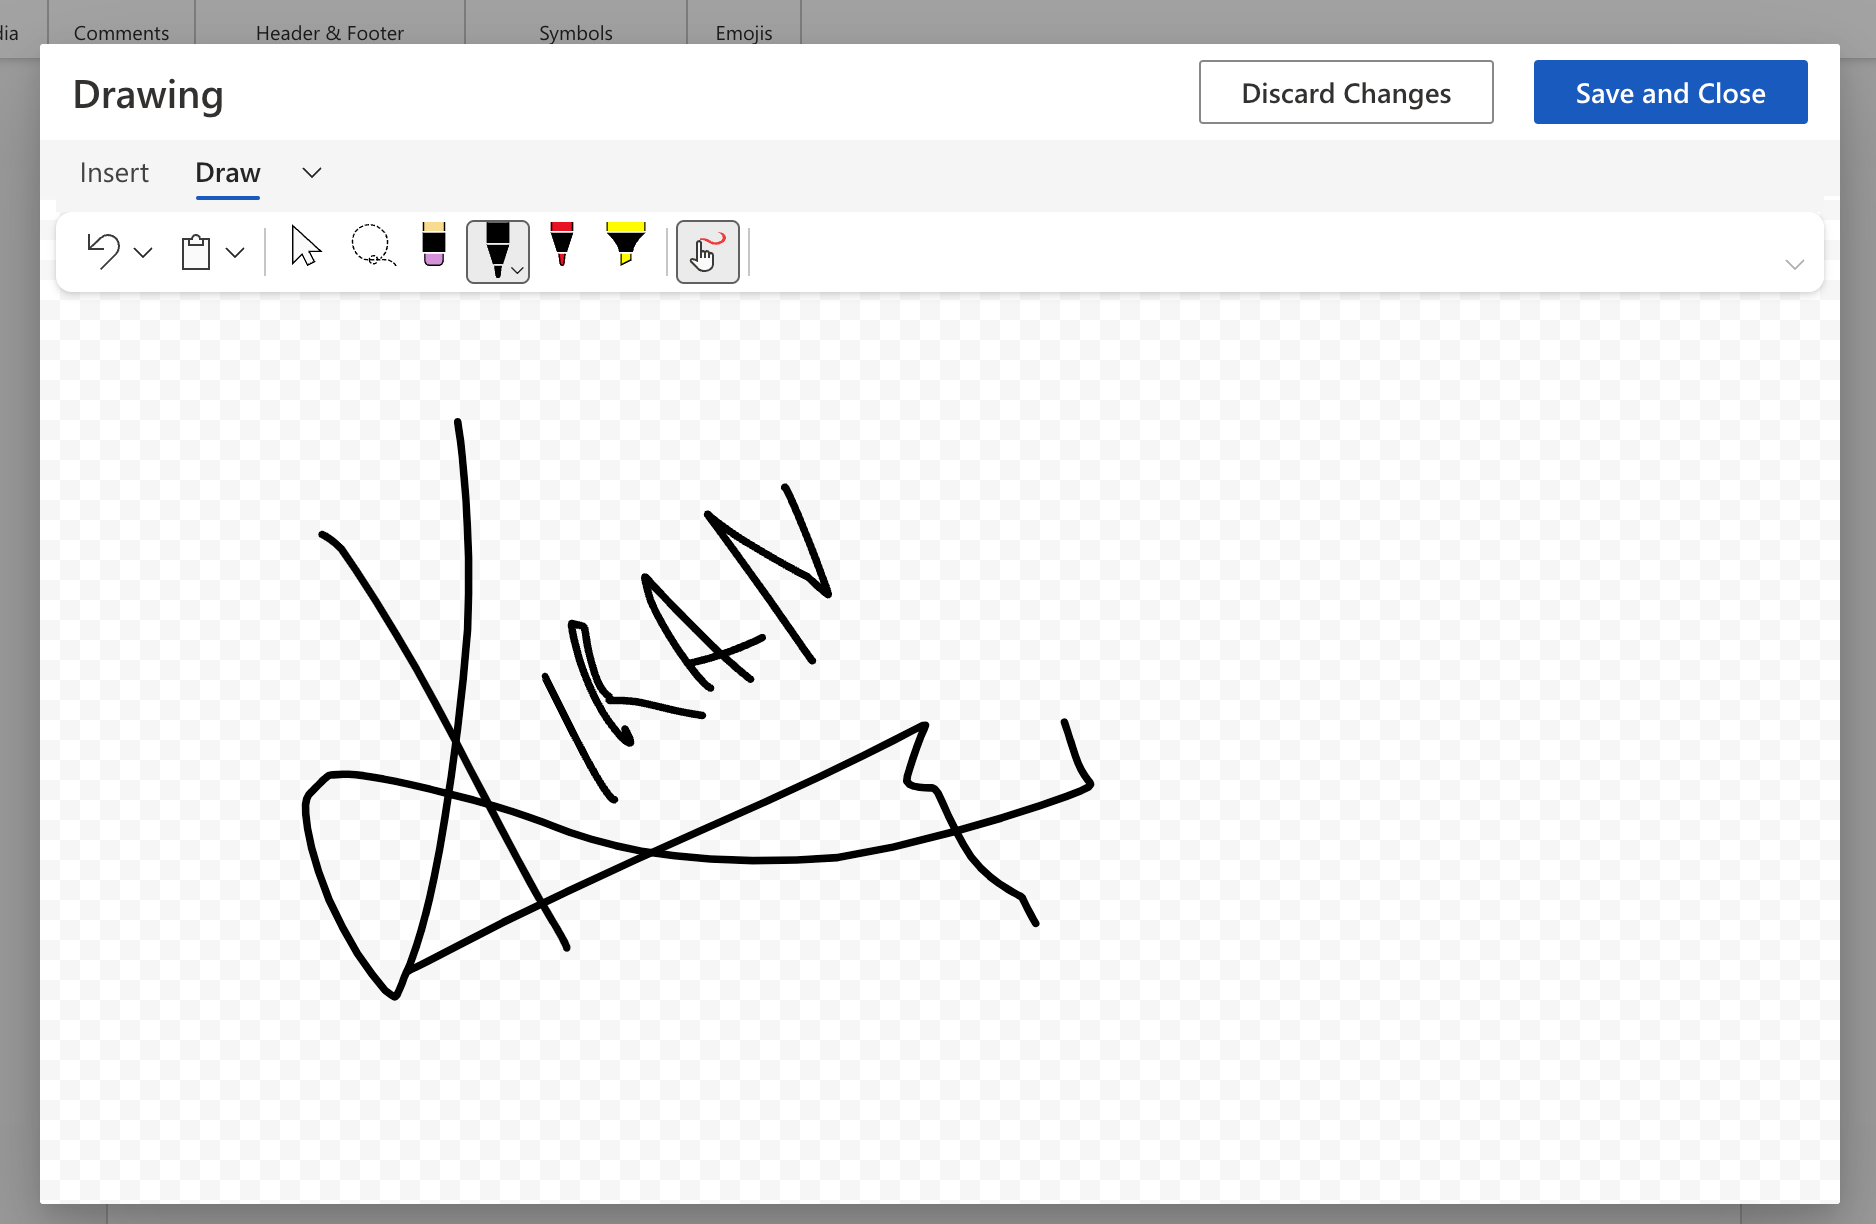
4. When you’re happy with your sign, click “Save and Close”
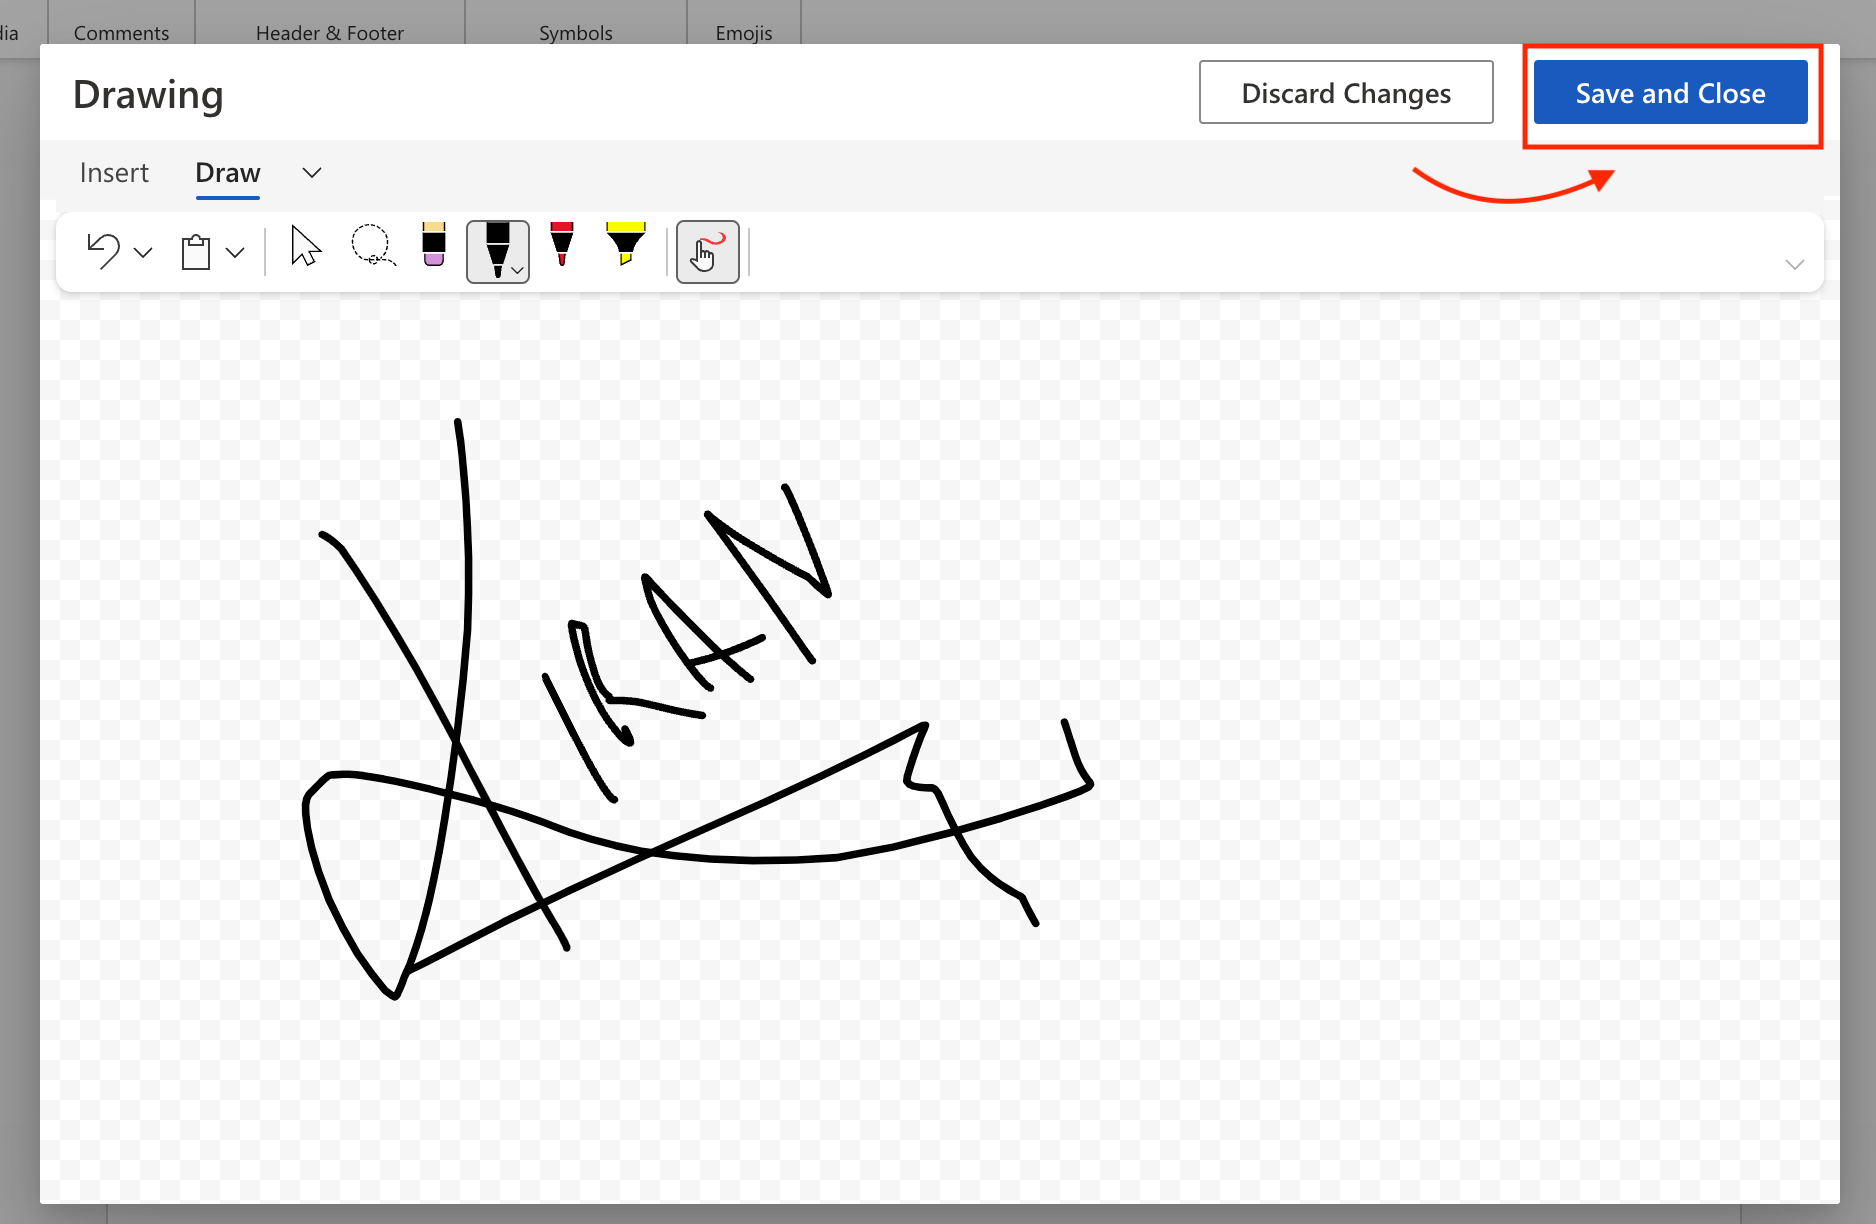
5. Once you’ve added the signature, click the arrows to resize it if needed
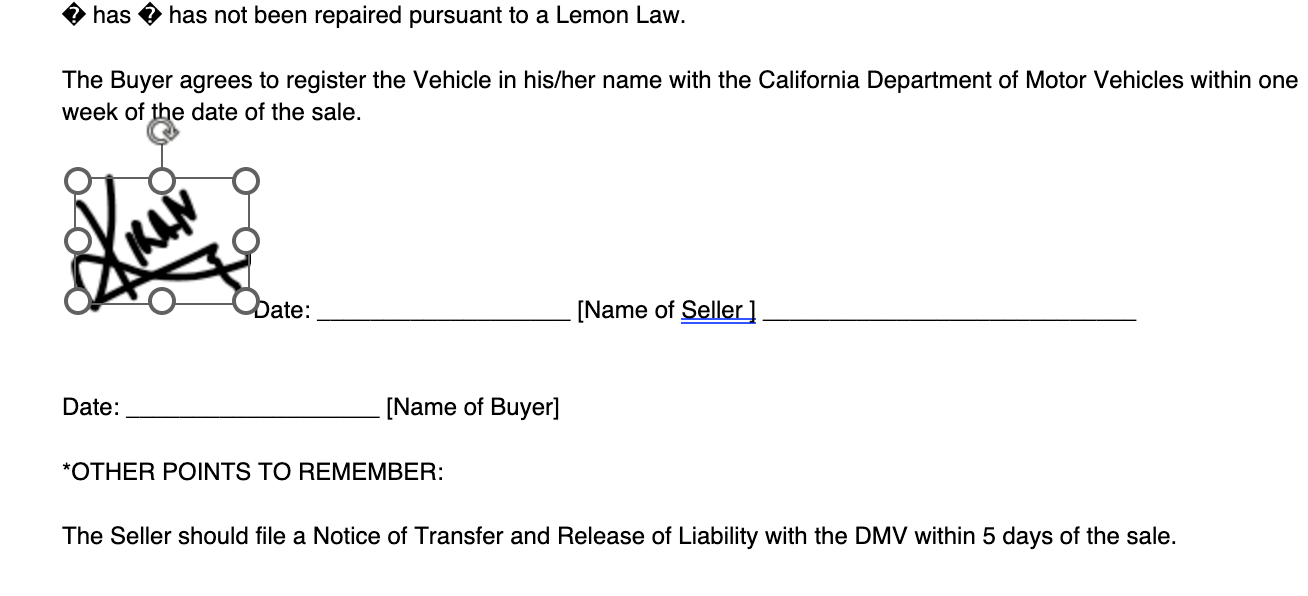
6. When done, click the “Share” button on the web app or if you’re using the offline tool, download it like any other document and email it to the necessary parties
Preview on Mac
Mac's built-in Preview app keeps things refreshingly simple. You can drop in a signature you've drawn on your trackpad or captured with your camera, then add it to any PDF. No subscriptions, no complications.
Pros
- Comes pre-installed on every Mac, requiring no extra software
- Lets users create e-signatures using a trackpad or camera
- Offers a simple and straightforward interface
Cons
- Provides only basic signature placement with no advanced workflows
- Works only on Macs, making it incompatible with teams using different systems
What you need to do
1. Open your PDF in Preview (it's the default PDF app on Mac)
2. Click the "Show Markup Toolbar" button (looks like a pen tip) or press Shift + Command + A

3. Click the signature button (looks like a scribbled line) in the toolbar
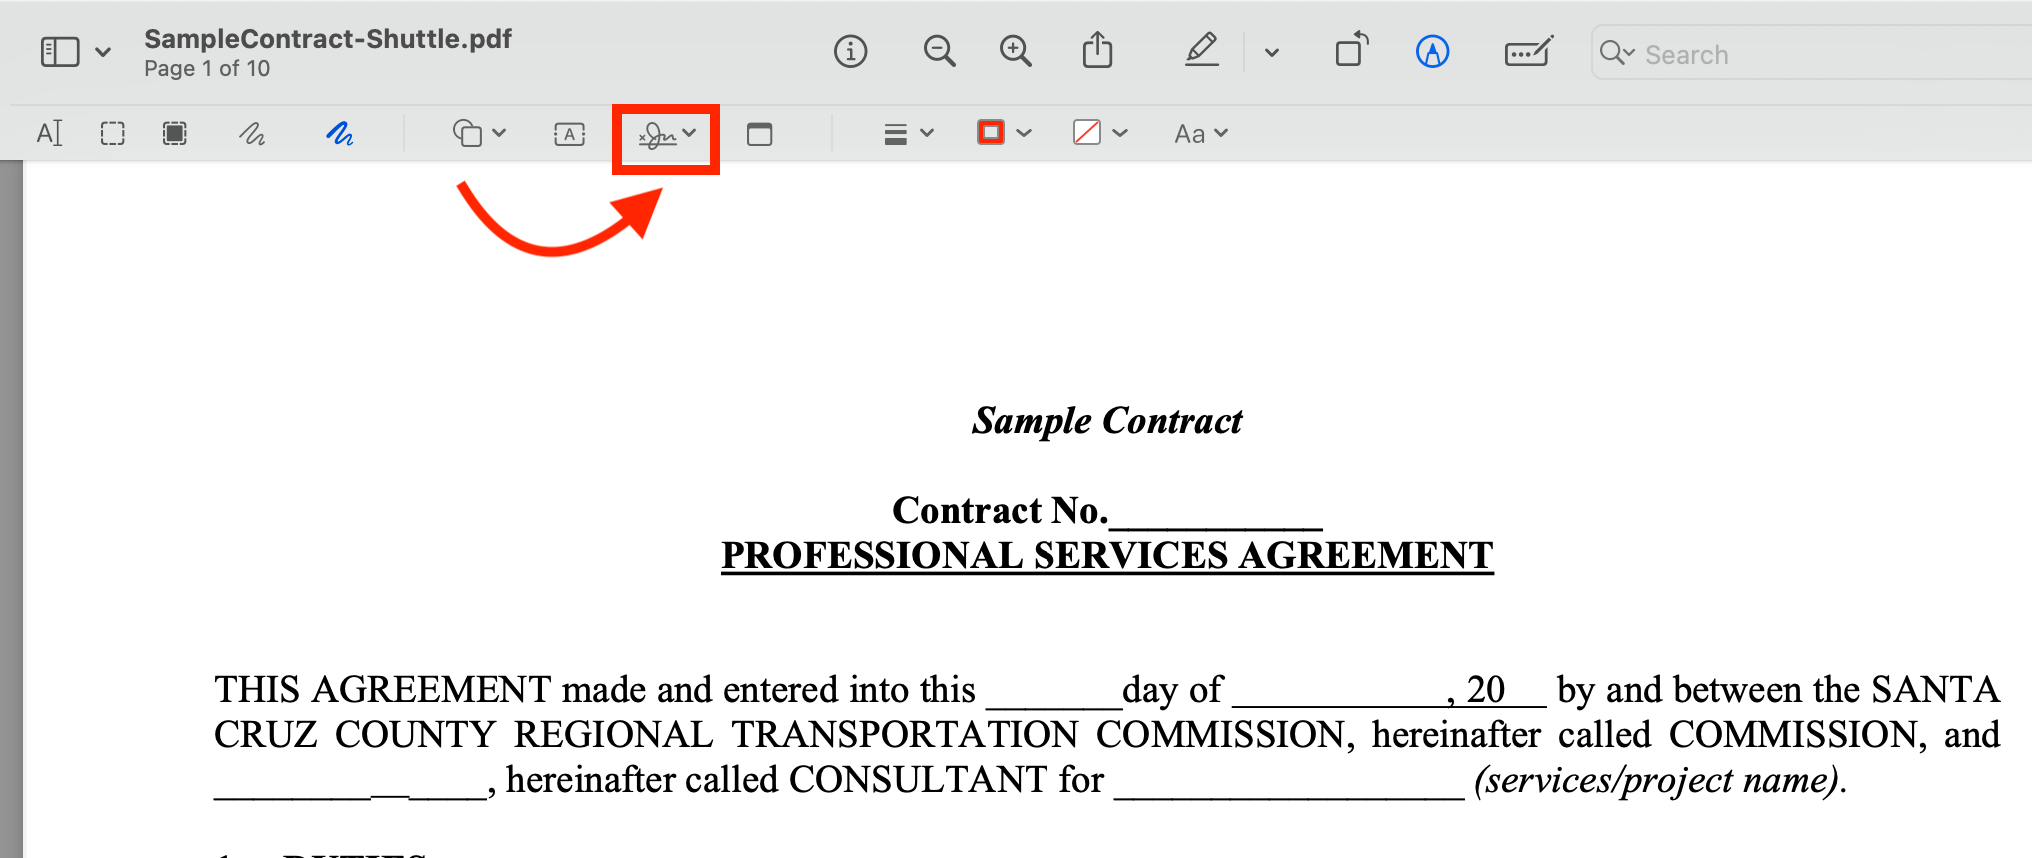
4. You'll see three options to create an electronic signature:
- Trackpad: Draw your signature with your finger
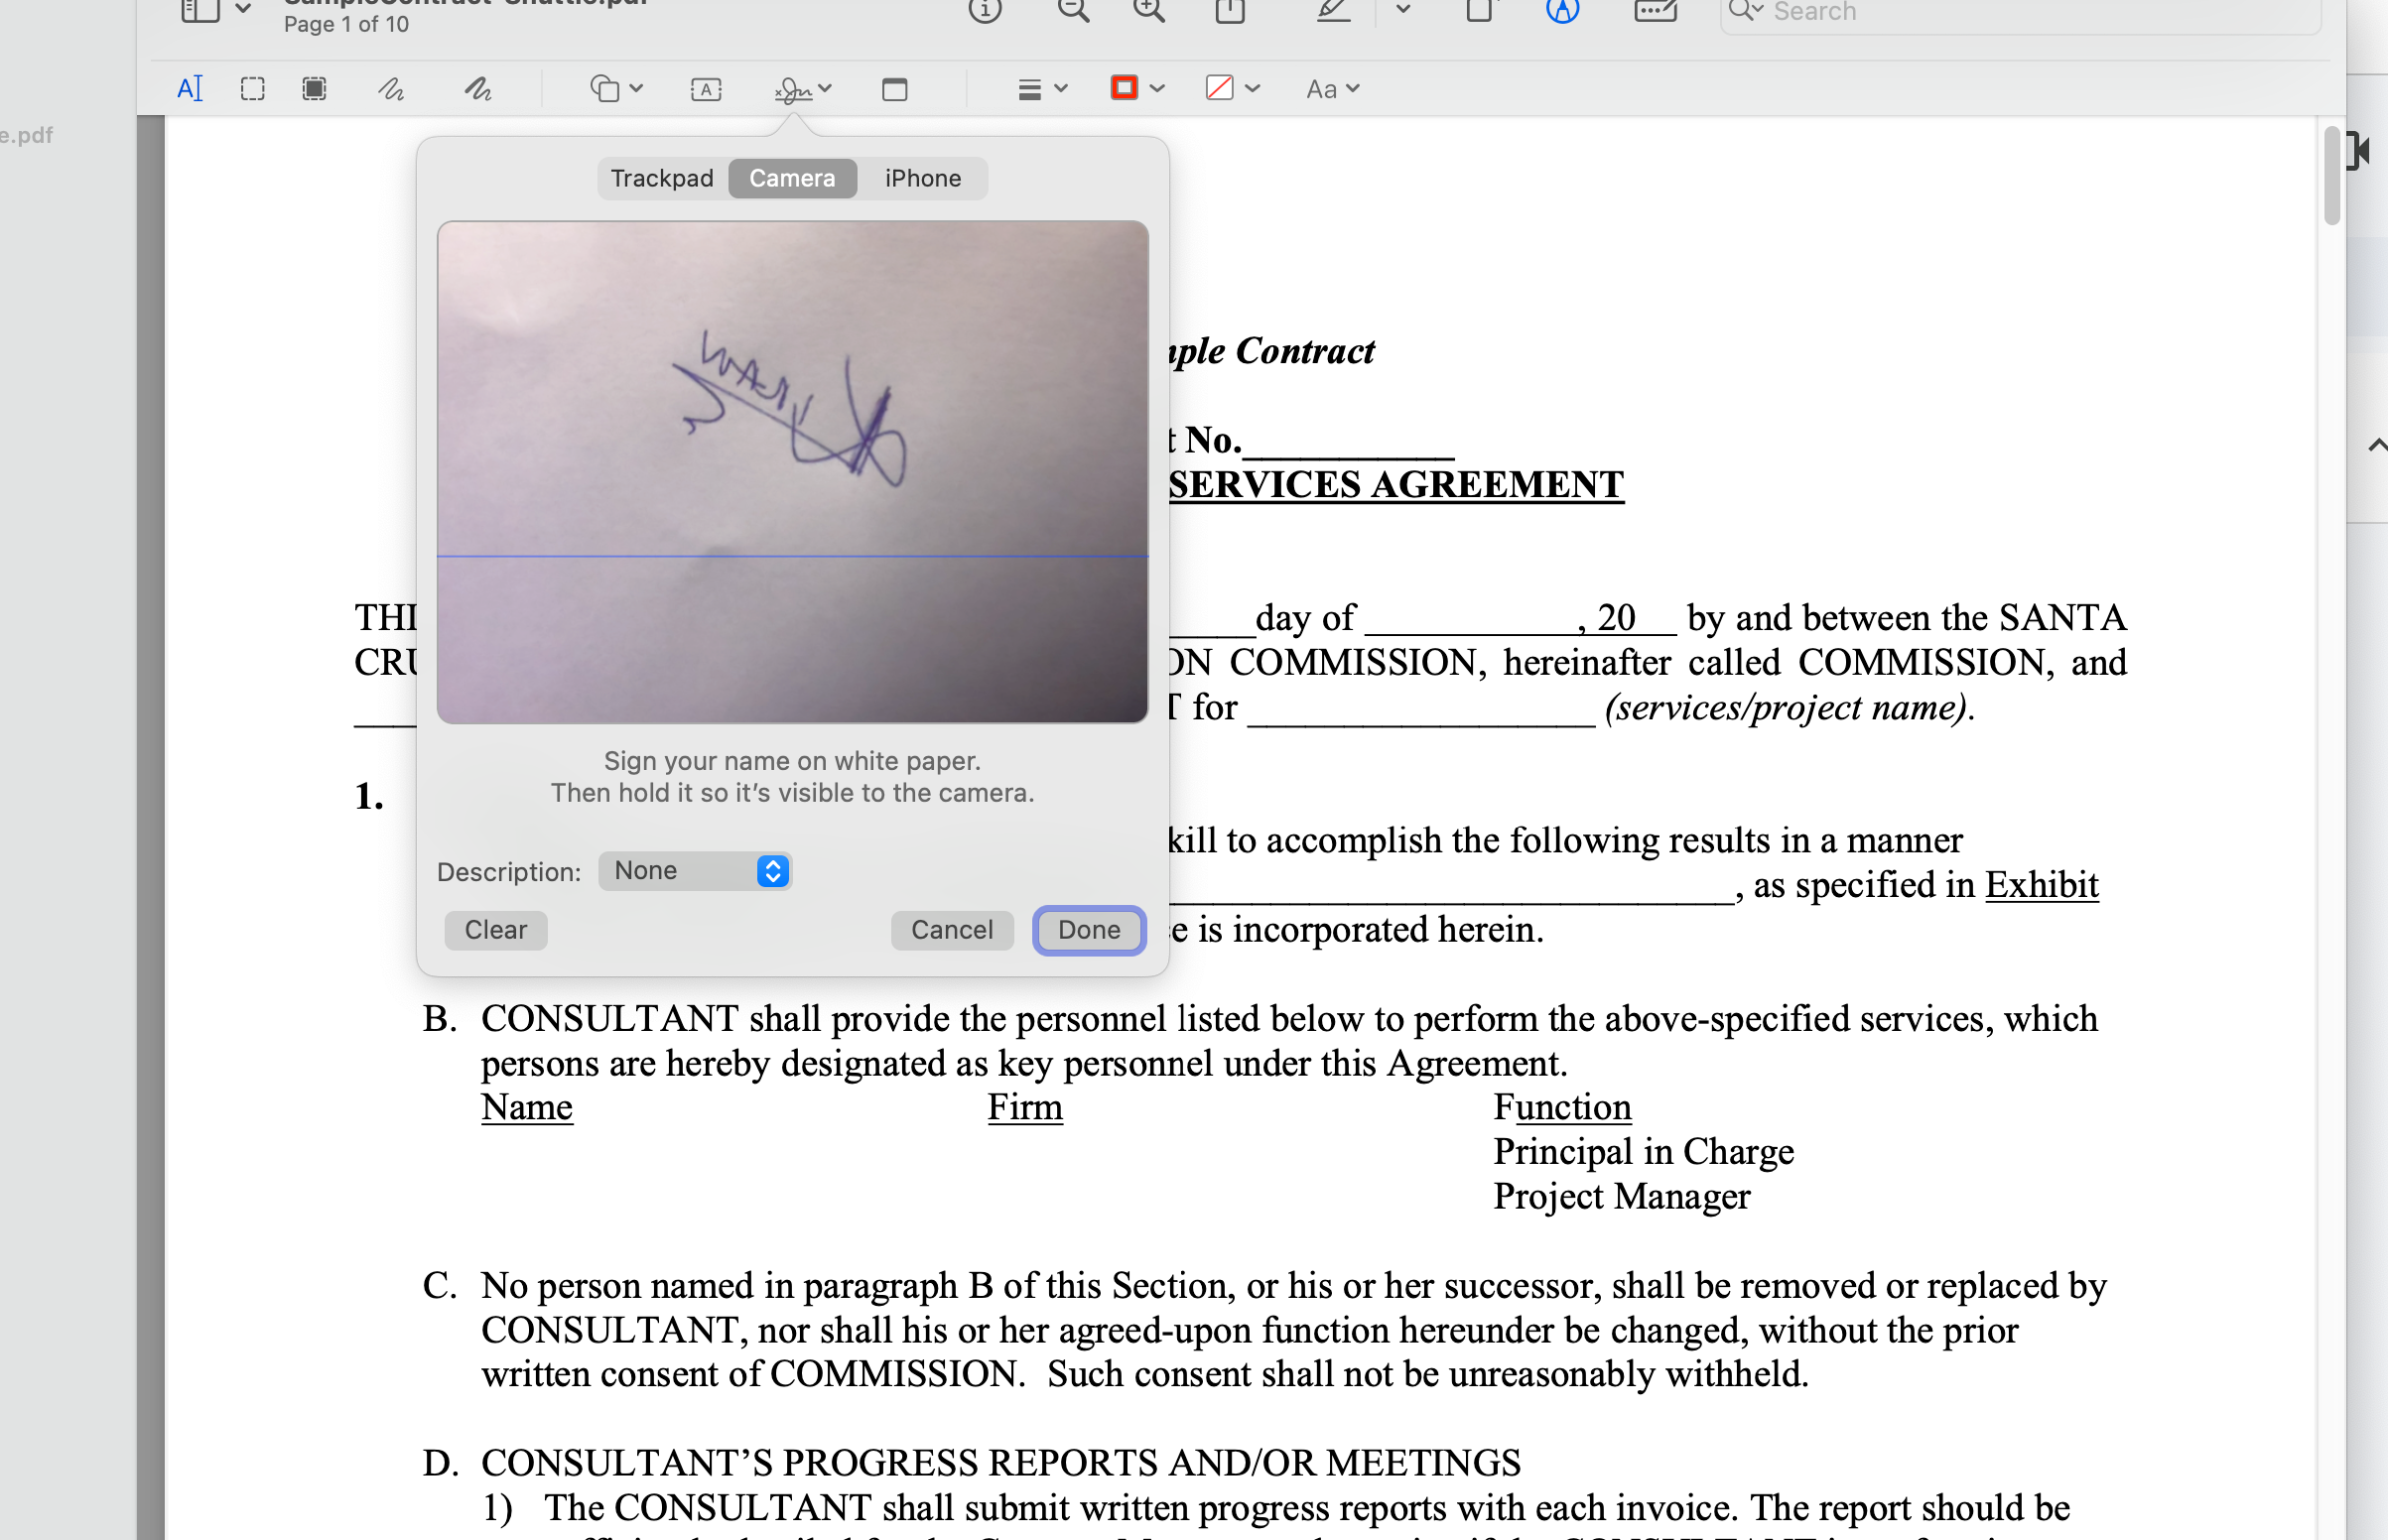
- Camera: Hold up your signature on white paper to capture it
- iPhone: Sign with your finger or Apple Pencil (on iPad)
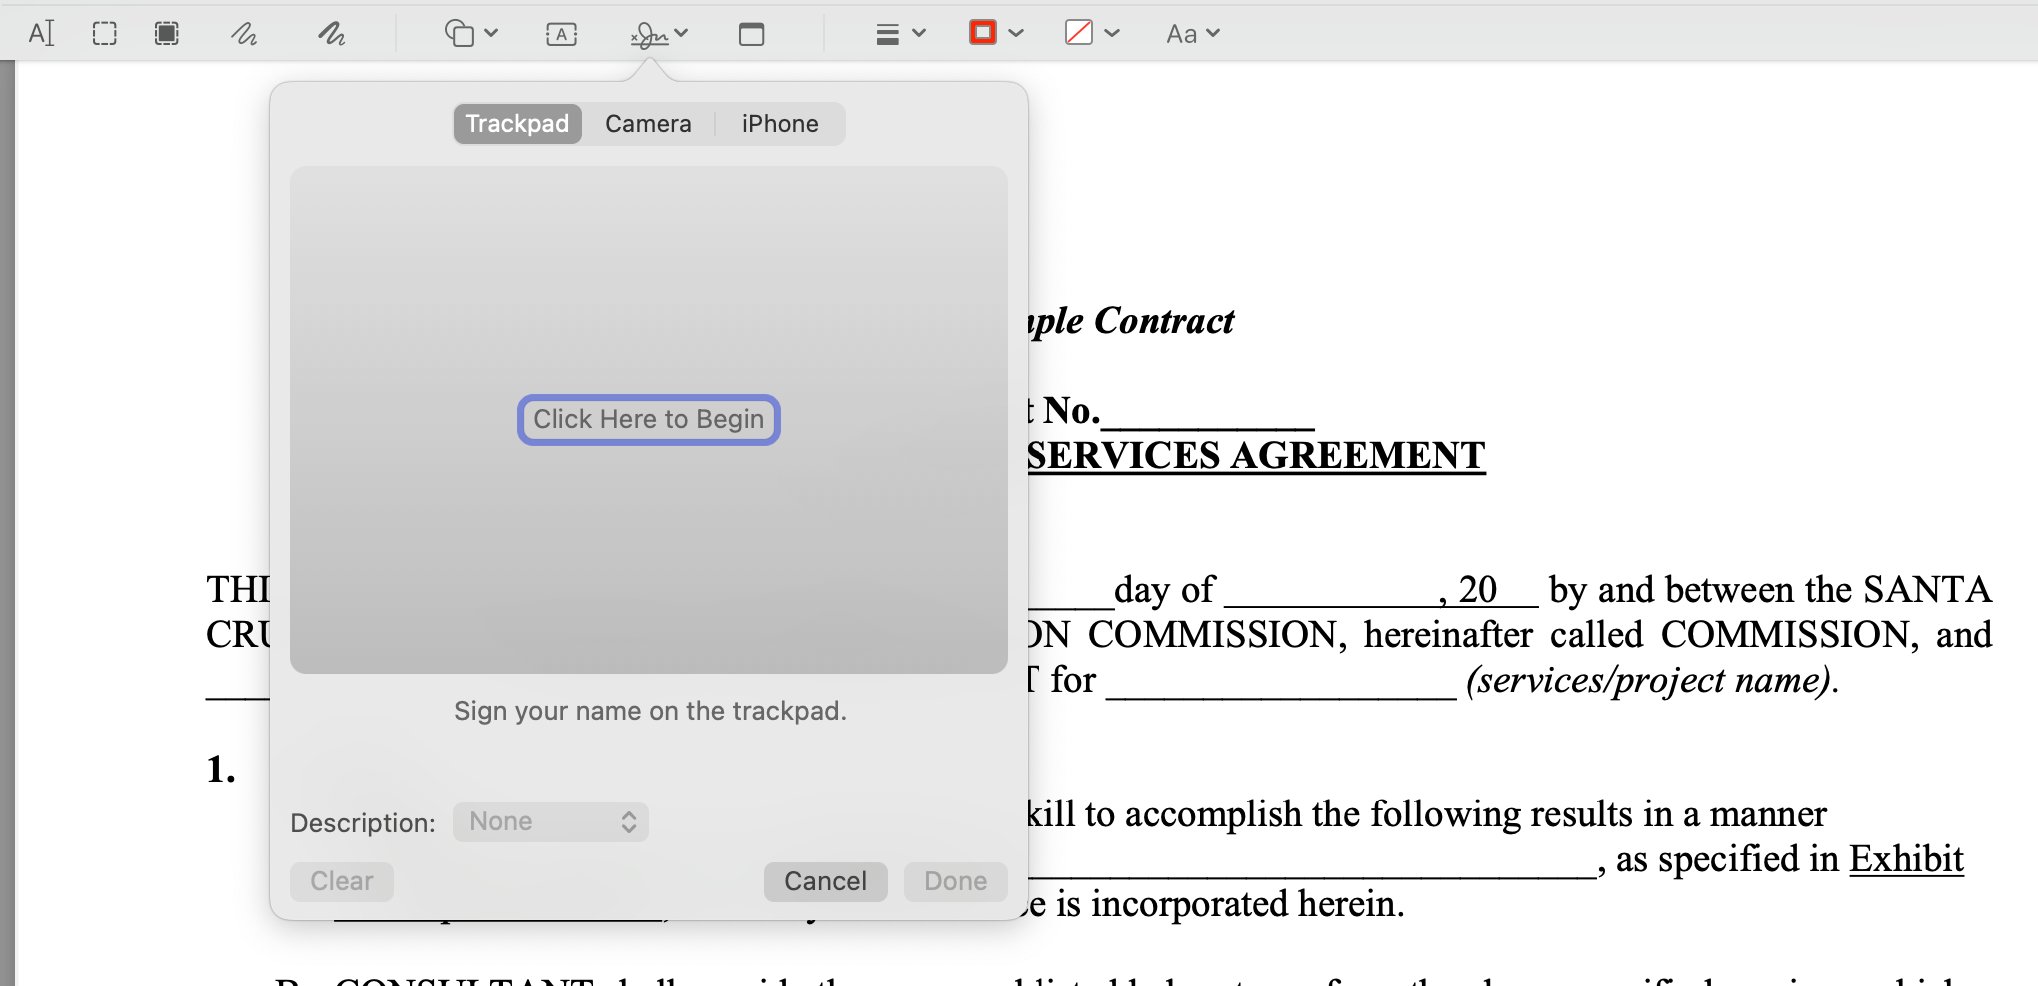
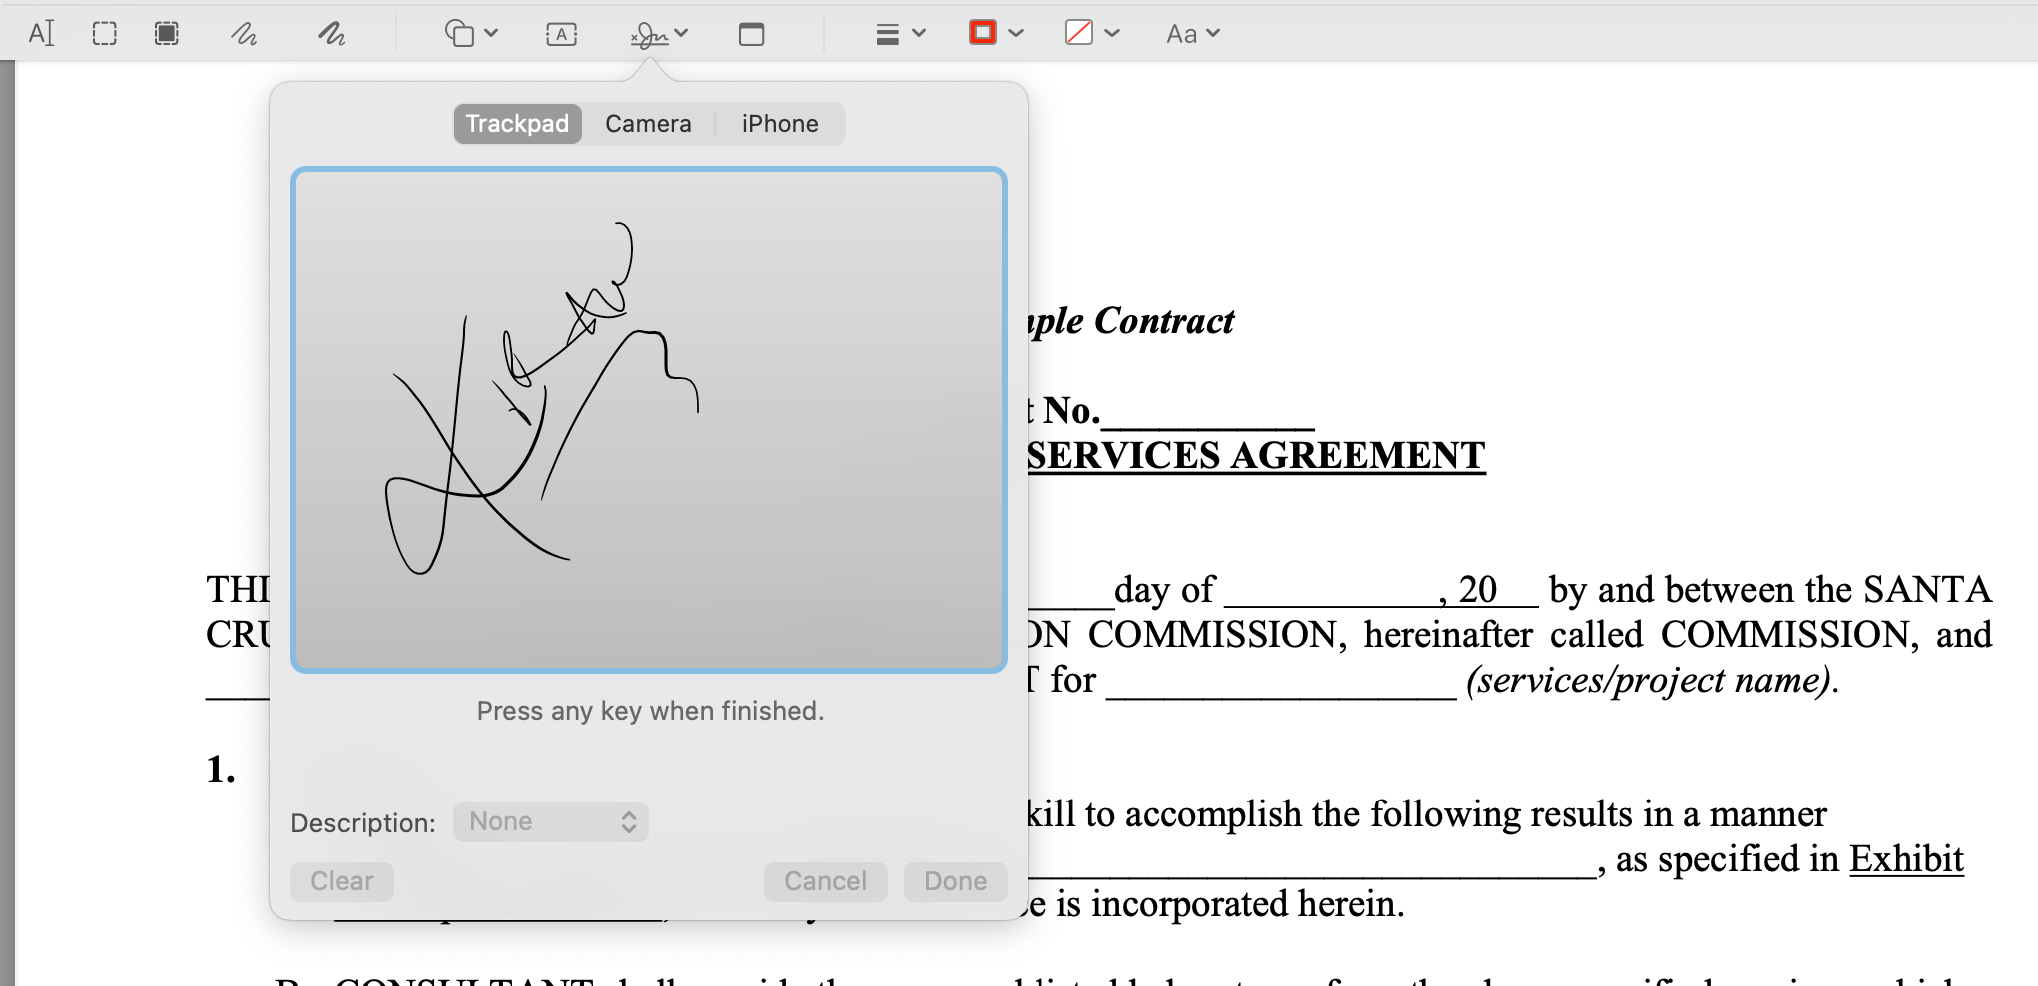
4.1 If using trackpad:
a. Click “Click Here to Begin”
b. Draw your signature on the trackpad
c. Press any key when done
d. Click “Done” if you're happy with it
4.2 If using camera:
a. Hold your signature on white paper up to the camera
b. Line it up with the blue line on screen
c. Preview will capture the signature
d. Click “Done” when it looks right
Note: You can create digital signatures using your iPhone, but it must meet Continuity system requirements which aren't available on all devices.
SmallPDF
Sometimes you just need to sign something quickly without installing complex software or creating yet another account. SmallPDF is a browser-based tool that strips away the complexity of document signing.
While it won't replace a full-featured e-signature platform for busy sales teams, it handles one-off signing tasks with minimal fuss.
The free version lets you process a couple of documents per day, making it a handy backup option when your main signing tool isn't available or practical.
Pros
- Requires no account for basic use
- Offers a free tier for cost-effective use
- Takes little time to learn and use
Cons
- Limits storage capacity
- Requires a separate tool, sign.com, to invite signees
What you need to do
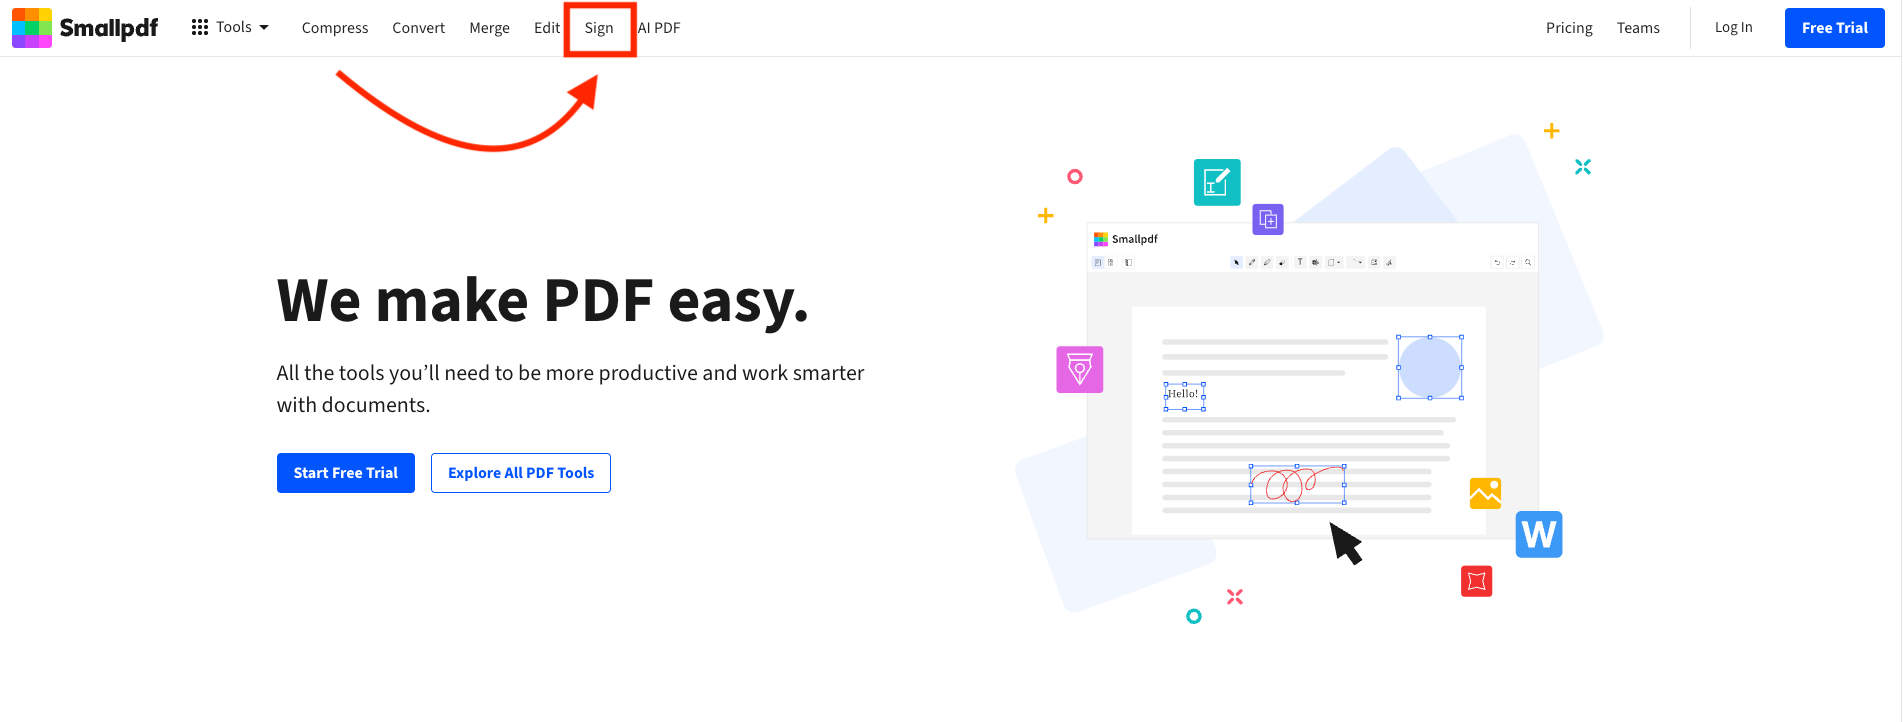
1. Head to SmallPDF's website and select the e-sign tool
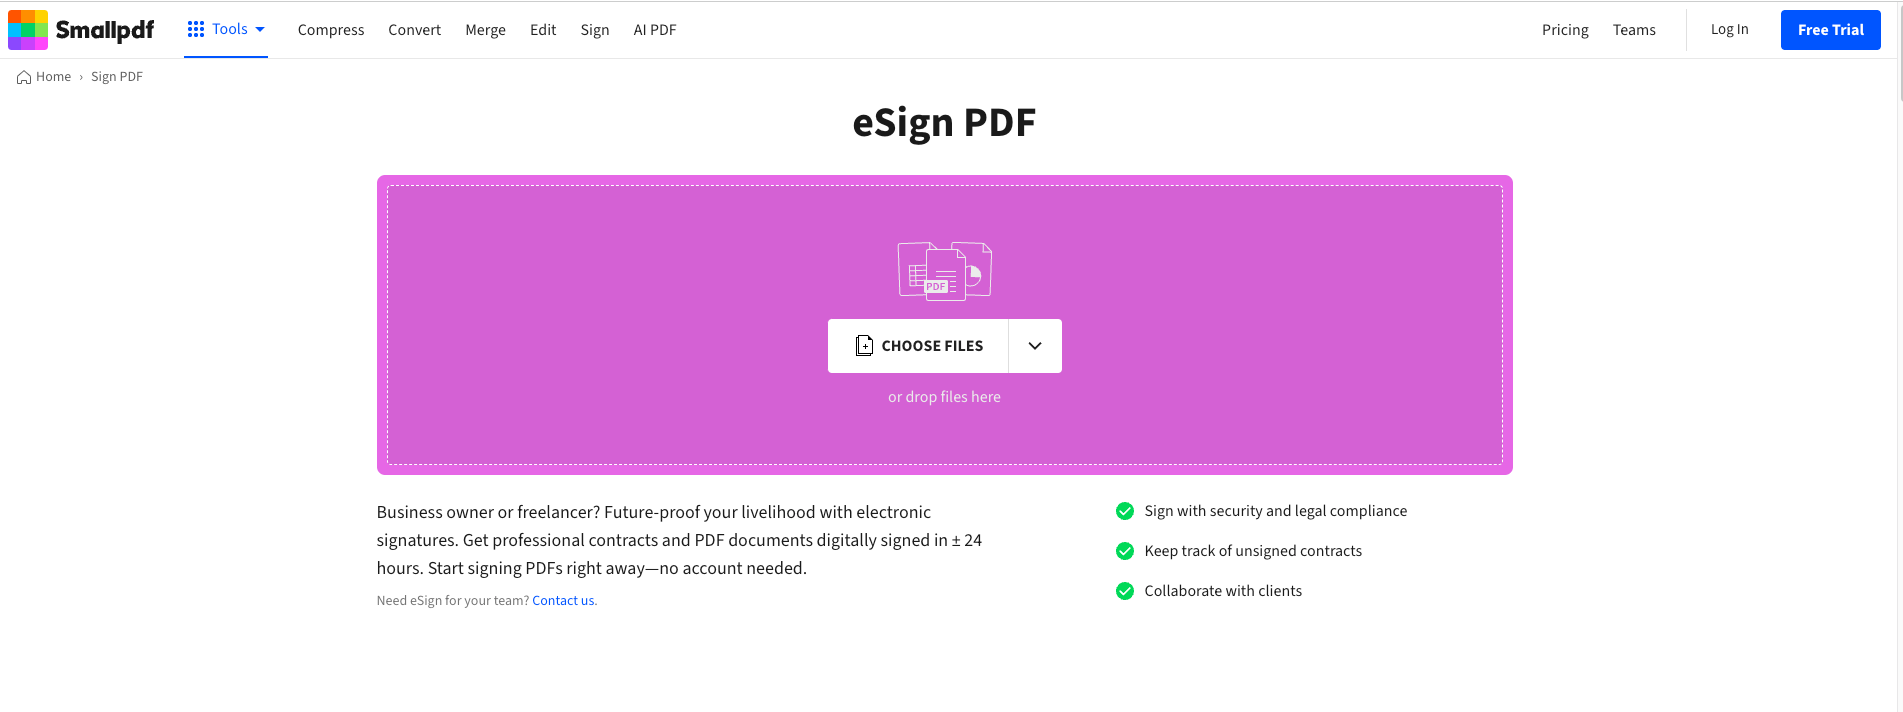
2. Upload your document
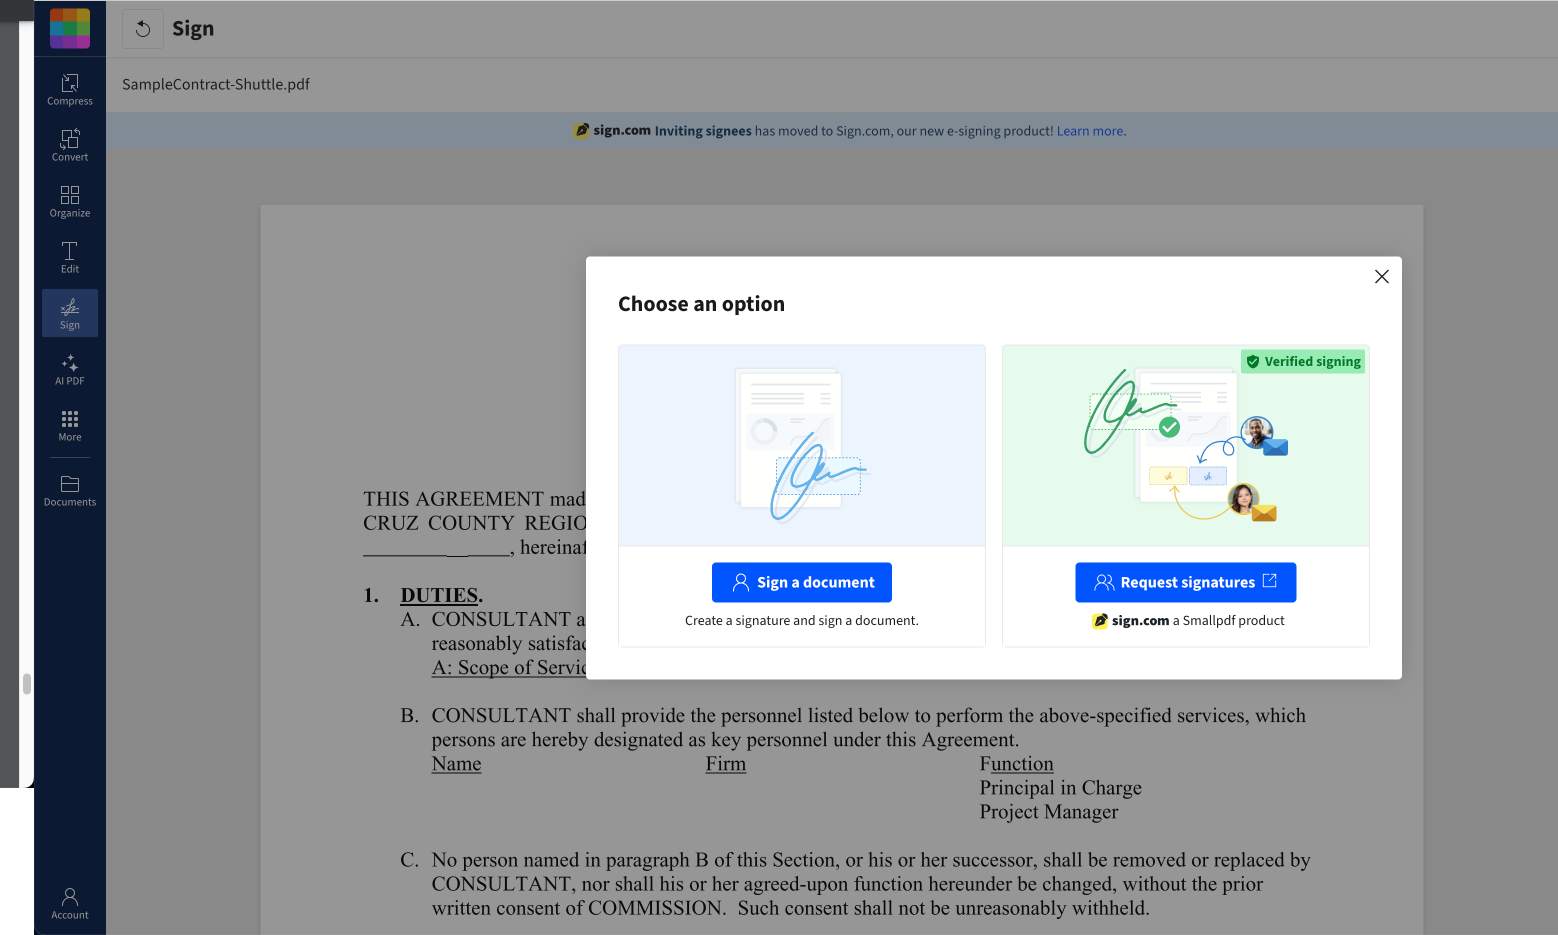
3. Select “Sign a document”
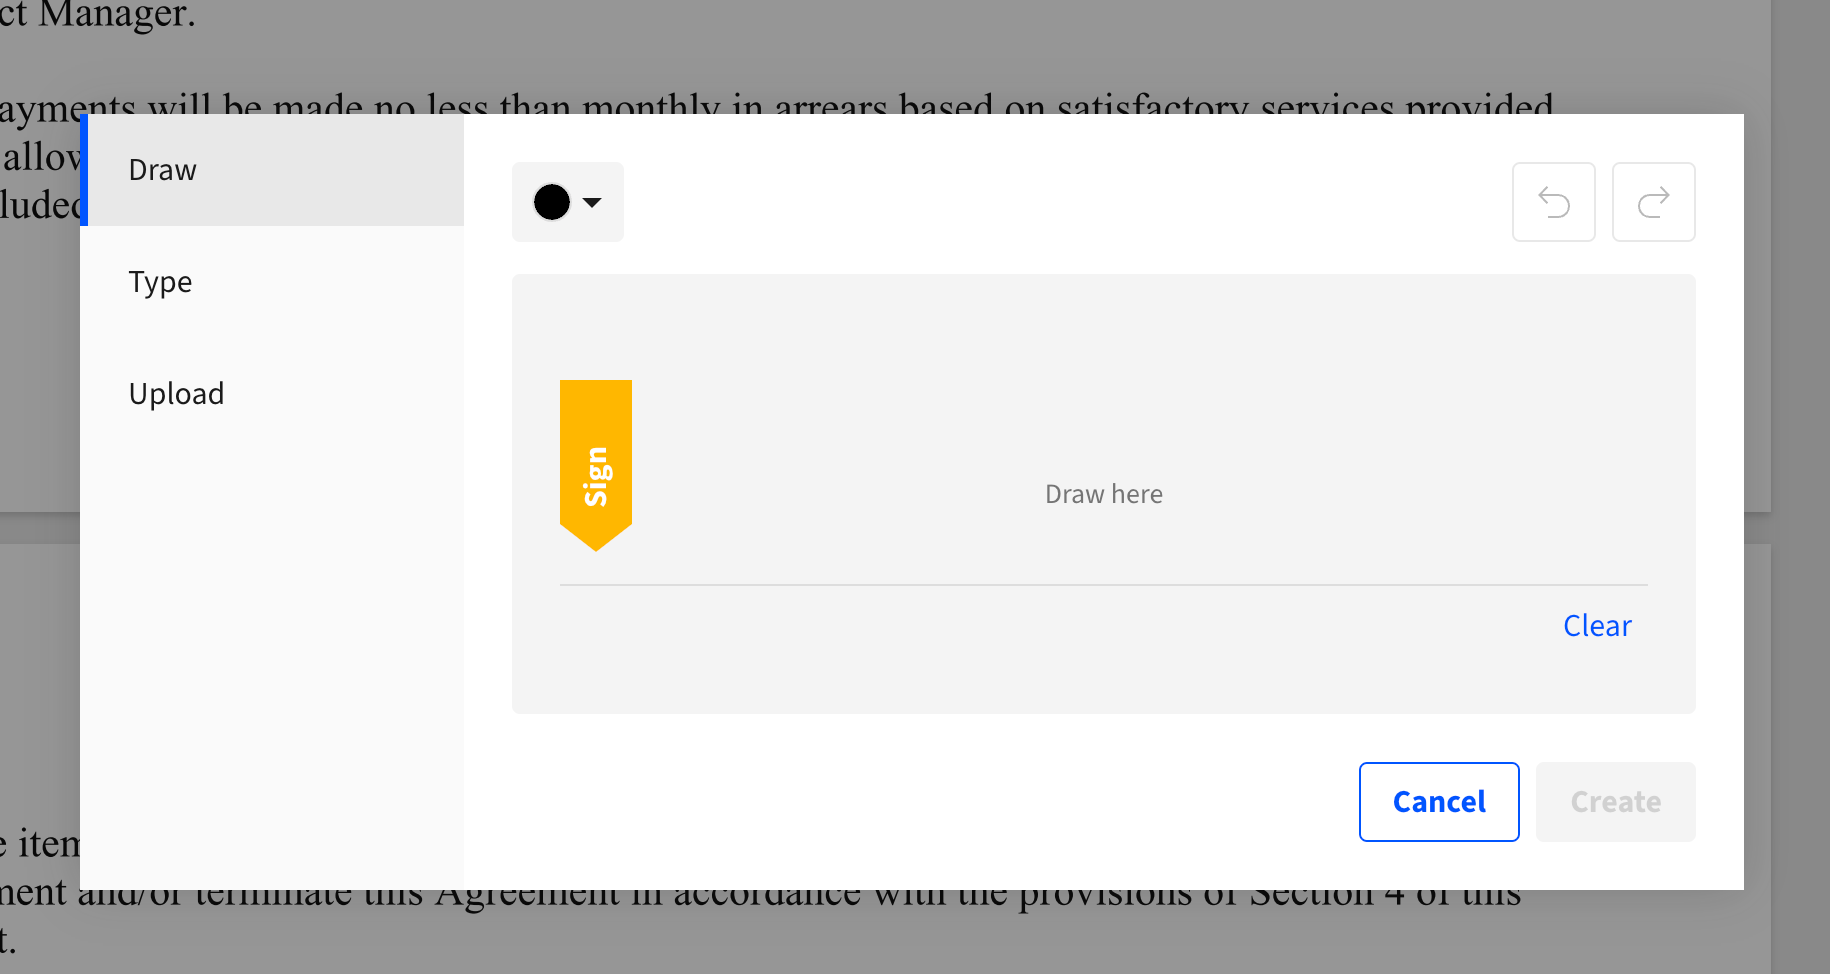
4. Add your signature using draw, type, or image options
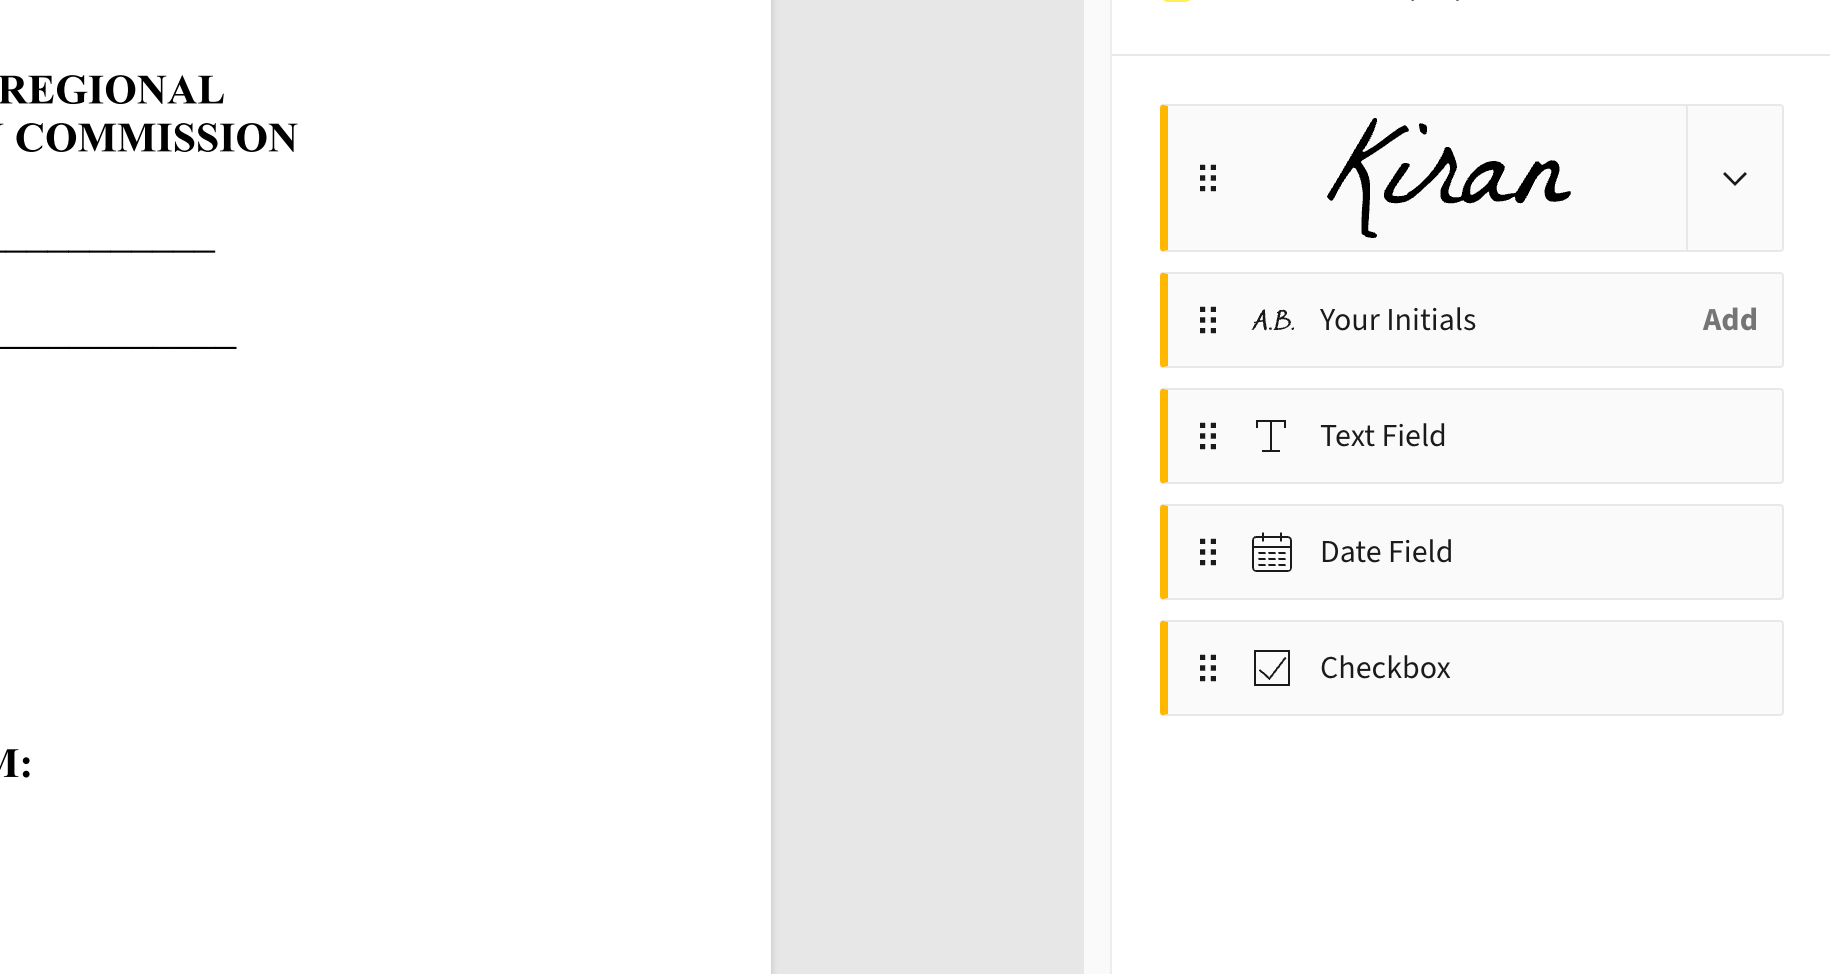
5. Select your signature from the right-hand sidebar
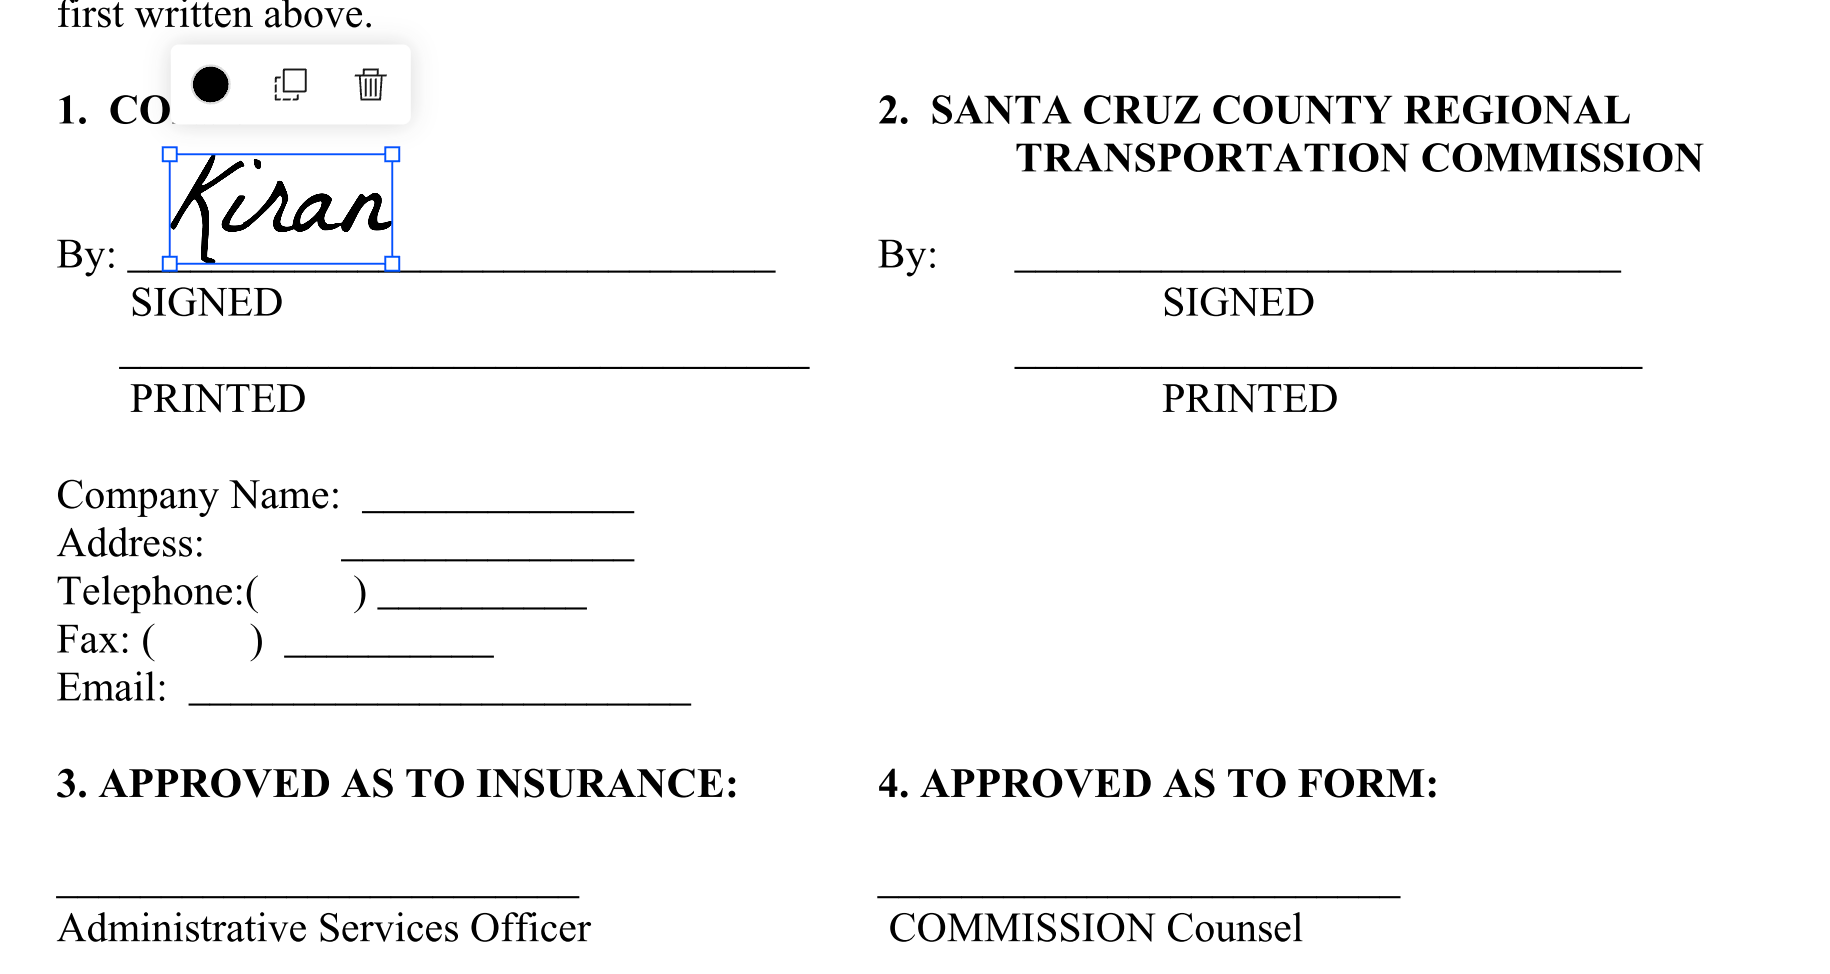
6. Place it where needed in the document
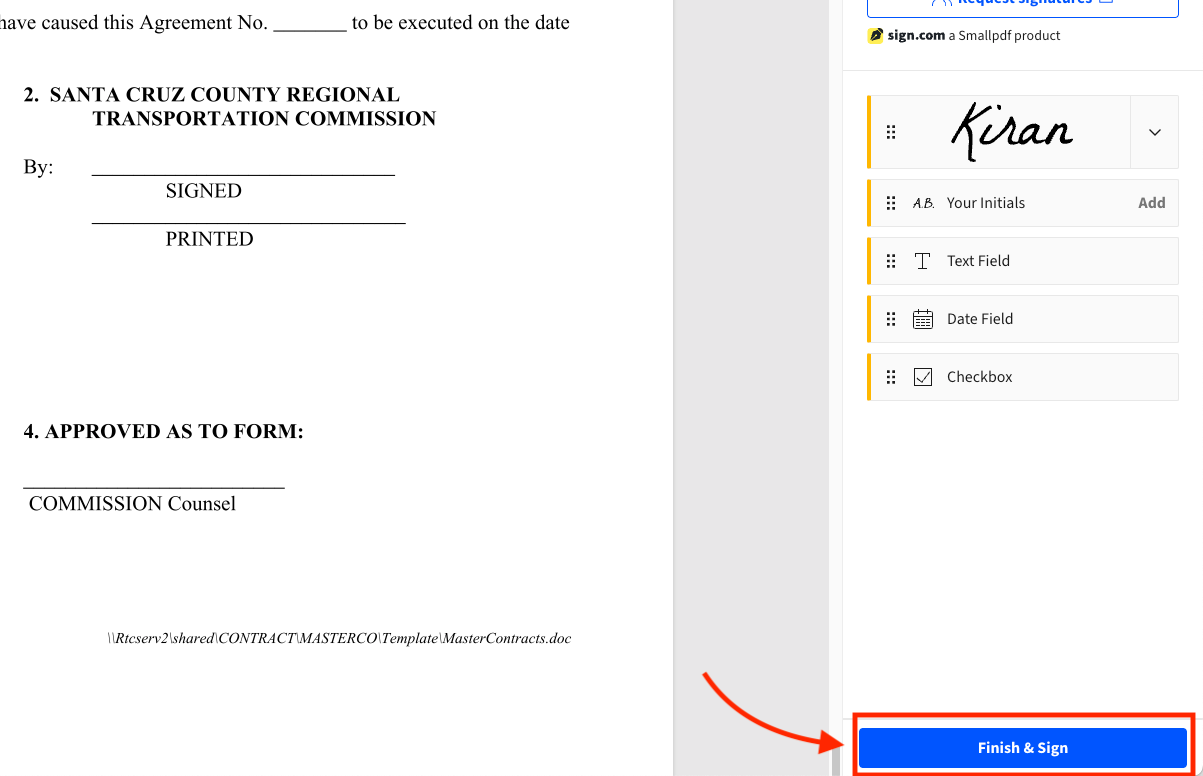
7. Download your signed PDF by clicking “Finish & Sign”
Qwilr
Qwilr's end-to-end proposal platform lets you build interactive web pages that look sharp and handle everything from custom pricing to e-signature functions.
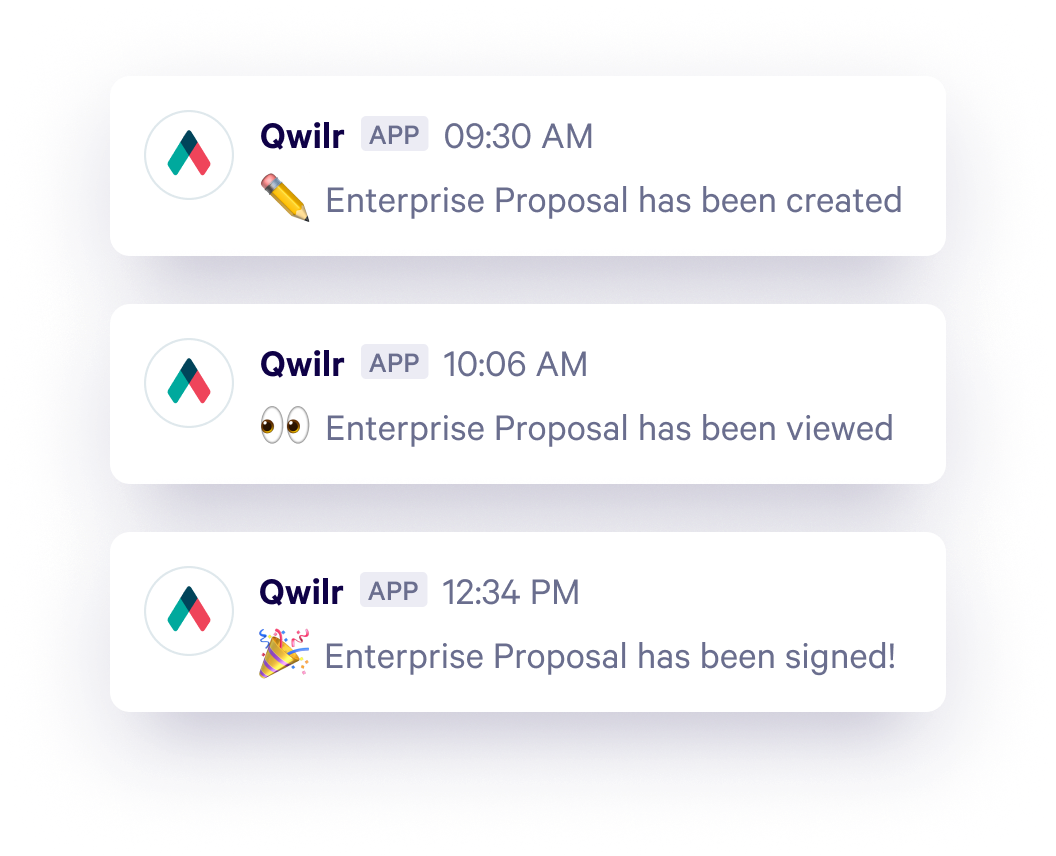
On the signing front, Qwilr keeps things moving with clear signing fields, multi-signer support, and instant notifications when someone signs (or abandons) a document.
Each signature comes with a complete audit trail for compliance. Use Qwilr to pre-fill signer information to remove friction and speed up the process—all the benefits of e-signatures in one place.
Pros
- Includes plain text formal agreements alongside interactive sales collateral, such as contracts, NDAs, or privacy policies

- Sends smart notifications via email or Slack when people sign or abandon signing
- Pre-fills signing fields to reduce errors and speed up completion
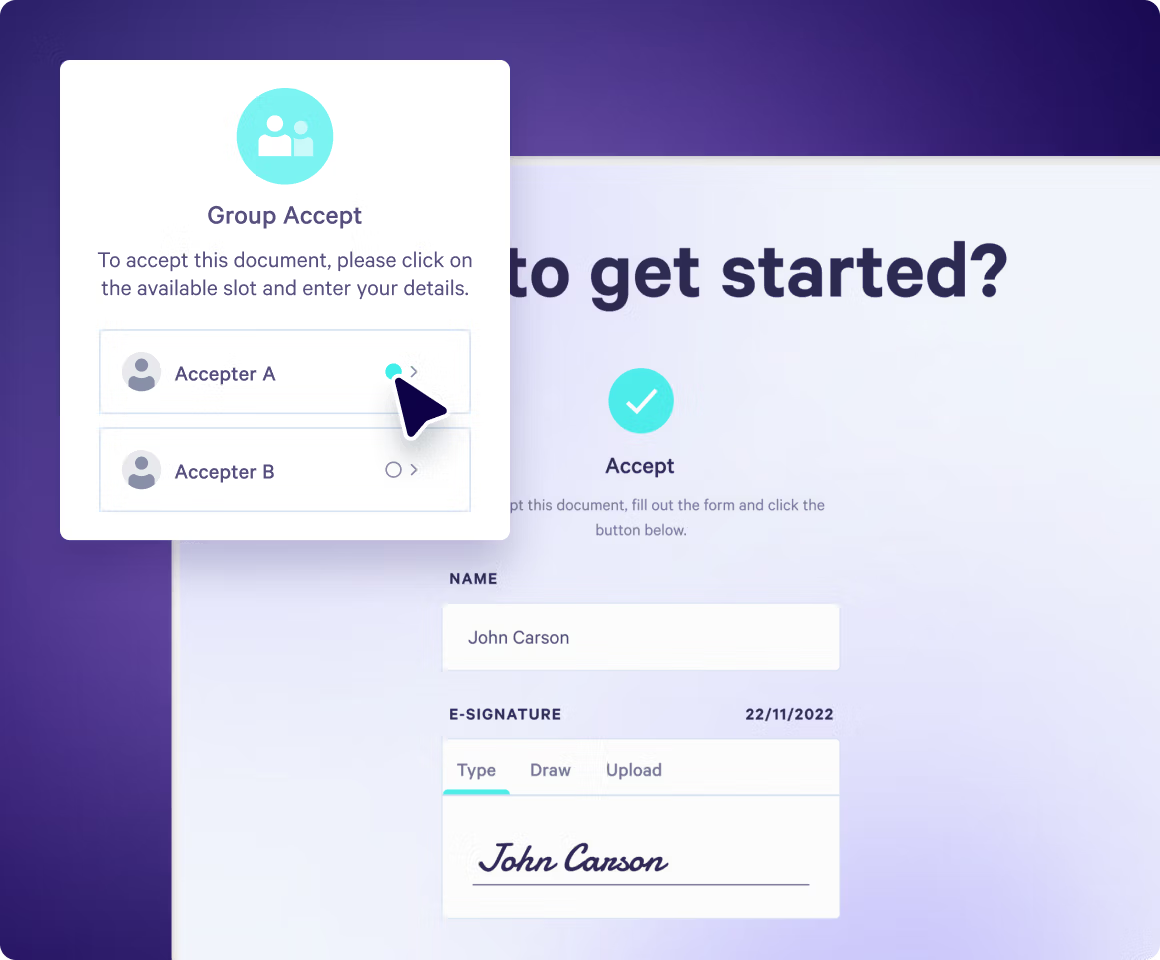
- Enables multiple signers to sign a single document with clear tracking
- Provides legally binding signatures that meet global requirements for enforceability and security
- Offers a group accept function for streamlined approvals
- Includes the option for instant payment through QwilrPay
Cons
- Requires a learning curve to switch from traditional document-based proposals
- May be price-prohibitive for individuals and is best suited to sales teams
What you need to do
As a Docusign alternative, Qwilr's e-signature system offers simplicity on both ends of the process. Whether you're creating documents for others to sign or signing something yourself, the steps are clear. Let's walk through how it works for everyone involved:
For document creators:
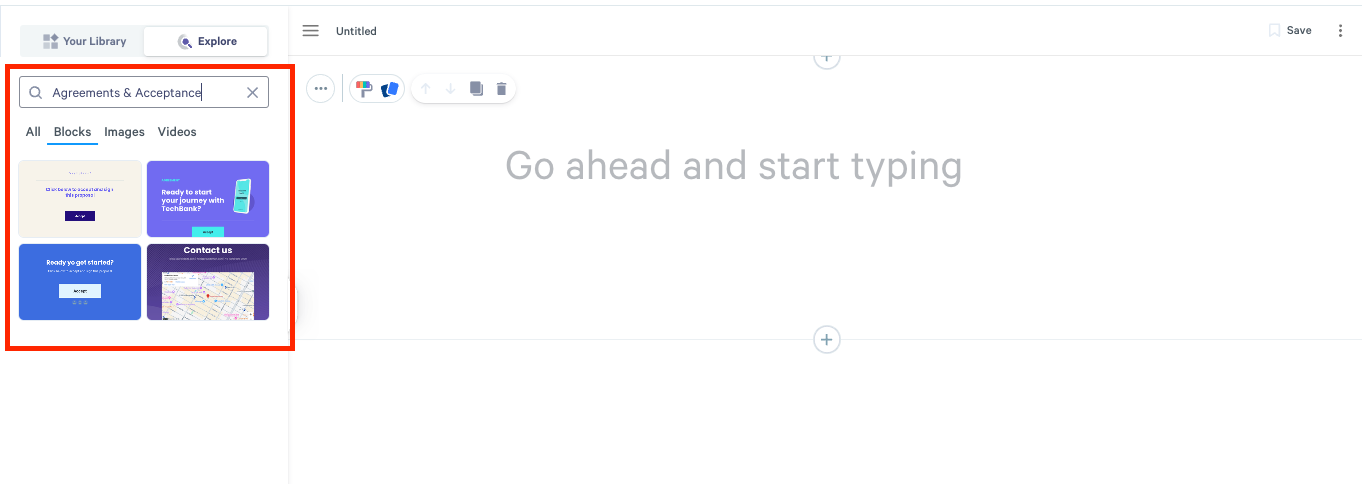
1. Open your Qwilr document and choose from one of the pre-designed 'Agreements and Acceptance' blocks in the left-hand sidebar. Alternatively, you can create your own block!
2. Drag and drop it where you want signatures in your document
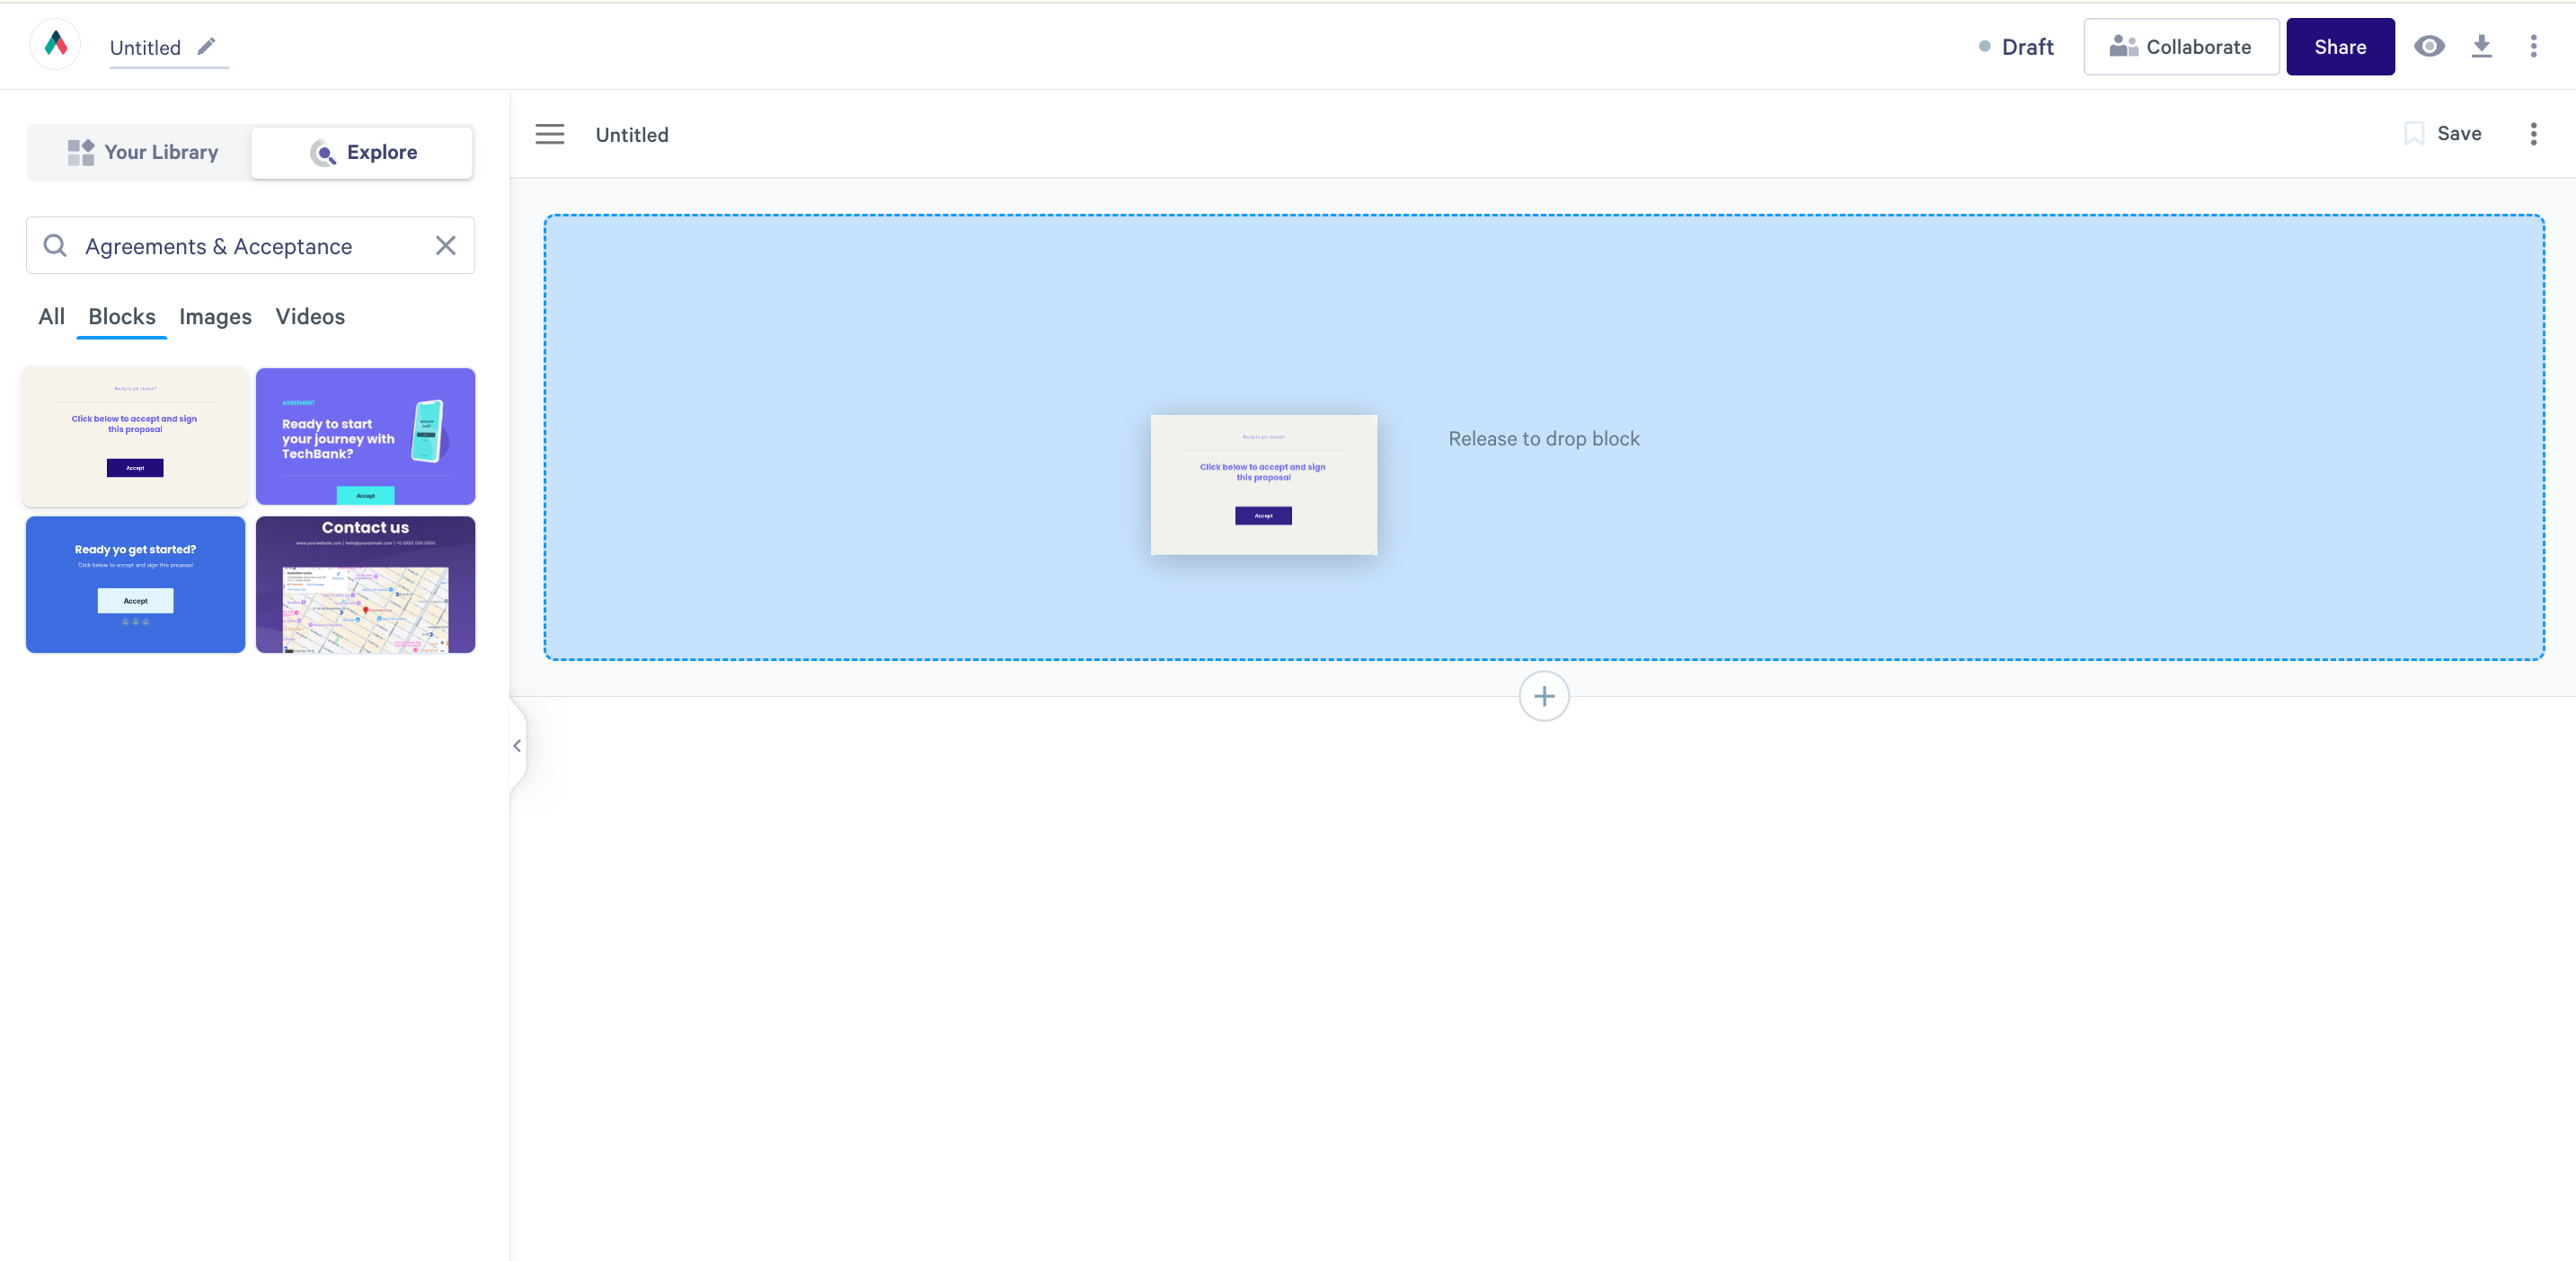
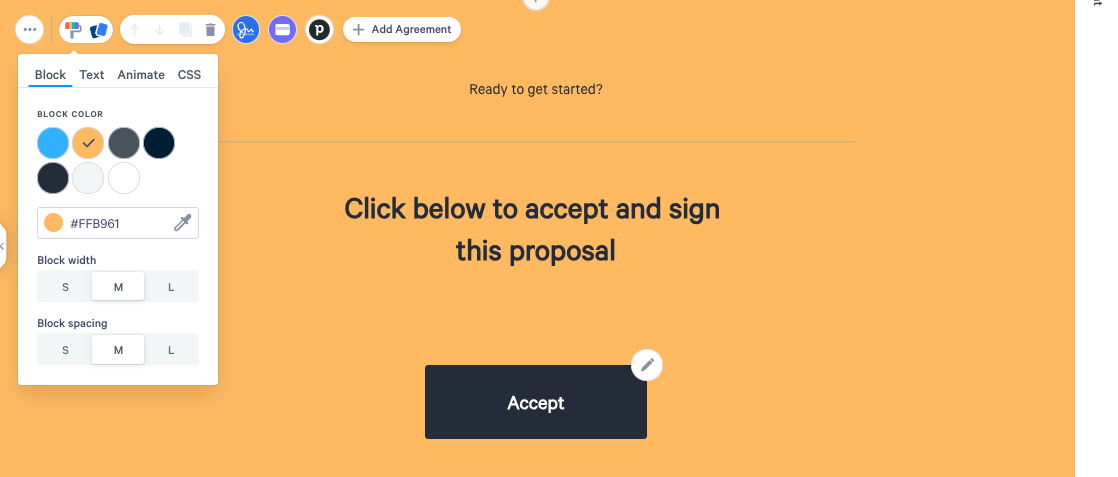
3. Use the block as is, or customize colors, fonts, text placement and animations to make it your own
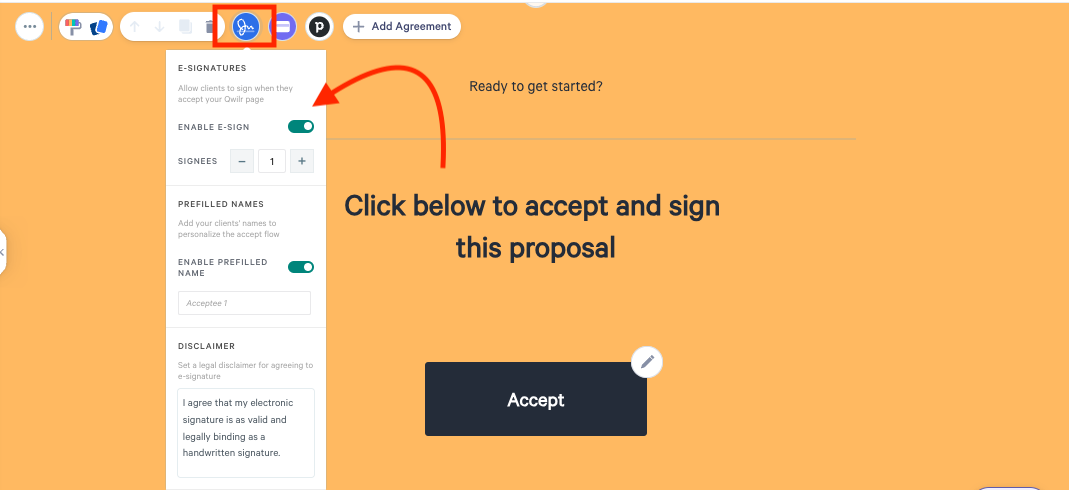
4. Go to e-signature settings to customize it for your needs. You can add multiple signers, choose to disable prefilled forms, and edit the disclaimer if necessary.
5. You can send your interactive web-based document as is, or choose to include a plain-text agreement if you require a formal document to be signed. Either create your own contract or choose from the premade agreement options.

For signers:
1. Click the “Accept” button on the document
2. Fill in your details (name, email, organization)
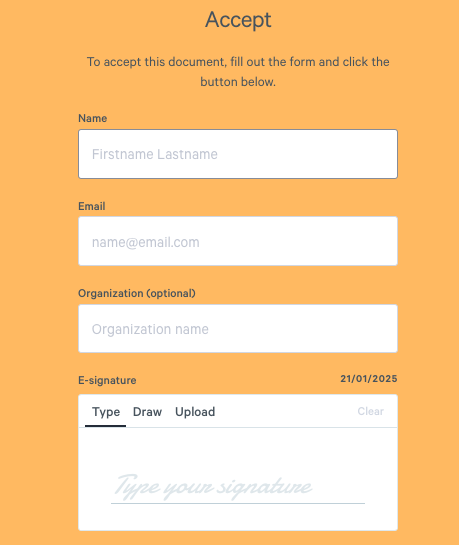
3. Choose how to create your e-signature and check the agreement box:
- Type it
- Draw it
- Upload an image
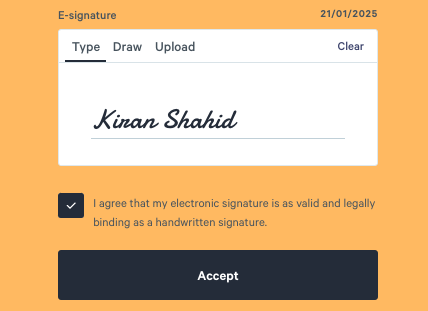
4. Click "Accept"
5. If a plain text agreement has been included, you'll be able to view and sign the agreement.

6. You'll get an email with your signed copy or if you want a copy handy, create a Qwilr account to store all your signed documents
Speed up your sales cycle with digital signatures
Moving your team to e-signatures respects everyone's time and creates a signing experience that matches the quality of your sales process.
Stop losing deals to paperwork bottlenecks. With Qwilr, you’ll save hours on every contract and impress clients with a signing process that’s fast, modern, and easy.
Sign up for a 14-day free trial and see how you can close deals faster with seamless proposals and e-signatures.
Read next: 10 top ShareFile alternatives
About the author

Kiran Shahid|Content Marketing Strategist
Kiran is a content marketing strategist with over nine years of experience creating research-driven content for B2B SaaS companies like HubSpot, Sprout Social, and Zapier. Her expertise in SEO, in-depth research, and data analysis allow her to create thought leadership for topics like AI, sales, productivity, content marketing, and ecommerce. When not writing, you can find her trying new foods and booking her next travel adventure."
